DIY Art Salon: A Step-by-Step Guide to Creative Home Display
Ever walk into someone’s house and just feel… inspired? A place where the art isn’t just decoration, but a conversation starter, a reflection of personality, maybe even a bit of a statement? Yeah, you know the feeling. Well, guess what? You can create that vibe in your own home, and it doesn’t require a trust fund or a degree in fine arts. It’s all about curating your own DIY art salon.
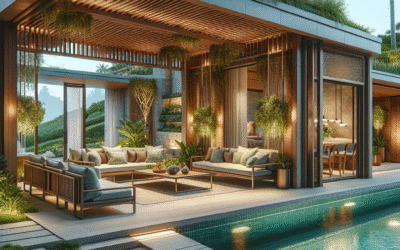
Why Create an Art Salon in Your Home?
Okay, so why bother? Why not just hang a couple of posters and call it a day? Well, an art salon is more than just decor; it’s about creating an environment that sparks joy, reflects your identity, and ignites conversations. It’s about intentionally personalizing your space. Think of it as visual storytelling, where each piece plays a role in a larger narrative. Plus, it’s a fantastic way to showcase the art you love, whether it’s your own creations, thrift store finds, or investments for the future.
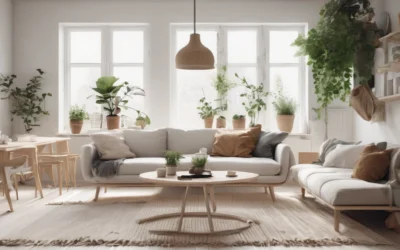
Assessing Your Space: A Blank Canvas or a Diamond in the Rough?
First, you gotta take a good, hard look at your space. What are you workin’ with? Are we talking expansive walls screaming for attention, or cozy nooks begging for a touch of character? Maybe you have awkward corners that need some love?
Walk Through, Notebook in Hand
Grab a notebook and pen – yeah, old school – and walk through each room. Note the wall colors, the amount of natural light, and the existing furniture. How does the space make you feel? Overwhelmed? Calm? Energetic? These feelings are crucial to consider as you plan your art salon.
- Evaluate Wall Space: How much wall space do you genuinely have? Factor in doors, windows, and built-in elements.
- Consider Lighting: Natural light is a huge plus, but artificial lighting is just as important. Does your space have warm or cool lighting?
- Identify Focal Points: Are there existing focal points like a fireplace or large window? These can influence where you place your art.
Don’t Forget the Function
Honestly, a living room has very different needs than a bedroom, right? As you plan your art display, what is the atmosphere trying to be? A lively living room versus a serene bedroom setting require different approaches. Consider this as you’re planning the placement and types of art pieces.
Gathering Your Collection: From Hidden Gems to Beloved Pieces
This is where the real fun begins. What kind of art excites you? What tells your story, or makes you stop and stare? Don’t limit yourself to just paintings; consider photography, prints, sculptures, textiles, and even quirky objects.
Embrace a Variety of Mediums
Variety is the spice of life, and it’s also the secret ingredient to a captivating art salon. Mix and match different mediums to create visual interest:
- Paintings: From oils and acrylics to watercolors, paintings offer texture and depth.
- Prints: Affordable and versatile, prints come in endless styles.
- Photography: Capture moments in time with striking photographs.
- Sculptures: Add three-dimensional intrigue with sculptures of various sizes.
- Textiles: Tapestries, quilts, and fiber art can bring warmth and texture to your walls.
Where to Find Art?
You don’t need to drop a fortune at some fancy gallery. You know what? The art world is way more accessible than you might think.
- Your Own Creations: Don’t underestimate your own talent!
- Thrift Stores and Flea Markets: Hidden gems abound if you’re willing to dig.
- Online Marketplaces: Discover independent artists on sites like Etsy and Saatchi Art.
- Local Art Fairs: Support local artists and find unique pieces.
- Garage Sales: You would be very surprised at people are willing to part with at discounted prices.
Creating a Cohesive Theme
Now, it helps to have some sort of thread holding everything together. A theme can be something as simple as a color palette, a subject matter (like landscapes or portraits), or an artistic style (like abstract or modern). This’ll keep your display from looking like a total hodgepodge.
Planning Your Layout: The Art of Arrangement
Alright, time to get strategic. How do you actually arrange these pieces so they look good together?
The Mock-Up Method
Before you start hammering nails into your walls, create a mock-up on the floor. Arrange your art pieces in different configurations until you find something that feels right. This lets you play with the composition without committing to anything permanent.
Hanging Height: Eye Level is Key
As a general rule, hang your art at eye level. This is usually about 57 to 60 inches from the floor to the center of the artwork. Of course, adjust this depending on the height of the people living in your home. If everyone in your family is over six feet tall, you might want to raise the hanging height accordingly.
Spacing: Give Your Art Room to Breathe
Don’t overcrowd your art. Just give each piece enough space to breathe. A good rule of thumb is to leave about 2 to 5 inches between frames.
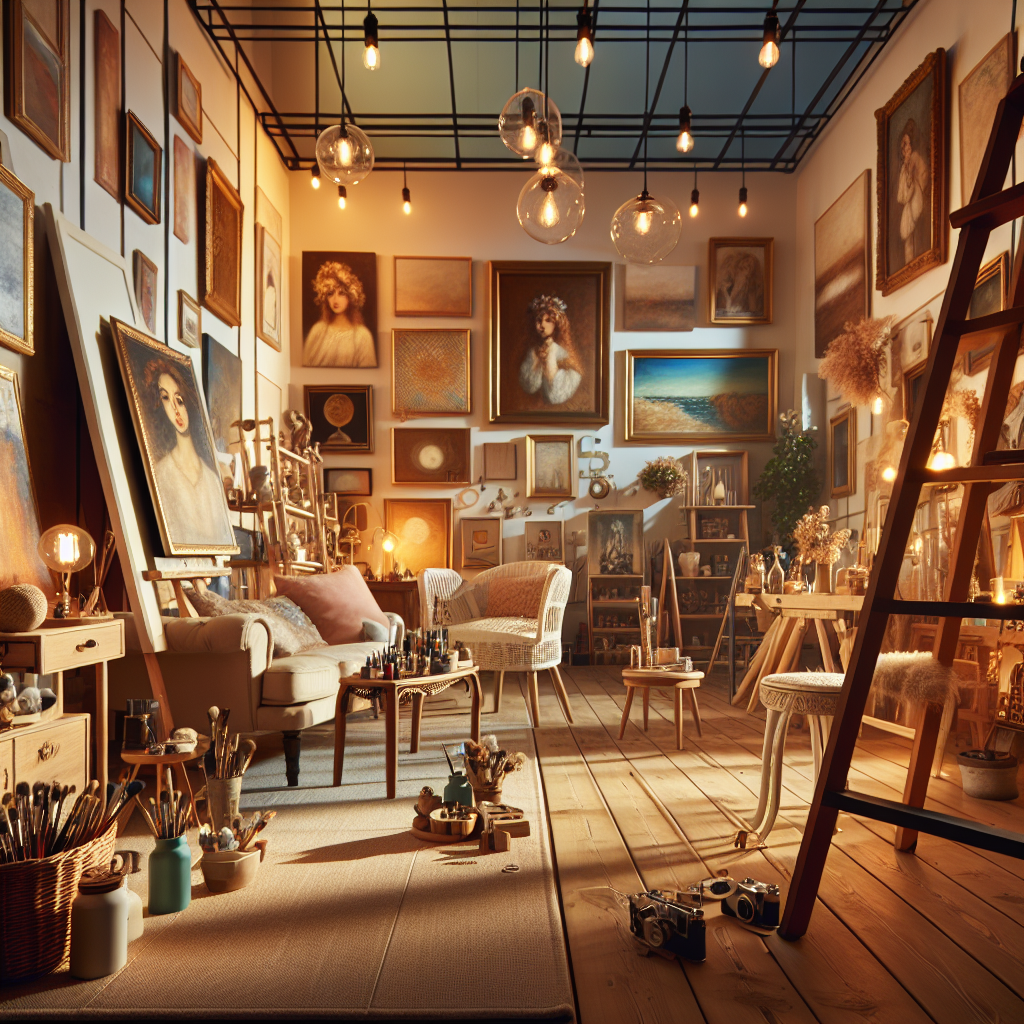
Gallery Wall vs. Salon Style
Let me explain, a gallery wall is a curated collection of art arranged in a neat, orderly grid. Salon style, on the other hand, is more free-flowing and eclectic, with art pieces hung closely together in a seemingly random fashion. Which one resonates with you?
Think About Symmetry
Symmetry can create a sense of balance and harmony. Try hanging two identical pieces side by side, or create a symmetrical arrangement around a central focal point. On the other hand, asymmetry can add a touch of whimsy and surprise.
Hanging Your Art: Tools, Techniques, and Tips
Time to put those plans into action. But before you start hammering, make sure you have the right tools and techniques.
Gather Your Supplies
You’ll need a few basic tools:
- Hammer and Nails: For lightweight pieces.
- Picture Hooks: Offer more stability than nails.
- Level: Essential for ensuring your art is straight.
- Measuring Tape: For accurate placement.
- Pencil: For marking the wall.
- Drill and Screws: For heavier pieces or plaster walls.
Protecting Your Walls
Before you start hammering, consider using painter’s tape to mark the placement of your art. This can help prevent damage to your walls. For particularly delicate surfaces, use adhesive strips designed for hanging art.
Dealing with Different Wall Types
Here’s the thing, not all walls are created equal. Plaster walls require special care to avoid cracking. Use picture hooks designed for plaster, or drill pilot holes before hammering. For drywall, use anchors to provide extra support.
Lighting Your Art: Setting the Mood
Lighting can make or break your art salon. The right lighting can highlight the colors, textures, and details of your art, while the wrong lighting can leave your pieces looking dull and lifeless.
Natural Light vs. Artificial Light
Natural light is always a plus, but you can’t always rely on it. Use a combination of natural and artificial light to create a balanced and inviting atmosphere; which makes sense, right?
Types of Lighting
These are some options to use:
- Track Lighting: Flexible and adjustable, track lighting is ideal for highlighting multiple art pieces.
- Spotlights: Use spotlights to focus attention on a single piece of art.
- Picture Lights: Mounted directly above the artwork, picture lights provide focused illumination.
Color Temperature
The color temperature of your light bulbs can also impact the look of your art. Warm light (2700-3000K) creates a cozy and inviting atmosphere, while cool light (3500-4100K) provides brighter, more accurate illumination. Choose the color temperature that best complements your art and your overall decor.
Adding Personal Touches: Making it “You”
Here’s the cool thing, your art salon should be a reflection of your personality and style. Don’t be afraid to add personal touches that make it uniquely “you.”
Incorporate Non-Traditional Elements
Mix in unexpected elements like plants, mirrors, or decorative objects. These additions can add depth and dimension to your display.
Tell a Story
Arrange your art pieces in a way that tells a story. Group pieces together that share a common theme or evoke a similar emotion.
Don’t Be Afraid to Experiment
The beauty of a DIY art salon is that you can always change it up. If something isn’t working, don’t be afraid to rearrange your art or try a different hanging style. After all, it’s your space, so have fun with it!
Maintaining Your Art Salon: Keeping it Fresh
An art salon isn’t a static thing; it’s a living, breathing part of your home. To keep it looking its best, you’ll need to do a little maintenance now and then.
Dust Regularly
Dust can accumulate on your art over time, dulling its colors and diminishing its impact. Use a soft cloth or a feather duster to gently remove dust from your art pieces.
Protect from Sunlight and Humidity
Excessive sunlight and humidity can damage your art. Avoid hanging art in direct sunlight, and consider using a dehumidifier in particularly humid areas.
Rotate Your Art
Rotating your art is a great way to keep your salon looking fresh and interesting. Swap out pieces seasonally, or simply rearrange your existing collection.
Troubleshooting Common Issues: When Things Go Wrong
Let’s be real, things don’t always go according to plan. Here are a few common issues you might encounter, and how to fix them:
Crooked Art
Use a level to ensure your art is straight. If it’s still crooked, try using shims to adjust the frame.
Damaged Walls
Fill nail holes with spackle, and touch up the paint. For larger holes, you may need to patch the wall.
Art Doesn’t Look Right
Don’t be afraid to experiment with different arrangements. Try moving your art to a different location, or pairing it with different pieces.
Frequently Asked Questions (FAQ)
Disclaimer
This guide provides general advice for creating a DIY art salon. Always exercise caution when using tools and working with electrical components. Test wall stability before hanging heavy objects, and consult professionals for valuable or irreplaceable art pieces. The author and publisher are not responsible for any damages or injuries resulting from the use of this information.
document.addEventListener(‘DOMContentLoaded’, function() {
const faqItems = document.querySelectorAll(‘.faq-item’);
faqItems.forEach(item => {
const question = item.querySelector(‘.faq-question’);
question.addEventListener(‘click’, () => {
item.classList.toggle(‘active’);
});
});
});
Categories
- Accent Walls & Ceilings (84)
- Art Curation & Gallery (83)
- Bedding Style Trends (89)
- Bedroom Makeover (96)
- Bohemian & Eclectic Styles (80)
- DIY & Budget-Friendly Decor (78)
- Eco-Friendly Design (83)
- Furniture Care (87)
- Home Decor & Design Ideas (181)
- Home Wellness Spaces (103)
- Integrated Outdoor Living (91)
- Japandi Style (84)
- Kids and Nursery Decor (73)
- Living Room Decor (99)
- Mix & Match Techniques (95)
- Modern & Contemporary Design (88)
- Rug Sizing & Placement (89)
- Scandinavian Design Inspiration (51)
- Seasonal Home Decor (100)
- Small Space Solutions (93)
- Wall Art & Painting Tips (94)
Recent Comments
Archives
Product Gallery
-
 Majestic African Wildlife Canvas Art for Stylish Home Decor
Rated 5.00 out of 5
Majestic African Wildlife Canvas Art for Stylish Home Decor
Rated 5.00 out of 5 -
 Cozy Irregular Green Plush Rug for Nordic Living Spaces
Rated 5.00 out of 5$37.00 – $231.00Price range: $37.00 through $231.00
Cozy Irregular Green Plush Rug for Nordic Living Spaces
Rated 5.00 out of 5$37.00 – $231.00Price range: $37.00 through $231.00 -
 Scandinavian Geometric Area Rugs for Stylish Home Décor
Rated 5.00 out of 5$28.00 – $415.00Price range: $28.00 through $415.00
Scandinavian Geometric Area Rugs for Stylish Home Décor
Rated 5.00 out of 5$28.00 – $415.00Price range: $28.00 through $415.00