Ever walked into a room and felt… uninspired? That blank wall just staring back at you, practically begging for a makeover? You’re not alone. Many homeowners dream of transforming their living spaces but hesitate, intimidated by the potential cost and complexity. Accent walls offer an incredible solution, providing a focal point, adding personality, and bringing a room to life without requiring a full renovation. The best part? You don’t need to splurge on designers or expensive materials. We’re here to dive deep into a treasure trove of **DIY budget-friendly accent wall ideas** that will empower you to create stunning, personalized spaces without breaking the bank.
This comprehensive guide isn’t just about painting a single wall; it’s about unlocking your inner decorator and discovering innovative techniques using readily available, affordable materials. We’ll cover everything from classic paint projects to inventive textural designs, ensuring you find the perfect **budget-friendly accent wall** to match your style and skill level. By the end, you’ll have a clear roadmap to selecting, designing, and implementing an accent wall that elevates your home’s aesthetic and brings you immense satisfaction. Get ready to turn that drab wall into a show-stopping feature!
Why an Accent Wall is a Home Decor Game-Changer
Before we dive into the nitty-gritty of **DIY budget-friendly accent wall ideas**, let’s first appreciate why this design element holds so much power. An accent wall is more than just a splash of color; it’s a strategic design decision that can:
- Define Spaces: In open-concept living, a well-placed accent wall can subtly delineate areas, perhaps separating the dining nook from the living room without the need for physical barriers.
- Add Depth and Dimension: A flat, monochromatic room can feel one-dimensional. An accent wall, especially one with texture or a bold design, instantly adds visual interest and depth.
- Express Personality: Your home should tell your story. An accent wall is an ideal canvas for showcasing your unique style, whether it’s through a vibrant hue, a geometric pattern, or a rustic texture.
- Create a Focal Point: Ever feel like a room lacks a center of attention? An accent wall naturally draws the eye, providing an anchor for furniture arrangement and decor. It dictates where your eye should go.
- Boost Mood and Energy: Colors and patterns have a profound psychological impact. A vibrant accent wall can energize a space, while a serene tone can promote calmness.
- Affordable Impact: Compared to redecorating an entire room, updating just one wall is incredibly cost-effective, making it one of the most impactful **budget-friendly decor upgrades**.
The beauty of these **DIY accent wall ideas** lies in their flexibility and the sheer variety of options available. You’re not just limited to paint; think beyond the brush to unlock true creative potential.
Planning Your Budget-Friendly Accent Wall: The Foundation of Success
Even the most **budget-friendly accent wall** needs a little planning to ensure a flawless execution. Skipping these initial steps can lead to wasted time and materials. Here’s how to lay a solid foundation:
1. Choosing the Right Wall
Not every wall is destined for accent status. Consider these factors:
- The First Impression: Which wall do you see first when you enter the room? This is often the prime candidate.
- Architectural Features: Does one wall have an interesting architectural detail, like a fireplace, built-in shelves, or a large window? Highlighting it can amplify its impact.
- Furniture Placement: Will a large piece of furniture (like a headboard or sofa) be placed against this wall? The accent should complement, not compete with, the furniture.
- Natural Lighting: How does light hit the wall throughout the day? A darker color on a brightly lit wall can create drama, while a brighter color can make a dim wall pop.
- Purpose of the Room: In a bedroom, the wall behind the bed is often chosen. In a living room, it might be the wall with the TV or a gallery wall.
Stand in different parts of your room and visualize. Which wall feels like it naturally wants to be the star?
2. Defining Your Style & Color Palette
This is where your personality shines! Are you drawn to:
- Bold & Contemporary: Think geometric patterns, deep jewel tones, or metallic finishes.
- Rustic & Farmhouse: Shiplap, reclaimed wood, or subtle textured paint effects fit this vibe.
- Minimalist & Serene: A soft, muted tone, a subtle stripe, or a textured wallpaper in a neutral shade.
- Eclectic & Boho: Mix unexpected colors, hand-painted murals, or even textile hangings.
Look at your existing decor, furniture, and textiles. The accent wall should enhance, not clash with, your established aesthetic. Use online tools, Pinterest, or physical paint swatches to test colors against different lighting conditions.
3. Budgeting for Your DIY Project
The “budget-friendly” part is key here. Make a realistic estimate:
- Materials: Paint, wallpaper, wood, fabric, stencils, adhesive, etc.
- Tools: Brushes, rollers, tape measure, level, utility knife, drop cloths, sandpaper. (Many of these you might already own!)
- Prep Supplies: Painter’s tape, spackle, primer, cleaning supplies.
Always add a 10-15% buffer for unforeseen expenses. Remember, choosing affordable options doesn’t mean sacrificing quality. It means being resourceful and creative, which is the heart of any great **DIY project**.
Paint Power: The Ultimate Budget-Friendly Accent Wall Tool
Paint is arguably the most accessible and effective medium for creating a **DIY budget-friendly accent wall**. Its versatility allows for endless creative possibilities beyond just a single color.
1. The Classic Bold Color Accent Wall
Sometimes, simplicity is key. A single wall painted in a saturated, contrasting color can be incredibly impactful. This is one of the most straightforward and **budget-friendly accent wall ideas** out there.
- How-To: Choose a color that complements or strikingly contrasts with your existing wall colors. Use painter’s tape for crisp lines. Apply 2-3 coats for full coverage.
- Tips for Success: Test paint swatches on your wall first. Consider the room’s purpose; calming blues for bedrooms, energetic yellows for playrooms.
- Cost: Very low. A single gallon of good quality paint is often sufficient for an average-sized accent wall.
- Visual Suggestion: Imagine a living room with three light grey walls and one deep navy accent wall behind a white sofa, anchored by gold accents.
2. Geometric Painted Patterns
Take paint a step further by creating captivating geometric designs. This method offers a high-impact look for minimal cost, making it a stellar **budget-friendly accent wall idea**.
- How-To: Use painter’s tape to create lines, triangles, chevrons, or abstract shapes. You can choose 2-3 complementary colors or stick to varying shades of one color for a more subtle effect.
- Tips for Success: A laser level is your best friend for straight lines. Press tape firmly to prevent bleeding. Remove tape when paint is still slightly tacky for the cleanest edges.
- Cost: Low to moderate, depending on the number of colors used.
- Visual Suggestion: A nursery wall with soft pastel triangles in varying sizes or a modern office wall with bold, intersecting lines in black and white.
- Tool Recommendation: FrogTape Multi-Surface Painter’s Tape for ultra-sharp lines.
3. Hand-Painted Murals or Stenciled Designs
For the artistically inclined, a hand-painted mural can turn a wall into a masterpiece. If freehand isn’t your forte, stencils offer a fantastic alternative for intricate designs without specialized artistic skills, making both excellent **DIY budget-friendly accent wall ideas**.
- How-To (Mural): Sketch your design lightly with a pencil. Use small brushes for detail and larger brushes for fills. Practice on a spare board first.
- How-To (Stencil): Secure the stencil to the wall with temporary adhesive or painter’s tape. Use a stencil brush or a foam roller with minimal paint to prevent bleeding. Repeat the pattern across the wall.
- Tips for Success: For stencils, apply thin coats and blot excess paint off your brush/roller. For murals, work in sections and allow layers to dry.
- Cost: Low (stencils can be reused or custom-made affordably, paint can be small craft bottles).
- Visual Suggestion: A whimsical nature-inspired mural in a child’s playroom or an elegant damask stencil pattern in a master bedroom.
4. Ombré or Gradient Walls
Create a stunning, ethereal effect by blending colors from dark to light (or vice versa) on your accent wall. This soft transition is surprisingly easy to achieve and looks incredibly professional, offering a uniquely beautiful **budget-friendly accent wall**.
- How-To: Choose 2-3 shades of the same color (or complementary colors). Paint the darkest color at the bottom (or top), the lightest at the opposite end, and the medium shade in the middle. While the paint is still wet, use a clean, dry brush or a large sponge to blend the edges where the colors meet, moving in circular or up-and-down motions.
- Tips for Success: Work in small sections quickly before the paint dries. Have plenty of clean blending tools ready. Practice on a large piece of cardboard first.
- Cost: Low to moderate (similar to a two-tone paint job).
- Visual Suggestion: A serene bedroom accent wall transitioning from a deep sea blue at the bottom to a pale sky blue at the top.
Beyond Paint: Textural and Material-Based DIY Accent Walls
While paint is powerful, incorporating texture or different materials can add another layer of sophistication and warmth to your **DIY budget-friendly accent wall**. These ideas might require a bit more effort but often deliver a truly custom look.
5. Removable Wallpaper or Decals
For commitment-phobes or renters, removable wallpaper is a game-changer. It offers the look of traditional wallpaper without the mess or permanence, making it an ideal **DIY budget-friendly accent wall idea** for temporary transformations.
- How-To: Measure carefully. Peel the backing and apply slowly, smoothing out bubbles with a squeegee. Pattern matching is key for a seamless look.
- Tips for Success: Use a plumb line to ensure your first strip is perfectly straight. Overlap slightly and trim edges with a sharp utility knife against a straightedge.
- Cost: Moderate to high (per square foot, but less than professional installation of traditional wallpaper). Can be quite affordable if you find deals.
- Visual Suggestion: A bold botanical peel-and-stick wallpaper in a dining room or sleek marble-effect vinyl decals in a bathroom.
6. Fabric Wall Coverings
Add softness, pattern, and unique texture with fabric. This can be completely removable if you use liquid starch, or more permanent with staple guns or adhesive.
- How-To (Liquid Starch Method): Measure and cut fabric panels slightly larger than your wall. Apply liquid starch directly to the wall with a roller or brush. Press fabric onto the wet starch, smoothing out bubbles. Apply another layer of starch over the fabric to seal it.
- Tips for Success: Choose lightweight, tightly woven fabrics. Pre-wash fabric to prevent shrinking. Ensure patterns align if using multiple panels.
- Cost: Low to moderate, depending on fabric choice. Fabric scraps can be very cheap!
- Visual Suggestion: A vibrant ikat fabric behind a headboard for an exotic touch or a subtle linen for a quiet reading nook.
7. Reclaimed Wood or Pallet Walls
Achieve a rustic, farmhouse, or industrial look with salvaged wood. Pallets are often free, making this one of the most **budget-friendly accent wall ideas** for a textured statement.
- How-To: Clean and deconstruct pallets (or source reclaimed wood). Sand lightly and apply a sealant or stain if desired. Attach wood pieces directly to studs using a nail gun or construction adhesive. Vary plank lengths and colors for an authentic look.
- Tips for Success: Ensure wood is completely dry and free of insects. Wear gloves and eye protection. Use a pry bar for deconstructing pallets safely.
- Cost: Very low (often free if you find pallets) to moderate (if buying reclaimed wood).
- Visual Suggestion: A rustic shiplap-style wall in a cozy living room or a weathered wood panel accent behind a home bar.
8. DIY Paneling with Trim and Molding
Create elegant architectural detail like board and batten, wainscoting, or applied molding. This technique adds classic charm and depth, making a sophisticated **DIY budget-friendly accent wall**.
- How-To: Plan your design on the wall using a pencil and level. Cut inexpensive wood trim or MDF strips to size. Attach them to the wall with construction adhesive and small finishing nails. Caulk seams and gaps, then paint the entire wall (including the trim) a single color for a unified look, or contrasting colors for more definition.
- Tips for Success: Measure twice, cut once! Use a miter saw for clean angled cuts if creating frames. Fill nail holes for a smooth finish.
- Cost: Low to moderate (cost of trim/MDF and paint).
- Visual Suggestion: A classic white board and batten accent wall in a nursery or a dark blue wainscoting effect in a formal dining room.
9. Faux Brick or Stone Panels
If you love the industrial or old-world charm of exposed brick or stone but lack the real thing (or the budget for it), faux panels are an excellent alternative. These are designed for easy **DIY installation**.
- How-To: Faux panels usually come in lightweight sheets that interlock. They can often be cut with a utility knife or saw and attached directly to the wall with construction adhesive and screws.
- Tips for Success: Follow manufacturer instructions carefully. Ensure the first panel is perfectly level. Stagger seams for a more natural look.
- Cost: Moderate (panels can be pricier but still far less than real brick/stone installation).
- Visual Suggestion: A rugged faux brick accent wall in a home office or a stacked stone effect around a fireplace.
10. Cork Board or Fabric Tile Walls
Combine style with functionality by creating an accent wall out of cork tiles or DIY fabric-covered acoustic panels. This provides texture, can help with sound dampening, and offers a practical display surface.
- How-To: Purchase cork tiles (available in various thicknesses) or cut MDF/foam board into desired shapes for fabric tiles. Cover foam/MDF with batting and fabric, stapling neatly on the back. Adhere cork tiles or fabric panels directly to the wall using a strong adhesive or command strips.
- Tips for Success: Ensure your wall is clean and smooth. Plan your pattern layout before adhering. For cork, consider different shapes or even painting some tiles.
- Cost: Low to moderate (cork tiles are incredibly affordable, fabric scraps can be repurposed).
- Visual Suggestion: A grid of various-sized cork tiles in a home office for pin-up space, or a soft, geometric pattern of fabric squares in a media room.
Creative & Unexpected DIY Accent Wall Solutions
Sometimes the most striking **DIY accent walls** come from thinking outside the box, repurposing common items, or using simple techniques in innovative ways. These ideas lean heavily into the “budget-friendly” aspect.
11. Washi Tape Wonders
Washi tape is an exceptionally versatile and **budget-friendly material** that allows for incredible creativity without permanence. It’s perfect for renters or those who love to change their decor frequently.
- How-To: Choose tapes in various colors, patterns, and widths. Use them to create stripes, geometric patterns, faux wallpaper effects, or even to “frame” art or photos directly on the wall.
- Tips for Success: Clean the wall thoroughly. Use a credit card or squeegee to press tape firmly for smooth application. Washi tape is repositionable, so don’t fear mistakes!
- Cost: Very low. A few rolls of washi tape can transform an entire wall.
- Visual Suggestion: A playful chevron pattern of black and white washi tape in a child’s room or abstract, intersecting lines of gold washi tape for a minimalist entryway.
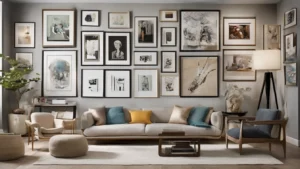
12. Photo Gallery or Mural Accent Wall
Turn cherished memories or captivating images into a large-scale accent wall. This personal approach is exceptionally **budget-friendly** if you use existing photos or digital prints.
- How-To: Print photos in various sizes and frames, then arrange them on the floor before hanging. Alternatively, create a large digital collage and have it printed as a single, large poster or several smaller panels that fit together. You can even print black and white photos on regular printer paper and adhere them with paste or double-sided tape for a truly raw, industrial look.
- Tips for Success: For gallery walls, use paper templates to plan placement. For large prints, ensure the wall is smooth and clean for adhesion.
- Cost: Low to moderate (printing costs, frames if desired).
- Visual Suggestion: A wall filled with family photos (or travel prints) in matching frames, or a large-format print of a captivating landscape bringing nature indoors.
13. Sharpie or Paint Pen Designs
Unleash your inner artist with permanent markers or paint pens. This technique provides incredible detail and can mimic the look of expensive wallpaper or hand-drawn art, making it a very **budget-friendly accent wall idea**.
- How-To: Sketch your design lightly with a pencil. Use a permanent marker (like a black Sharpie) or paint pen to trace and fill in your design. Common patterns include faux shiplap lines, doodles, abstract squiggles, or intricate mehndi-inspired motifs.
- Tips for Success: Practice on paper first. Work slowly and steadily. For long straight lines, use a ruler or straightedge. Ensure adequate ventilation.
- Cost: Very low (cost of pens).
- Visual Suggestion: A wall with faux shiplap lines drawn with a black Sharpie for a modern farmhouse look, or intricate botanical doodles in a guest bedroom.
14. Plate Walls or Basket Walls
Transform decorative plates or woven baskets into a textured, visually rich accent wall. This adds global flair and a unique artistic touch, often by repurposing items you already own or find affordably.
- How-To: Collect plates (mix and match patterns, colors, and sizes) or various woven baskets. Plan your arrangement on the floor first. Use plate hangers or command strips with care to secure them to the wall.
- Tips for Success: Protect your wall from potential scratches by adding felt pads to the back of plates if necessary. Vary spacing for visual interest.
- Cost: Low to moderate (if purchasing new, or free if using existing collections). Thrift stores are great places to find unique plates and baskets.
- Visual Suggestion: An eclectic mix of blue and white plates creating a formal dining room accent, or a bohemian arrangement of woven baskets and dreamcatchers in a living area.
15. Book Page or Map Walls
For the avid reader or travel enthusiast, old book pages or maps can become an unexpected and deeply personal **DIY budget-friendly accent wall**.
- How-To: Carefully tear pages from old books (look for damaged or outdated ones at thrift stores). Apply a thin layer of wallpaper paste or mod podge to the back of each page and press onto the wall, overlapping slightly. Seal with another thin layer of mod podge. For maps, use larger sections or full maps adhered similarly.
- Tips for Success: Ensure the wall is clean and smooth. Work in small sections to prevent paste from drying. Use a roller to smooth out bubbles.
- Cost: Very low (thrift store books are often under a dollar, old maps can be found cheaply or printed).
- Visual Suggestion: A cozy reading nook with an accent wall covered in vintage book pages, or a child’s bedroom featuring a colorful world map.
Essential Tools and Tips for a Flawless DIY Accent Wall
No matter which **budget-friendly accent wall idea** you choose, having the right tools and following best practices will ensure a professional-looking finish. Don’t underestimate the power of preparation!
Basic Tool Kit Checklist
- Measuring Tape: Crucial for accuracy.
- Pencil & Eraser: For marking and planning.
- Ladder or Stepladder: For reaching high spots safely.
- Drop Cloths or Old Sheets: To protect your floors and furniture.
- Painter’s Tape: Essential for clean lines, especially for paint.
- Level (Laser or Bubble): For perfectly straight lines and even application.
- Utility Knife & Extra Blades: For cutting wallpaper, tape, or fabric.
- Squeegee or Smoothing Tool: For wallpaper and decals.
- Spackle & Putty Knife: For fixing wall imperfections before starting.
- Sandpaper (fine-grit): For smoothing patched areas.
- Cleaning Supplies: Wipes, mild detergent, and sponges for wall prep.
- Specific Tools: Depending on your project (e.g., paint rollers/brushes, staple gun, miter saw).
Pro Tips for DIY Success
- Prep the Wall Properly: Clean the wall thoroughly. Fill any holes or cracks with spackle, sand smooth, and wipe off dust. A clean, smooth surface is key for any application.
- Prime if Necessary: If you’re painting a dark color over a light one, if the wall is new drywall, or if you’re using wallpaper over a porous surface, primer will ensure better adhesion and truer color.
- Test, Test, Test: Always test paint colors on a small, inconspicuous area (or a poster board) to see how it looks in your room’s lighting. For wallpaper or fabric, test a small piece in an corner to see how it adheres and looks.
- Measure and Mark Carefully: “Measure twice, cut once” is a mantra for a reason. Precise measurements prevent costly mistakes and wasted materials.
- Work in Good Lighting: Natural light is best. If working at night, ensure you have sufficient overhead and task lighting to spot imperfections.
- Don’t Rush the Process: Especially with paint, allow adequate drying time between coats. Patience pays off with a professional finish.
- Enlist a Friend: For larger projects like applying wallpaper or heavy wood panels, an extra set of hands makes a huge difference.
Common Accent Wall Challenges & Solutions
Even the most meticulously planned **DIY accent wall** can present a few hurdles. Here’s how to navigate them:
- Bleeding Paint Under Tape: Solution: Apply a thin coat of your base wall color *over* the painter’s tape before applying the accent color. This seals the tape edge, and any bleed-through will be the same color as the existing wall, giving you a crisp line for your accent color.
- Uneven Texture/Application: Solution: For paint, ensure even rolling with light pressure. For textured materials, work in small sections and consistently apply pressure. Sand lightly between paint coats if needed.
- Bubbles in Wallpaper/Decals: Solution: Use a squeegee to smooth from the center outwards immediately after application. For stubborn bubbles, a tiny pinprick can release trapped air, then smooth again.
- Running Out of Materials: Solution: Always purchase 10-15% more material than you estimate. Keep receipts and unopened items for returns, or save extra for touch-ups.
- Lack of Inspiration: Solution: Take a break! Browse Pinterest, interior design magazines, or even local art galleries. Sometimes walking away and coming back with fresh eyes is all you need. Look for inspiration in everyday objects or nature’s patterns.
Remember, the goal is not perfection, but rather a creative expression that brings joy to your space. While aiming for a high-quality finish with these **DIY budget-friendly accent wall ideas** is important, don’t let minor imperfections deter you. They often add character!
The Long-Term Impact of Your DIY Accent Wall
Beyond the immediate aesthetic upgrade, your **DIY budget-friendly accent wall** offers several long-term benefits:
- Increased Home Value: While a single accent wall won’t drastically increase resale value, a thoughtfully designed, well-maintained space can certainly boost buyer appeal. It shows care and attention to detail.
- Personal Satisfaction: There’s immense pride in knowing you created something beautiful with your own hands. This sense of accomplishment is invaluable.
- Cost Savings Over Time: Choosing DIY options means saving significant money on labor costs, freeing up your budget for other home improvements or experiences.
- Skill Development: Each DIY project hones your skills, giving you confidence for future endeavors around the house. You’ll become more adept with tools and techniques.
- Adaptability: Many of these **budget-friendly accent wall ideas** are easily reversible or changeable, allowing you to adapt your decor as your style evolves without major commitment.
An accent wall is more than just decor; it’s an investment in your home and your well-being. It enriches the environment you live in, creating a more personalized and comfortable sanctuary. By exploring these **DIY budget-friendly accent wall ideas**, you’re embarking on a journey to transform your space in a meaningful and accessible way.
FAQ: Your DIY Budget-Friendly Accent Wall Questions Answered
What is the average cost for a DIY accent wall?
The cost of a DIY accent wall can range widely, typically from **$20 to $200**, depending heavily on the materials chosen. A simple painted accent wall might cost as little as $20-$50 for a gallon of paint and tape. Projects involving wood, fabric, or removable wallpaper might range from $50-$200 for materials, but still significantly less than professional installation or full room redecoration. The key is sourcing materials creatively and doing the labor yourself.
How long does it typically take to complete a DIY accent wall?
Most DIY accent walls can be completed in **one to two days**, including preparation and drying time. A simple painted wall might take a few hours of active work over a day. More complex projects like elaborate geometric patterns or wood paneling could take a full weekend. Planning and proper prep (cleaning, patching) are often the most time-consuming parts but are crucial for a good finish.
Can I create an accent wall in a rented apartment?
Absolutely! Many **DIY budget-friendly accent wall ideas** are perfect for renters. Look for options that are easily removable and won’t damage walls, such as **removable peel-and-stick wallpaper**, washi tape designs, fabric secured with liquid starch, or large framed art/photo collages. Always double-check your lease agreement, and consider testing a small, inconspicuous area before committing to a full wall.
What’s the best way to choose a color for my accent wall?
Start by considering the existing colors in your room (furniture, textiles, other walls) and the mood you want to create. Look for a color that either **complements** (e.g., blues with yellows) or **strikingly contrasts** (e.g., a dark wall in a light room) with your decor. Test large swatches of paint on your chosen wall at different times of day to see how the light affects the color before making a final decision.
How do I ensure my lines are straight for painted patterns?
Achieving crisp, straight lines is all about preparation. Use a **laser level or a traditional bubble level with a long straightedge** to mark your lines with a light pencil. Apply high-quality painter’s tape (like FrogTape) firmly, pressing down the edges to prevent bleeding. A trick for perfectly crisp lines is to paint a thin layer of your existing wall color over the tape edge before applying your accent color; this seals the tape.
Is it okay to put an accent wall in a small room?
Yes, an accent wall can work wonders in a small room! It can create the illusion of depth, define a specific area, or draw the eye upward to make the ceiling feel higher. In smaller spaces, consider using **lighter colors**, subtle textures, or focusing on the wall you want to be the focal point without overwhelming the space. Geometric patterns or vertical stripes can also help visually expand a room.
What materials are truly “budget-friendly” for accent walls?
The most budget-friendly materials often include **paint, washi tape, repurposed wood (like pallets), old book pages or maps, fabric scraps, and DIY stencils**. Many of these utilize items you might already have or can acquire for very little money from thrift stores or free sources. The key is creativity and leveraging your own labor instead of paying for professional installation.
Do I need to prime my wall before painting an accent color?
Priming is not always mandatory but is often highly recommended. You should definitely prime if you’re painting a **dark color over a light one** (or vice versa), using **new drywall**, or applying a very **vibrant color** that needs a neutral base to truly pop. Primer helps with adhesion, provides a uniform surface, and ensures your accent color looks its best, preventing the need for excessive coats of expensive paint.
Conclusion: Your Home, Your Masterpiece
Transforming your home doesn’t require a bottomless budget or a team of professional designers. With these **DIY budget-friendly accent wall ideas**, you have the power to infuse personality, depth, and style into any room of your house. From the vibrant simplicity of a bold painted wall to the rustic charm of reclaimed wood, each project offers a unique opportunity to express your creativity. Remember, the journey of creating something with your own hands is just as rewarding as the stunning result.
We’ve explored the diverse world of accent walls, providing practical tips, creative inspiration, and solutions to common challenges. Now, it’s your turn to pick up those tools, unleash your imagination, and bring your vision to life. Don’t let a blank wall intimidate you; see it as an invitation to create something truly yours. Which **budget-friendly accent wall** will you tackle first? Dive in, have fun, and enjoy the beautiful, personalized space you’re about to create!
Ready to continue your home decor journey? Explore our guides on affordable kitchen upgrades and small bathroom renovation ideas for more transformative DIY projects.
Content Disclaimer
The information provided in this article regarding DIY home improvement projects is for general informational and educational purposes only. It is not professional advice. Always exercise caution, wear appropriate safety gear, and follow manufacturer instructions when using tools and materials. If you are unsure about any DIY task, please consult with a qualified professional. We are not responsible for any injury, damage, or loss incurred as a result of using the information contained herein. Results may vary based on individual skill, tools, and project specifics.
Categories
- Accent Walls & Ceilings (61)
- Art Curation & Gallery (62)
- Bedding Style Trends (68)
- Bedroom Makeover (81)
- Bohemian & Eclectic Styles (58)
- DIY & Budget-Friendly Decor (64)
- Eco-Friendly Design (62)
- Furniture Care (71)
- Home Decor & Design Ideas (162)
- Home Wellness Spaces (59)
- Integrated Outdoor Living (67)
- Japandi Style (61)
- Kids and Nursery Decor (59)
- Living Room Decor (79)
- Mix & Match Techniques (73)
- Modern & Contemporary Design (66)
- Rug Sizing & Placement (73)
- Scandinavian Design Inspiration (20)
- Seasonal Home Decor (79)
- Small Space Solutions (73)
- Wall Art & Painting Tips (77)
Recent Comments
Archives
Product Gallery
-
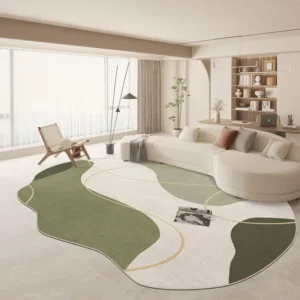 Large Area Green Rugs for Bedroom Nordic Living Room Decoration Shaped Carpet Irregular Plush Lounge Rug Home Thick Washable Mat
Rated 5.00 out of 5$54.94 – $346.41Price range: $54.94 through $346.41
 -
 Nordic Style Rugs for Bedroom Morandi Living Room Decoration Carpet Large Area Geometry Lounge Rug Home Cloakroom Non-slip Mat
Rated 5.00 out of 5$39.46 – $597.66Price range: $39.46 through $597.66
 -
 Irregular Shapes Living Room Decoration Carpet Modern Style Rugs for Bedroom Home Thicken Plush Rug Fluffy Soft Lounge Floor Mat
Rated 4.83 out of 5$55.91 – $347.82Price range: $55.91 through $347.82

