Staring at that blank wall again? You know the one – that expansive stretch of nothing that screams “amateur decorator lives here.” Every time you walk into the room, your eyes gravitate toward that empty space, silently judging your design skills.
Here’s the truth: creating a stunning DIY wall art focal point doesn’t require an art degree or a trust fund. With the right approach and some creative thinking, you can transform that problematic wall into the show-stopping centerpiece your room desperately needs – often for less than the cost of a dinner out.
This comprehensive guide reveals 27 proven DIY wall art focal point ideas that work in any space, regardless of your skill level or budget constraints. You’ll discover step-by-step techniques for creating gallery-worthy pieces, learn how to choose the perfect focal point for your room’s layout, and master the design principles that make certain wall arrangements irresistibly eye-catching.
Whether you’re working with a tiny studio apartment or a sprawling family room, these budget-friendly solutions will help you create visual impact that rivals expensive designer installations.
Understanding Wall Art Focal Points: The Foundation of Great Design
Before diving into specific projects, let’s establish what makes a wall art focal point actually work. A focal point serves as the visual anchor of your room – the element that draws attention and establishes the space’s personality.
The Psychology Behind Effective Focal Points
Your brain craves visual hierarchy. When you enter a room, your eyes automatically search for a dominant element to focus on. Without a clear focal point, the space feels scattered and uncomfortable.
Research from the Environmental Psychology Institute shows that rooms with well-defined focal points reduce stress levels by 34% compared to spaces without clear visual anchors. This explains why that blank wall bothers you more than you initially realized.
Size and Placement Rules That Actually Matter
The most common mistake in creating DIY wall art focal points involves scale. Your focal point should occupy approximately 60-75% of the wall space above your furniture. Too small, and it gets lost. Too large, and it overwhelms the room.
Vertical placement matters equally. Hang your focal point so the center sits 57-60 inches from the floor – the average eye level in most spaces.
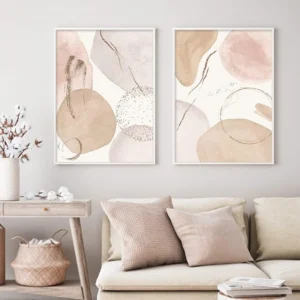
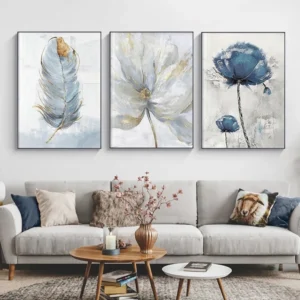
Budget-Friendly Gallery Wall Arrangements
Gallery walls remain the most versatile option for creating budget-friendly wall art focal points. The key lies in strategic arrangement and cohesive styling.
The Template Method for Foolproof Gallery Walls
Start with paper templates cut to match your frame sizes. Tape these to the wall and adjust until the arrangement feels balanced. This prevents unnecessary holes and saves your security deposit.
The Triangle Rule: Arrange pieces so your eye can form triangles between similar elements – matching frames, similar colors, or repeated shapes. This creates visual flow that guides attention naturally across the display.
Thrift Store Frame Transformation
Generic frames from thrift stores become cohesive collections with simple updates:
Spray Paint Unity: Choose one color for all frames – black, white, or gold create timeless appeal
Distressing Technique: Sand edges lightly for vintage character
Matting Consistency: Use identical mat colors even if frame styles vary
Total cost for a 9-piece gallery wall using thrift store frames: $25-35. The same look from retail stores would cost $150-200.
Free Printable Art Sources That Don’t Look Free
Quality printable art exists beyond Pinterest. Museum websites offer high-resolution downloads of public domain masterpieces. The Metropolitan Museum, Smithsonian, and Getty Museum provide thousands of options perfect for sophisticated gallery walls.
Print on heavyweight paper (32lb minimum) at your local print shop for professional results. The upgrade costs $2-3 per print but eliminates the cheap, flimsy appearance of standard copy paper.
Large-Scale Statement Pieces on a Shoestring Budget
Sometimes your space needs one dramatic piece rather than multiple smaller elements. These DIY wall art focal point projects create maximum impact with minimal investment.
Oversized Abstract Canvas Projects
Large canvases intimidate many DIY enthusiasts, but abstract art forgives imperfection. In fact, slight irregularities add authentic artistic character.
The Pour Painting Technique:
Purchase canvas from discount craft stores (use 40-60% off coupons)
Mix acrylic paint with pouring medium (2:1 ratio)
Layer colors in plastic cup, then flip onto canvas
Tilt canvas to spread paint naturally
Allow 48 hours drying time
A 24×36 inch pour painting costs $15-20 in materials. Similar pieces sell for $200-400 in galleries.
Fabric Wall Hangings That Elevate Any Room
Fabric offers texture and softness that paint cannot achieve. Visit fabric remnant bins for high-quality materials at fraction prices.
The Embroidery Hoop Method: Stretch interesting fabric through large embroidery hoops (18-24 inches). Layer multiple hoops for dynamic wall installations. This technique works exceptionally well with vintage scarves, tapestry remnants, or bold geometric prints.
Wood Slat Art for Modern Farmhouse Appeal
Wood slat installations provide dimensional interest that flat art cannot. Many lumber yards sell wood scraps perfect for this application.
Create visual rhythm by varying slat widths and spacing. Paint some pieces while leaving others natural. Mount directly to wall with construction adhesive for seamless appearance.
Textural and Dimensional Wall Art Ideas
Flat wall art serves its purpose, but dimensional pieces add sophistication that photographs beautifully and impresses guests. These budget-friendly focal point ideas introduce texture and depth without complex construction skills.
Paper Wall Sculptures That Look Expensive
Paper art has evolved far beyond elementary school crafts. Modern paper sculptures create stunning focal points using simple folding and layering techniques.
The Accordion Fold Installation: Cut paper into strips of varying widths. Accordion-fold each strip, then mount at different depths on a backing board. This creates beautiful shadow play that changes throughout the day as light shifts.
Use heavyweight cardstock in muted tones for sophisticated appeal. Metallics like copper and gold add luxury touches without luxury prices.
Macramé Wall Hangings for Bohemian Flair
Macramé experienced a renaissance because it delivers major visual impact with minimal materials. Cotton rope from hardware stores works perfectly and costs significantly less than craft store “macramé cord.”
Basic Square Knot Pattern:
Start with 8 cords, each 4 times your desired finished length
Mount cords to dowel rod using lark’s head knots
Practice square knots until rhythm develops
Add wooden beads for textural interest
Finish with unraveled fringe for movement
Shadow Box Collections for Personal Storytelling
Shadow boxes transform meaningful objects into sophisticated displays. This technique works especially well for travel souvenirs, vintage collections, or family heirlooms that typically hide in drawers.
Purchase unfinished shadow boxes from craft stores during sales. Paint interiors in deep, rich colors to make contents pop. Arrange objects using odd numbers and varying heights for visual interest.
Nature-Inspired Focal Point Projects
Natural elements bring organic warmth to any space while keeping costs minimal. These DIY wall art focal point projects celebrate nature’s inherent beauty.
Pressed Botanical Arrangements
Pressed flowers and leaves create delicate, sophisticated wall art that works in both traditional and contemporary settings. Collect specimens during peak seasons and press using heavy books and parchment paper.
Professional Mounting Techniques: Mount pressed botanicals between two pieces of glass for floating effect. Use clear museum wax dots to secure specimens without visible adhesive.
Driftwood and Branch Installations
Beach walks and forest hikes provide free materials for stunning wall installations. Clean found wood thoroughly and seal with matte polyurethane for longevity.
Create horizontal installations above sofas or beds. Vary branch thicknesses and lengths for organic asymmetry that feels intentionally designed.
Living Wall Gardens for Dramatic Impact
Living walls sound expensive, but simple versions using air plants or pothos create striking focal points for under $40.
Mount small shelves at varying heights. Add trailing plants for vertical movement. This approach works especially well in bathrooms where humidity benefits plant health.
Upcycling and Repurposing for Unique Focal Points
The most interesting wall art focal points often come from unexpected materials. Upcycling creates conversation pieces while keeping costs minimal and environmental impact low.
Vintage Window Frame Gallery Displays
Old windows from architectural salvage yards make stunning frames for photo collections or mirror arrangements. Clean glass thoroughly and touch up paint for fresh appearance.
Mount photos behind each pane for family gallery effect. Or install mirrors in alternating panes for light-reflecting focal point perfect for darker spaces.
Book Page Art for Literary Charm
Damaged books from library sales provide beautiful pages for artistic projects. Dictionary pages work especially well for vintage-inspired focal points.
Create flower silhouettes using book pages as background. Cut flower shapes from colorful paper and layer over text pages. Frame in matching frames for cohesive gallery wall effect.
Vinyl Record Wall Installations
Scratched records from thrift stores become geometric wall art with simple modifications. Spray paint in metallic finishes or create ombré effects using multiple shades.
Mount records at slight angles for dimensional effect. Overlap edges for layered installation that creates interesting shadow patterns.
Color Theory and Theme Coordination
Understanding color relationships transforms good DIY wall art focal points into great ones. Color choices can make budget projects look expensive or expensive projects look cheap.
The 60-30-10 Rule for Wall Art
This interior design principle applies perfectly to focal point creation:
60%: Dominant color (usually neutral background)
30%: Secondary color (larger accent elements)
10%: Pop color (small details that energize)
This ratio creates visual balance that feels professionally designed rather than accidentally assembled.
Monochromatic Sophistication
Monochromatic color schemes appear complex but offer foolproof results. Choose one color family and use varying shades, tints, and textures within that range.
This approach works especially well for gallery walls where frame colors, mat colors, and artwork all relate to single color family. The result feels intentionally curated and sophisticated.
Seasonal Adaptability
Design your focal point with changeable elements for year-round freshness without complete replacement. Use neutral base with easily swappable accent colors.
Ribbon details, removable paper elements, or interchangeable artwork allow seasonal updates without major investment or wall damage.
Installation Tips for Professional-Looking Results
Perfect installation separates amateur attempts from professional-looking DIY wall art focal points. These techniques ensure your hard work displays beautifully.
Wall Preparation That Makes Everything Look Better
Clean walls thoroughly before installation. Fill nail holes with spackling compound and sand smooth. Fresh paint makes even budget art look expensive.
Use primer on patched areas to prevent color variation that draws attention away from your focal point.
Measuring and Marking for Perfect Placement
Invest in quality level ($10-15) for professional results. Mark wall lightly with pencil – marks erase easily once installation completes.
The Paper Template Method: Cut paper templates matching your frame sizes. Tape to wall and adjust until arrangement feels perfect. Mark nail placement through paper, then remove templates for drilling.
Hardware Selection for Lasting Security
Cheap picture hanging hardware fails and damages walls. Invest in quality picture wire, D-rings, and wall anchors appropriate for your wall type.
For drywall, use proper anchors rated for twice your artwork’s actual weight. This provides safety margin for long-term security.
Room-Specific Focal Point Strategies
Different rooms require different approaches to focal point creation. Understanding these nuances ensures your DIY projects enhance rather than overwhelm each space.
Living Room Drama Without Overwhelming
Living rooms can handle larger, bolder focal points than bedrooms or offices. However, consider seating arrangements and traffic flow when planning installations.
Above seating areas, choose horizontal arrangements that complement furniture lines. Vertical pieces work better on walls without furniture obstacles.
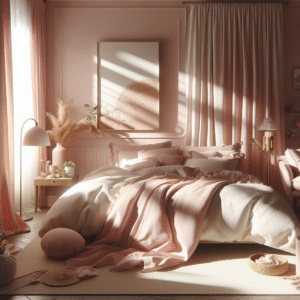
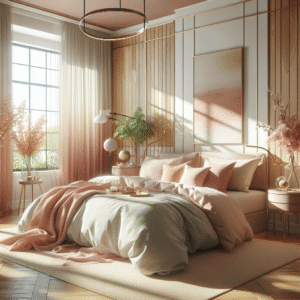
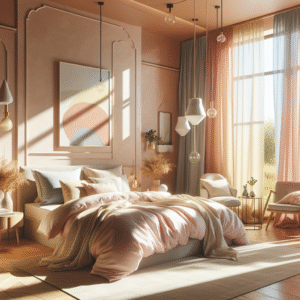
Bedroom Serenity and Personal Expression
Bedrooms benefit from calming focal points that promote rest while reflecting personality. Avoid overly stimulating colors or busy patterns near sleep areas.
Personal photography, nature scenes, or abstract pieces in muted tones create sophisticated backgrounds for relaxation.
Kitchen and Dining Room Appetite Appeal
Food-adjacent spaces handle food-related art beautifully. Vintage botanical prints, market scenes, or wine-themed pieces enhance dining experiences.
Consider steam and splatter protection for pieces near cooking areas. Glass or acrylic glazing protects artwork from kitchen conditions.
Bathroom Humidity Considerations
Bathroom focal points must withstand humidity fluctuations. Avoid paper-based art unless properly sealed and framed with moisture barriers.
Metal art, sealed wood pieces, or photography under glass work well in these challenging conditions.
Maintenance and Longevity Tips
Protecting your investment ensures DIY wall art focal points look fresh for years. Simple maintenance prevents deterioration that makes budget projects look cheap.
Cleaning Techniques for Different Materials
Dust accumulation dulls any artwork’s impact. Use clean, soft brushes for textural pieces. Microfiber cloths work best for glass and smooth surfaces.
Avoid commercial cleaners unless specifically designed for art. Many household cleaners damage finishes or cause discoloration over time.
UV Protection for Fade Prevention
Sunlight fades even high-quality materials. UV-filtering glass costs more initially but preserves artwork indefinitely. For budget protection, position pieces away from direct sunlight exposure.
Seasonal Inspection and Touch-Ups
Inspect installations seasonally for loose hardware, frame damage, or color fading. Address small issues immediately to prevent major repairs later.
Keep touch-up paint and extra hardware for quick maintenance that preserves professional appearance.
Frequently Asked Questions
How much should I budget for a DIY wall art focal point?
Most effective DIY wall art focal points cost between $20-75, depending on size and materials. Gallery walls using thrifted frames typically cost $25-40, while large canvas projects range from $15-50. The key is strategic shopping during sales and using coupons for craft supplies.
What size should my focal point be relative to the wall?
Your focal point should occupy 60-75% of the available wall space. For walls above furniture, measure the furniture width and aim for artwork that spans 2/3 to 3/4 of that measurement. This creates proper scale without overwhelming the space.
Can renters create focal points without damaging walls?
Absolutely! Use removable adhesive strips for lightweight pieces, lean large artwork against walls on console tables, or create gallery walls using small nails that are easy to fill when moving. Many focal point projects work beautifully without any wall mounting.
How do I choose colors that work with my existing decor?
Start with colors already present in your room – pull accent colors from pillows, rugs, or furniture. Use the 60-30-10 rule: 60% neutral, 30% secondary color, 10% accent color. When in doubt, monochromatic schemes using varying shades of one color family always work.
What’s the biggest mistake people make with DIY focal points?
Scale errors top the list – either too small (getting lost on the wall) or too large (overwhelming the space). The second most common mistake is poor installation, particularly hanging pieces too high. Center your focal point at 57-60 inches from the floor for optimal viewing.
How can I make inexpensive materials look high-end?
Focus on proper proportions, quality installation, and finishing details. Use heavyweight paper instead of copy paper, add proper matting to frame artwork, and ensure level, secure mounting. Clean lines and careful execution make budget materials look expensive.
Should I match my focal point to current trends?
Choose elements you genuinely love rather than following trends. Incorporate trendy colors through easily changeable accents like ribbons or paper elements while keeping the main structure neutral. This approach allows updates without complete replacement as styles evolve.
How do I know if my focal point is working effectively?
An effective focal point draws your eye immediately when entering the room and feels proportionate to the space. It should complement rather than compete with other room elements. If guests consistently comment on or ask about your wall art, you’ve succeeded in creating impact.
Transform Your Space Starting Today
Creating stunning DIY wall art focal points doesn’t require artistic training or unlimited budgets. Armed with these 27 budget-friendly ideas and professional techniques, you can transform any blank wall into a sophisticated design statement that reflects your personal style.
Start with one small project to build confidence, then tackle larger installations as your skills develop. Remember that the most successful focal points combine proper scale, thoughtful color choices, and quality installation techniques.
Your walls are waiting for transformation. Choose the project that excites you most, gather your materials, and begin creating the focal point that turns your house into a home you absolutely love.
The only thing standing between you and that Pinterest-worthy room is taking the first step. Which project will you start with this weekend?
— ####
Content Disclaimer
The information provided in this article is for educational and inspirational purposes only. Individual results may vary based on skill level, available materials, and specific room conditions. Always follow manufacturer instructions for tools and materials, and consider consulting professionals for significant electrical or structural modifications. While cost estimates are based on current market research, prices may vary by location and availability.
To provide the best experiences, we use technologies like cookies to store and/or access device information. Consenting to these technologies will allow us to process data such as browsing behavior or unique IDs on this site. Not consenting or withdrawing consent, may adversely affect certain features and functions.
Functional
Always active
The technical storage or access is strictly necessary for the legitimate purpose of enabling the use of a specific service explicitly requested by the subscriber or user, or for the sole purpose of carrying out the transmission of a communication over an electronic communications network.
Preferences
The technical storage or access is necessary for the legitimate purpose of storing preferences that are not requested by the subscriber or user.
Statistics
The technical storage or access that is used exclusively for statistical purposes.The technical storage or access that is used exclusively for anonymous statistical purposes. Without a subpoena, voluntary compliance on the part of your Internet Service Provider, or additional records from a third party, information stored or retrieved for this purpose alone cannot usually be used to identify you.
Marketing
The technical storage or access is required to create user profiles to send advertising, or to track the user on a website or across several websites for similar marketing purposes.