Remember that old dresser tucked away in your attic? Or maybe that charming chair you found at a flea market? That’s not just furniture; it’s a story waiting to be retold. Vintage wood furniture holds a certain magic, doesn’t it? It whispers tales of bygone eras, adding character and warmth to any home. But let’s be honest, sometimes these pieces need a little TLC to truly shine. That’s where furniture restoration comes in. And guess what? It doesn’t have to be intimidating.
Why Bother with Restoration Anyway?
So, why should you even consider restoring old furniture? Well, beyond just aesthetics, there’s something deeply satisfying about breathing new life into something old. It’s sustainable, it’s creative, and it’s a whole lot more rewarding than buying something mass-produced from a big box store.
Think about it: you’re preserving a piece of history, reducing waste, and creating a unique statement piece for your home. Plus, you’re getting a great conversation starter! “Oh, this? I restored it myself.” Boom. Instant cool points.
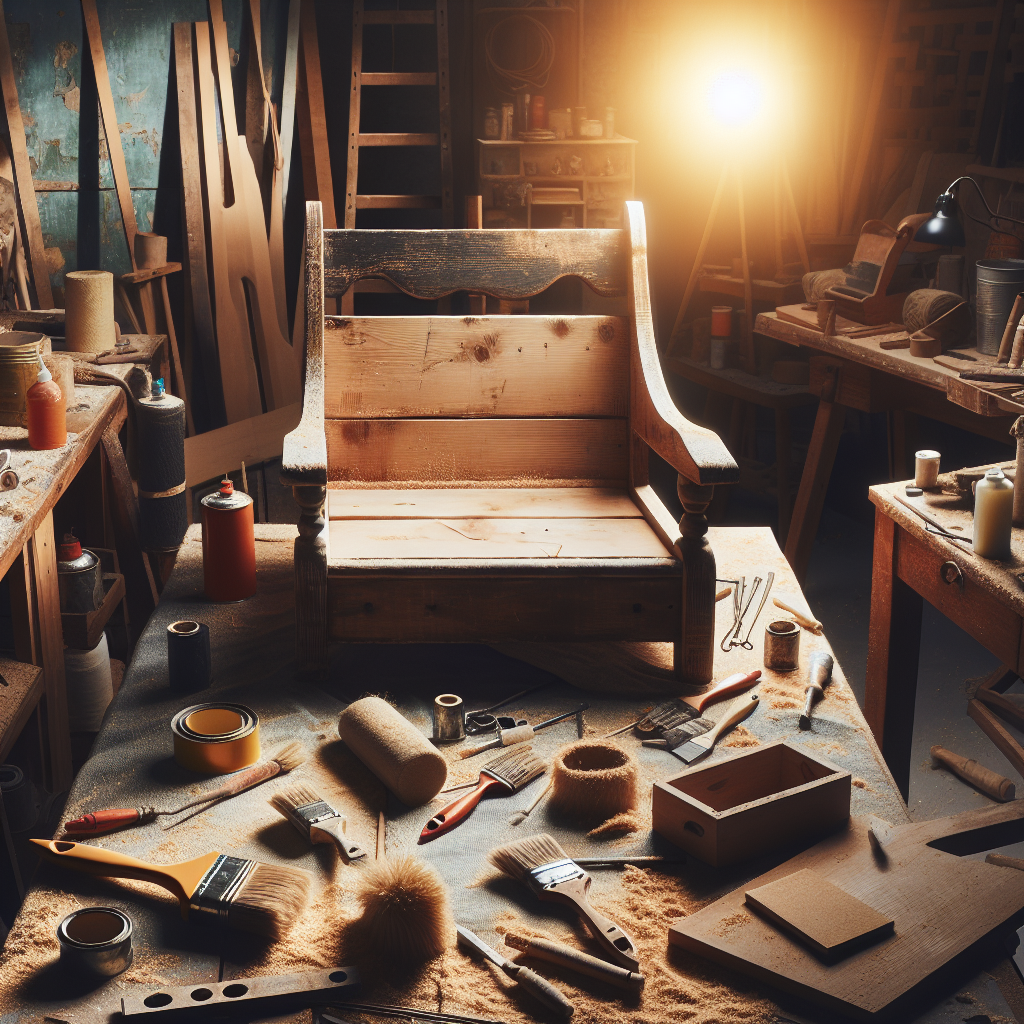
Getting Started: What You’ll Need in Your Toolkit
Okay, so you’re intrigued. Excellent! Before we get our hands dirty, let’s talk tools. You don’t need a fancy workshop to get started; some basic supplies will do the trick. Let me explain…
* Safety First: Gloves, safety glasses, and a dust mask are non-negotiable. Seriously, protect yourself.
* Cleaning Supplies: Mild soap, water, and soft cloths for surface cleaning. You might also want to use mineral spirits for tougher grime.
* Stripping Agents: Chemical strippers or heat guns for removing old finishes. Choose based on the type of finish and your comfort level.
* Sanding Gear: Sandpaper in various grits (from coarse to fine), a sanding block, and possibly an orbital sander for larger, flat surfaces.
* Wood Filler: For repairing minor damages like scratches, dents, and chips.
* Stain and Finish: Choose a stain that complements the wood and a finish that provides protection and enhances the beauty of the piece.
* Brushes and Rags: High-quality brushes for applying stain and finish, and lint-free rags for wiping.
* Optional Extras: A scraper, a tack cloth, and furniture polish can also come in handy.
Quick tip: don’t skimp on quality. Good brushes and sandpaper will make a world of difference.
Assessing the Patient: Evaluating Your Furniture’s Condition
Before you start hacking away at that antique table, take a good, hard look at it. What kind of shape is it really in? What are you dealing with?
Inspect the piece for:
* Structural Issues: Are there loose joints, wobbly legs, or broken pieces?
* Finish Condition: Is the finish cracked, peeling, or just plain ugly?
* Damage: Look for scratches, dents, water stains, and other blemishes.
* Wood Type: Knowing the type of wood will help you choose the right products and techniques.
* Hardware: Note the condition of knobs, hinges, and other hardware. Can they be salvaged, or do they need replacing?
This step is crucial because it will determine your restoration strategy. It’s like a doctor diagnosing a patient before prescribing treatment. No point in prescribing aspirin for a broken leg, right?
Cleaning Up: Removing Grime and Old Finishes
Alright, so you’ve assessed the damage. Now it’s time to clean things up. This usually involves removing old finishes and general grime. And honestly, this can be the most satisfying part.
Gentle Cleaning
Start with a gentle cleaning using mild soap and water. This will remove surface dirt and grime without damaging the existing finish, if you’re planning to keep some of it. Use a soft cloth and avoid harsh chemicals at this stage. Think of it as giving your piece a spa day before the real work begins.
Stripping Old Finishes
If the old finish is cracked, peeling, or otherwise unsalvageable, you’ll need to strip it. There are two main methods:
* Chemical Strippers: These are messy but effective. Apply the stripper according to the manufacturer’s instructions, let it sit, and then scrape off the old finish. Remember to work in a well-ventilated area and wear gloves and safety glasses.
* Heat Guns: These use heat to soften the finish, making it easier to scrape off. Be careful not to overheat the wood, as this can cause damage. Again, ventilation is key.
Honestly, stripping can be a bit of a pain, but it’s essential for a good foundation. Think of it as clearing the canvas before you paint a masterpiece.
Just so you know, there are eco-friendly stripping options available these days. Products like Citristrip are less harsh and safer for the environment (and you!). So, if you’re eco-conscious, definitely explore those options.
Repairing Imperfections: Filling Scratches, Dents, and Chips
Now that you’ve got a clean, bare surface, it’s time to address those imperfections. Scratches, dents, and chips are common in vintage furniture, but they’re usually easy to fix. Just a heads up.
Wood Filler
Wood filler (sometimes called wood putty) is your best friend here. Apply it to the damaged areas using a putty knife, making sure to overfill slightly. Let it dry completely, then sand it smooth. You might need to apply multiple layers for deeper imperfections. No biggie.
Remember to choose a wood filler that matches the color of your wood, or one that can be stained. This will help it blend seamlessly with the surrounding area. Minwax makes some good options if you’re curious.
Sanding Like a Pro
Sanding is crucial for creating a smooth, even surface. Start with a coarser grit sandpaper (like 80 or 100) to remove any remaining imperfections, then gradually move to finer grits (like 120, 180, and 220) to achieve a silky-smooth finish. Sand with the grain of the wood to avoid scratches.
Don’t rush this step. Take your time and pay attention to detail. Sanding is like meditation – it’s therapeutic, right? Just me?
Selecting Your Stain and Finish: The Personality Phase
Okay, the surface is prepped, the imperfections are gone, and it’s time to add some personality! Choosing the right stain and finish is where you can really make the piece your own. What kind of vibe are you going for?
Stain Selection Basics
Stain enhances the natural beauty of the wood by accentuating its grain and adding color. You’ll find stains in various shades, from light and airy to dark and dramatic. Consider the existing wood color, the style of the furniture, and your personal preferences.
Always test the stain on a hidden area of the furniture first to make sure you like the color. Trust me, it’s better to be safe than sorry. Been there, done that!
Finishing Touches
The finish protects the wood from moisture, scratches, and wear, while also enhancing its appearance. Common types of finishes include:
* Polyurethane: Durable and water-resistant, ideal for high-traffic pieces.
* Varnish: Provides a clear, glossy finish.
* Lacquer: Dries quickly and offers a smooth, hard finish.
* Oil-Based Finishes: Penetrate the wood and provide a natural, matte finish.
Choose a finish based on the desired look and level of protection. Again, testing is your friend!
For a more sustainable option, consider water-based finishes. They’re lower in VOCs (volatile organic compounds) and better for the environment. General Finishes makes some excellent water-based products.
Applying Stain and Finish: The Art of Patience
Now for the fun part: applying the stain and finish. This requires a steady hand, a good brush, and a whole lot of patience. I’m serious about the patience part.
Staining Techniques
Apply the stain evenly with a brush or rag, working with the grain of the wood. Let it sit for the recommended time (check the product instructions), then wipe off the excess with a clean rag. The longer you leave it on, the darker the color will be. It’s like brewing tea – you control the strength.
Allow the stain to dry completely before applying the finish. This usually takes 24-48 hours. Impatience is the enemy here!
Finishing with Finesse
Apply the finish in thin, even coats, using a high-quality brush. Let each coat dry completely before applying the next. You’ll probably need 2-3 coats for adequate protection. Sand lightly between coats with very fine sandpaper (like 320 or 400 grit) to remove any imperfections and create a smooth surface.
Let me explain…
Hardware Installation and Final Touches: The Final Flourish
You’re almost there! The finish is dry, the wood is gleaming, and now it’s time to add the finishing touches. This usually involves installing new or restored hardware and giving the piece a final polish.
Hardware Revival
If the original hardware is in good condition, clean it up and reattach it. If it’s damaged or missing, consider replacing it with vintage-style hardware that complements the era of the furniture. Sources like eBay are perfect for finding authentic vintage hardware.
Sometimes, all it takes is a little elbow grease and some metal polish to bring old hardware back to life. You’d be surprised what a difference it makes!
The Polishing Power
Give the restored piece a final polish with furniture polish. This will enhance the shine and provide an extra layer of protection. Use a soft cloth and buff gently. You know what? You will see the magic happen before your very eyes.
Admire Your Handiwork
Step back and admire your handiwork! You’ve just transformed an old, forgotten piece of furniture into a beautiful, functional work of art. Pat yourself on the back – you earned it!
Beyond the Basics: Advanced Restoration Tips
So, you’ve mastered the basics. Feeling ambitious? Let’s talk about some advanced techniques for taking your restoration skills to the next level.
Veneer Repair
Veneer is a thin layer of wood applied to a less expensive substrate. It’s common in older furniture, and it can be tricky to repair. If you’re dealing with loose or damaged veneer, you’ll need to re-glue it using veneer glue and clamps. Seriously.
For larger repairs, you might need to replace the veneer entirely. This requires some skill and patience, but it’s definitely achievable with the right tools and techniques.
Don’t be afraid to experiment with different techniques and products. Restoration is a journey of discovery. The only way you improve is by practicing and learning from your mistakes. Just avoid experimenting on your grandmother’s prized possession, got it?
Seasonal Flair: Tailoring Your Restoration for the Holidays
Speaking of grandmothers, why not tie your restoration projects into the seasons? The holidays are a perfect time to add a touch of festive flair to your restored pieces. Here’s the thing,…
Consider using festive colors or patterns for your upholstery or paint. A red and green velvet cushion on a restored rocking chair can add a cozy, Christmas-y touch. Or how about a metallic gold finish on a side table for a New Year’s Eve celebration?
You can also use seasonal decorations to highlight your restored pieces. A vase of sunflowers on a refinished console table in the summer, or a spooky Halloween display on a restored dresser can make a big impact.
When to Call in the Pros: Knowing Your Limits
Okay, let’s be real. Not every restoration project is suitable for DIY. Sometimes, it’s best to call in a professional. Knowing your limits is crucial to avoid making things worse. Let me explain…
Consider hiring a professional if:
- The furniture has significant structural damage.
- The finish is rare or historically significant.
- You lack the necessary skills or tools.
- The project is simply too overwhelming.
There’s no shame in admitting defeat. Sometimes, it’s better to entrust the work to someone with more experience. Plus, you’ll save yourself time, money, and a whole lot of stress.
Restoring vintage wood furniture is a rewarding and creative endeavor. With the right tools, techniques, and a little patience, you can breathe new life into old pieces and create unique treasures for your home. So, go ahead, dust off those dreams, and let your furniture restoration journey begin!
Resources to keep you going
Common Questions about Wood Furniture Restoration
Disclaimer
Please note that furniture restoration involves working with tools, chemicals, and materials that can be hazardous. Always exercise caution and follow safety guidelines. Wear appropriate protective gear, work in a well-ventilated area, and consult with a professional if you’re unsure about any aspect of the restoration process.
The information provided in this article is for general informational purposes only and does not constitute professional advice. Any action you take upon the information in this article is strictly at your own risk. We will not be liable for any losses or damages in connection with your furniture restoration projects.
Enjoy the process, and good luck with your restoration project!
Categories
- Accent Walls & Ceilings (84)
- Art Curation & Gallery (83)
- Bedding Style Trends (89)
- Bedroom Makeover (96)
- Bohemian & Eclectic Styles (80)
- DIY & Budget-Friendly Decor (78)
- Eco-Friendly Design (83)
- Furniture Care (87)
- Home Decor & Design Ideas (181)
- Home Wellness Spaces (103)
- Integrated Outdoor Living (91)
- Japandi Style (84)
- Kids and Nursery Decor (73)
- Living Room Decor (99)
- Mix & Match Techniques (95)
- Modern & Contemporary Design (88)
- Rug Sizing & Placement (89)
- Scandinavian Design Inspiration (51)
- Seasonal Home Decor (100)
- Small Space Solutions (93)
- Wall Art & Painting Tips (94)
Recent Comments
Archives
Product Gallery
-
 Majestic African Wildlife Canvas Art for Stylish Home Decor
Rated 5.00 out of 5
Majestic African Wildlife Canvas Art for Stylish Home Decor
Rated 5.00 out of 5 -
 Cozy Irregular Green Plush Rug for Nordic Living Spaces
Rated 5.00 out of 5$37.00 – $230.00Price range: $37.00 through $230.00
Cozy Irregular Green Plush Rug for Nordic Living Spaces
Rated 5.00 out of 5$37.00 – $230.00Price range: $37.00 through $230.00 -
 Scandinavian Geometric Area Rugs for Stylish Home Décor
Rated 5.00 out of 5$28.00 – $413.00Price range: $28.00 through $413.00
Scandinavian Geometric Area Rugs for Stylish Home Décor
Rated 5.00 out of 5$28.00 – $413.00Price range: $28.00 through $413.00