How to Restore Antique Wood Furniture: Essential Tips and Techniques
Got a beautiful old piece of wood furniture? Maybe it’s a family heirloom, a lucky find at a flea market, or something you’ve been meaning to get around to. Restoring antique wood furniture isn’t just about bringing it back to its former glory; it’s about preserving history. It’s about giving new life to something old. Honestly, it’s just plain satisfying.
Why Restore Antique Furniture? Beyond Just Looks
So, why bother restoring that old dresser or that wobbly table? Well, there’s more to it than meets the eye.
First off, quality. You know, they really don’t make ’em like they used to. Antique furniture was often crafted with superior materials and techniques. Restoring it means you’re keeping something well-made alive and kicking. Plus, think of the stories these pieces hold! They were part of someone’s life, someone’s history. Restoring them is like connecting with the past. It’s pretty cool when you think about it.
And let’s not forget the environmental bit. Reusing and restoring is way more eco-friendly than buying new. It’s less waste, less demand for new resources. You know, it’s a small thing, but it adds up.
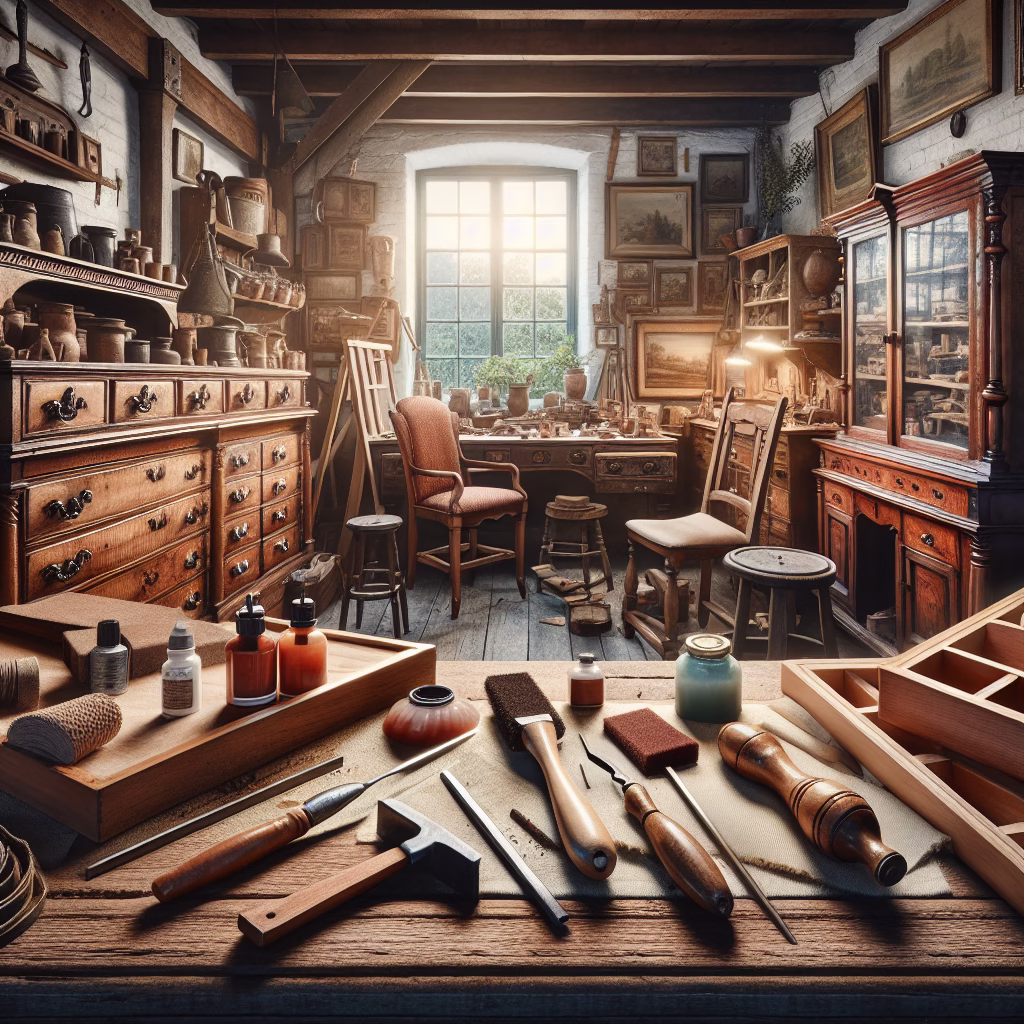
Gathering Your Arsenal: Essential Tools and Materials
Okay, ready to roll up your sleeves? First, you’ll need your tools. Don’t worry, you don’t need to break the bank.
Here’s where we separate the essential from the “nice to have”. First, you gotta have the basics:
- Cleaning Supplies: Gentle soap, mineral spirits, and soft cloths. Skip anything too harsh; we’re dealing with antiques here, not cast iron pans.
- Stripping Agents: Chemical strippers for removing old finishes. Always follow the instructions carefully and work in a well-ventilated area. Safety first!
- Sandpaper: Various grits, from coarse to fine. Trust me, you’ll need ’em.
- Wood Fillers: For repairing cracks or imperfections. There are different types, so pick one suited for your wood type.
- Finishes: Varnish, shellac, lacquer, wax – the options are endless! Choose the one that matches the original finish or your desired look.
- Brushes and Applicators: Good-quality brushes for applying finishes smoothly. Foam brushes can also be handy.
- Safety Gear: Gloves, safety glasses, and a respirator. No skimping here!
And you probably already have a screwdriver set, right? Maybe a rubber mallet? Those come in handy too.
First Steps: Assessing the Damage and Cleaning the Surface
Alright, before you start hacking away at that old dresser, let’s take a good, hard look.
So, assess the damage. Are we talking minor scratches? Water stains? Or has it been through a hurricane? Understanding the extent of the restoration needed is crucial.
Now, the cleaning part. Let’s start gentle. Mix a mild soap with warm water and use a soft cloth to wipe down the furniture. You want to remove any dirt, grime, or cobwebs. You know, the usual suspects. For stubborn spots, try mineral spirits. But remember, always test in an inconspicuous area first. We don’t want any surprises!
Stripping the Old Finish: Revealing the Beauty Beneath
Time for the slightly scary part: stripping the old finish. Why do we do it? Well, sometimes the old finish is just too far gone. Cracking, peeling, flaking – you name it. Or maybe you want to change the color or type of finish.
There are a couple of methods here. Chemical strippers are the most common. Follow the instructions to the letter and work in a well-ventilated area. Seriously, don’t skip the ventilation part. Apply the stripper, let it sit, and then scrape off the old finish. You might need to do this a couple of times.
The other method is sanding. Now, this requires a bit more finesse. Start with a coarser grit sandpaper and gradually move to finer grits. Be careful not to sand too aggressively, or you might damage the wood. Honestly, I prefer chemical strippers for intricate details, but sanding works well for flat surfaces.
Mending Broken Hearts: Repairing Damage and Imperfections
Okay, so you’ve stripped the finish and discovered a few boo-boos. Cracks, chips, maybe even a missing piece. Don’t worry, we can fix it.
For small cracks and chips, wood filler is your friend. Apply it carefully, let it dry, and then sand it smooth. For larger repairs, you might need to use wood glue and clamps to reattach pieces. If a piece is missing entirely, you might consider consulting a professional. They can often fabricate a replacement piece that matches the original.
You know, sometimes it’s tempting to hide every single imperfection. But remember, antique furniture has character. A few small dings and scratches tell a story. So, don’t feel like you need to make it look brand new. Embrace the imperfections!
Sanding: Achieving Silky Smoothness
Sanding. Sounds boring, right? But trust me, it’s crucial. Sanding prepares the surface for the new finish. It removes any imperfections left from the stripping process and creates a smooth, even surface.
Start with a medium-grit sandpaper and gradually move to finer grits. Sand with the grain of the wood, not against it. And be patient! It takes time to achieve that silky-smooth finish. Seriously, there are videos online where people spend hours just sanding. I’m not saying you need to go that far, but a little extra effort goes a long way.
Choosing the Right Finish: Protecting and Enhancing the Wood
Okay, the fun part! Choosing the right finish. This is where you can really customize the look of your furniture.
There are several options to choose from, each with its own pros and cons. Varnish is durable and water-resistant, making it a good choice for tabletops. Shellac is easy to apply and gives furniture a warm glow. Lacquer is fast-drying and provides a hard, glossy finish. Wax is easy to apply and maintain, but it’s not as durable as other finishes.
Honestly, the best finish depends on the type of furniture and your personal preferences. Do you want a glossy look or a matte finish? Do you need something durable, or are you okay with reapplying it periodically? Do your research and choose wisely!
Applying the Finish: Techniques for a Flawless Look
Alright, you’ve chosen your finish. Now, let’s apply it. This is where patience and technique come into play.
First, make sure the surface is clean and free of dust. Use a tack cloth to remove any lingering particles. Apply the finish in thin, even coats. Avoid drips and runs. Let each coat dry completely before applying the next one. Depending on the finish, you might need to apply several coats. Honestly, it’s better to apply multiple thin coats than one thick coat.
And here’s a pro tip: use a good-quality brush. Cheap brushes can leave bristles in the finish. Nobody wants that! And don’t forget to clean your brush after each use. Otherwise, it’ll be ruined.
Waxing and Polishing: Adding the Final Touches
Almost there! Once the finish is dry, you can add a coat of wax for extra protection and shine.
Apply the wax with a soft cloth and buff it to a shine. You can also use a furniture polish to maintain the finish over time. Honestly, a little wax and polish can make a big difference in the overall appearance of your furniture.
And that’s it! You’ve successfully restored your antique wood furniture. Stand back and admire your handiwork. Congratulations!
Maintaining Your Restored Furniture: Keeping it Beautiful for Years to Come
You’ve put in all this work; now, let’s keep that furniture looking great!
Keep it out of direct sunlight. UV rays can damage the finish over time. Avoid placing it near heat sources or in areas with high humidity. And be careful not to scratch the surface. Use coasters and pads to protect it from scratches and spills.
Honestly, regular cleaning and maintenance are key. Dust it regularly with a soft cloth. And apply a coat of wax or polish every few months. With a little care, your restored furniture will last for years to come. You know what else? Pass it down through generations. That’s how you keep the story going.
Common Mistakes to Avoid (and How to Sidestep Them)
Look, we all make mistakes. But here’s what people commonly do wrong so you don’t have to!
- Not prepping properly: Cleaning and sanding are crucial! Don’t skip these steps. Surface preparation makes all the difference in how the finish adheres and looks. It’s like painting a house – you wouldn’t paint over dirt, would you?
- Using the wrong products: Make sure you’re using products that are compatible with the type of wood and finish. Using the wrong stripper can damage the wood, and the wrong finish might not adhere properly. It’s worth spending a little extra on quality products that are designed for antiques.
- Applying finish too thick: Thin coats are key! Seriously, thin is in here. Thick coats lead to drips, runs, and uneven drying. It’s better to apply several thin coats than one thick one.
- Rushing the process: Restoration takes time and patience. Don’t rush it. Each step needs to be done carefully and thoroughly. Rushing can lead to mistakes that are difficult to fix.
When to Call a Pro (and When to DIY)
Okay, be honest. Sometimes, a project is just too big or too complex to tackle on your own. And that’s okay! The critical thing is to know when to call in a pro.
If you’re dealing with a valuable antique or a piece with significant damage, it’s best to consult a professional furniture restorer. They have the knowledge, skills, and tools to do the job right. Plus, they can often source replacement parts that you wouldn’t be able to find on your own.
But if you’re working on a more modest piece and the damage is relatively minor, you can probably handle it yourself. Just take your time, do your research, and don’t be afraid to ask for help. You’d be surprised how much you can learn from online tutorials and forums.
Resources and Further Reading
Want to dig deeper? Here are some great resources:
- Antique Furniture Restoration Guide – A comprehensive guide on restoring antique furniture.
- Woodworking Tips and Techniques – Woodworking basics and advanced techniques to enhance your skills.
FAQ: Your Burning Questions Answered
You’ve got questions, I’ve (hopefully) got answers! Here are a couple of common Q&As about restoring antique wood furniture.
DISCLAIMER
Restoring antique furniture can involve working with chemicals and tools that require caution. Always follow safety guidelines, wear appropriate protective gear, and work in a well-ventilated area. If you’re unsure about any aspect of the restoration process, consult a professional for guidance.
Categories
- Accent Walls & Ceilings (61)
- Art Curation & Gallery (62)
- Bedding Style Trends (68)
- Bedroom Makeover (81)
- Bohemian & Eclectic Styles (58)
- DIY & Budget-Friendly Decor (64)
- Eco-Friendly Design (62)
- Furniture Care (71)
- Home Decor & Design Ideas (162)
- Home Wellness Spaces (59)
- Integrated Outdoor Living (67)
- Japandi Style (61)
- Kids and Nursery Decor (59)
- Living Room Decor (79)
- Mix & Match Techniques (73)
- Modern & Contemporary Design (66)
- Rug Sizing & Placement (73)
- Scandinavian Design Inspiration (20)
- Seasonal Home Decor (79)
- Small Space Solutions (73)
- Wall Art & Painting Tips (77)
Recent Comments
Archives
Product Gallery
-
 Large Area Green Rugs for Bedroom Nordic Living Room Decoration Shaped Carpet Irregular Plush Lounge Rug Home Thick Washable Mat
Rated 5.00 out of 5$36.00 – $225.00Price range: $36.00 through $225.00
Large Area Green Rugs for Bedroom Nordic Living Room Decoration Shaped Carpet Irregular Plush Lounge Rug Home Thick Washable Mat
Rated 5.00 out of 5$36.00 – $225.00Price range: $36.00 through $225.00 -
 Nordic Style Rugs for Bedroom Morandi Living Room Decoration Carpet Large Area Geometry Lounge Rug Home Cloakroom Non-slip Mat
Rated 5.00 out of 5$26.00 – $387.00Price range: $26.00 through $387.00
Nordic Style Rugs for Bedroom Morandi Living Room Decoration Carpet Large Area Geometry Lounge Rug Home Cloakroom Non-slip Mat
Rated 5.00 out of 5$26.00 – $387.00Price range: $26.00 through $387.00 -
 Irregular Shapes Living Room Decoration Carpet Modern Style Rugs for Bedroom Home Thicken Plush Rug Fluffy Soft Lounge Floor Mat
Rated 4.83 out of 5$37.00 – $226.00Price range: $37.00 through $226.00
Irregular Shapes Living Room Decoration Carpet Modern Style Rugs for Bedroom Home Thicken Plush Rug Fluffy Soft Lounge Floor Mat
Rated 4.83 out of 5$37.00 – $226.00Price range: $37.00 through $226.00