The Complete Guide to Repairing and Restoring Antique Wood Furniture
So, you’ve got this beautiful old piece of wood furniture, right? Maybe it’s a family heirloom, a lucky find at a flea market, or simply something you’ve always admired. But it’s looking a little worse for wear. Don’t worry, that’s where the magic of restoration comes in!
Why Restore Antique Furniture? More Than Just a Pretty Face
Restoring antique furniture isn’t just about aesthetics; it’s about preserving history, craftsmanship, and sometimes even a bit of personal memory. You’re not just fixing up a table; you’re connecting with the past. Plus, you know, it usually looks fantastic when you’re done. Think of it like giving a tired old soul a new lease on life.
Assessing the Damage: What Are We Up Against?
Okay, let’s roll up our sleeves. First things first, let’s figure out what exactly needs fixing. Is it just some scratches? Maybe a wobbly leg? Or something more serious, like water damage or a missing piece? A thorough assessment will save you time and headaches down the road.
Common Types of Damage You Might Encounter:
- Surface Scratches and Dents
- Water Stains and Rings
- Loose Joints
- Chipped or Missing Veneer
- Faded or Damaged Finish
- Insect Damage (Yikes!)
Honestly, insect damage can be a nasty surprise. Always check thoroughly, especially in dark corners! It’s like finding uninvited guests at a party – nobody wants that.
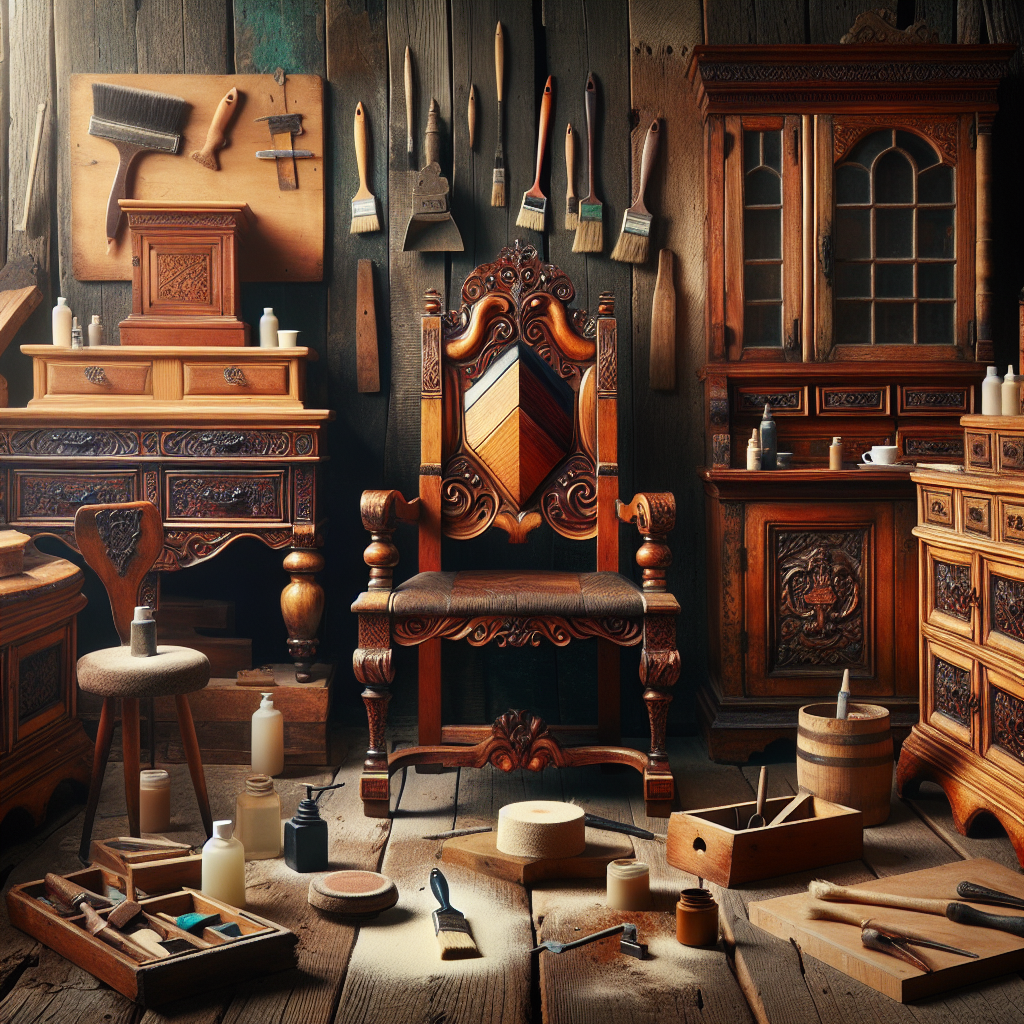
Gathering Your Arsenal: Essential Tools and Materials
Alright, time to gear up! Think of yourself as a furniture surgeon. You’ll need the right instruments for the job. Having the right tools not only makes the work easier but also minimizes the risk of causing further damage.
Must-Have Tools and Materials:
- Cleaning Supplies: Mild soap, soft cloths, mineral spirits
- Sandpaper: Various grits (from coarse to fine)
- Wood Fillers and Putty: For filling gaps and cracks
- Clamps: To hold pieces together while glue dries
- Adhesives: Wood glue, epoxy
- Finishing Products: Stain, varnish, lacquer, wax
- Brushes and Applicators: High-quality brushes for smooth finishes
- Safety Gear: Gloves, safety glasses, and a dust mask are essential. Honestly, don’t skip this!
You know what? Investing in quality brushes makes a world of difference. Cheaping out on brushes can lead to unsightly streaks and uneven finishes. Let me explain why paying a little more for a decent brush will save you in the long run!
Cleaning Like a Pro: Gentle Does It!
Before you start slapping on wood filler or stain, you need to clean the piece thoroughly. Dust, grime, and old polish can interfere with repairs and finishes. But be gentle! You don’t want to strip away any original character or damage the existing finish.
Steps for Gentle Cleaning:
- Dusting: Start with a soft cloth or brush to remove loose dust and debris.
- Mild Soap and Water: Mix a small amount of mild soap (like dish soap) with warm water. Gently wipe the surface with a damp cloth, then immediately dry with a clean, dry cloth.
- Mineral Spirits: For stubborn grime or old wax buildup, use mineral spirits on a cloth. Work in a well-ventilated area, of course.
Here’s the thing: avoid harsh chemicals! You never know how they’ll react with the existing finish. It’s always best to test any cleaning solution on an inconspicuous area first. Seriously, folks, test, test, test beforehand!
Repairing Surface Damage: Scratches, Dents, and Dings
Ah, scratches. The bane of every furniture lover’s existence. But fear not! Minor surface damage is usually easy to fix. If your piece has some nicks, dents, or scratches, this is where sandpaper starts its work.
Addressing Scratches:
- Light Scratches: Use a fine-grit sandpaper (e.g., 320-grit) to lightly sand the affected area. Sand in the direction of the wood grain.
- Deeper Scratches: Start with a medium-grit sandpaper (e.g., 180-grit) and gradually move to finer grits. Be careful not to sand too aggressively.
- Stain or Touch-Up Markers: Use stain or touch-up markers to match the original color of the wood. Apply sparingly and blend carefully.
Fixing Dents:
- Steaming: Place a damp cloth over the dent and use a hot iron to steam the wood. The moisture and heat will often cause the wood fibers to swell back to their original shape.
- Wood Filler: If the dent remains, use wood filler to fill the void. Allow it to dry completely, then sand smooth.
Honestly, sanding can be a bit tedious, but it’s crucial for a smooth finish. Treat it like meditation – focus on the process and enjoy the transformation.
Gluing and Clamping: Bringing It All Back Together
Loose joints are a common problem with antique furniture. Over time, the glue can dry out and the joints can become wobbly. But don’t worry. Re-gluing and clamping can restore stability and strength. Think of it as giving the furniture a good, firm hug!
Steps for Re-gluing Joints:
- Disassemble the Joint: Carefully take apart the loose joint. Remove any old, dried-out glue.
- Apply Fresh Glue: Use a high-quality wood glue. Apply generously to all surfaces of the joint.
- Clamp the Pieces Together: Use clamps to hold the pieces firmly together while the glue dries. Make sure the pieces are properly aligned.
- Wipe Away Excess Glue: Use a damp cloth to wipe away any excess glue that squeezes out of the joint.
- Allow to Dry: Let the glue dry completely according to the manufacturer’s instructions (usually 24 hours).
Clamps are your best friends here. Invest in a few different sizes and types. You’ll be amazed at how useful they are. Do you know what else is worth investing in? A good set of screwdrivers and a rubber mallet!
Dealing with Veneer: A Delicate Dance
Veneer – that thin layer of decorative wood – can be tricky. It’s beautiful, but also delicate and prone to chipping or lifting. Repairing damaged veneer requires patience and a light touch. This is not a race; it’s a graceful waltz.
Repairing Chipped or Lifting Veneer:
- Loose Veneer: Carefully lift the loose veneer and apply a thin layer of wood glue underneath. Use a veneer hammer or a rolling pin to press the veneer firmly into place.
- Chipped Veneer: If a piece of veneer is missing, you’ll need to replace it. Find a piece of veneer that matches the original as closely as possible. Cut it to size and glue it in place.
- Filling Gaps: Use wood filler to fill small gaps or cracks in the veneer. Sand smooth once dry.
Veneer work can be intimidating, but don’t let that scare you off. With a little practice, you can achieve amazing results. Honestly, it’s all about being patient and taking your time.
Finishing Touches: Staining, Varnishing, and Waxing
So, you’ve cleaned, repaired, and re-glued. Now comes the fun part: refinishing! This is where you can really bring out the beauty of the wood and give the piece a fresh, new look.
There are several ways to refinish a piece of furniture but here we will cover the basic techniques using new stain/varnish or waxing the existing finish.
Staining: Adding Color and Depth
- Choose a stain that matches the original color of the wood, or one that complements your decor.
- Apply the stain evenly with a brush or cloth, following the manufacturer’s instructions.
- Wipe off excess stain to achieve the desired color intensity.
- Allow the stain to dry completely before applying a topcoat.
Varnishing or Lacquering: Protection and Shine
- Apply varnish or lacquer in thin, even coats with a high-quality brush.
- Allow each coat to dry completely before applying the next.
- Lightly sand between coats for a smooth finish.
- Apply two to three coats for maximum protection and shine.
Waxing: Enhancing the Existing Finish
- Apply a thin layer of furniture wax with a soft cloth, working in small sections.
- Allow the wax to dry for a few minutes, then buff to a shine with a clean cloth.
- Waxing adds a layer of protection and enhances the natural beauty of the wood.
Choosing the right finish is crucial. Do you want a glossy shine or a more matte look? Consider the style of the furniture and your personal preferences. Seriously, think about what you want the end result to be.
Maintaining Your Restored Furniture: Keeping It Beautiful
You’ve put in all this work to restore your antique furniture. Now, keep it looking its best! Proper maintenance will prolong its life and preserve its beauty for years to come.
Tips for Maintaining Antique Furniture:
- Regular Dusting: Dust frequently with a soft cloth to prevent buildup.
- Avoid Direct Sunlight: Sunlight can fade and damage the finish.
- Use Coasters and Placemats: Protect surfaces from water rings and heat damage.
- Avoid Harsh Chemicals: Use mild cleaning products specifically designed for wood furniture.
- Waxing: Wax your furniture every few months to maintain its shine and protect the finish.
Honestly, a little bit of care goes a long way. It’s like taking care of a plant – a little water and sunlight, and it thrives. The same goes for your furniture!
When to Call a Professional: Knowing Your Limits
Sometimes, despite your best efforts, a restoration project might be too complex to handle on your own.
There are specific situations where having an advanced skill set, specialized tools, and vast knowledge comes in handy. Don’t feel bad about calling in reinforcements.
Situations Where Professional Help is Needed:
- Extensive Structural Damage
- Intricate Veneer Work
- Original Finishes with Historical Significance
- Insect Infestation
It’s better to be safe than sorry. A professional can ensure the job is done right and prevent further damage to your precious piece. I mean, come on, it’s an antique: get it fixed properly!
Final Thoughts: The Joy of Restoration
Restoring antique furniture can be a challenging but incredibly rewarding experience. You’re not just fixing up an old piece of furniture; you’re preserving history, honoring craftsmanship, and creating something beautiful that will last for generations. So, go forth, restore, and enjoy the process!
Resources
Here is a link to a tutorial for removing varnish from wooden furniture YouTube.com. As well as some high quality paint brushes Amazon.com.
Frequently Asked Questions about Furniture Restoration
Disclaimer
Restoring antique furniture can involve working with tools and chemicals that may pose risks. Always follow safety precautions and wear appropriate protective gear. If you are unsure about any aspect of the restoration process, consult a professional. The information provided in this guide is for informational purposes only and should not be considered a substitute for professional advice.
Categories
- Accent Walls & Ceilings (84)
- Art Curation & Gallery (83)
- Bedding Style Trends (89)
- Bedroom Makeover (96)
- Bohemian & Eclectic Styles (80)
- DIY & Budget-Friendly Decor (78)
- Eco-Friendly Design (83)
- Furniture Care (87)
- Home Decor & Design Ideas (181)
- Home Wellness Spaces (103)
- Integrated Outdoor Living (91)
- Japandi Style (84)
- Kids and Nursery Decor (73)
- Living Room Decor (99)
- Mix & Match Techniques (95)
- Modern & Contemporary Design (88)
- Rug Sizing & Placement (89)
- Scandinavian Design Inspiration (51)
- Seasonal Home Decor (100)
- Small Space Solutions (93)
- Wall Art & Painting Tips (94)
Recent Comments
Archives
Product Gallery
-
 Majestic African Wildlife Canvas Art for Stylish Home Decor
Rated 5.00 out of 5
Majestic African Wildlife Canvas Art for Stylish Home Decor
Rated 5.00 out of 5 -
 Cozy Irregular Green Plush Rug for Nordic Living Spaces
Rated 5.00 out of 5$37.00 – $231.00Price range: $37.00 through $231.00
Cozy Irregular Green Plush Rug for Nordic Living Spaces
Rated 5.00 out of 5$37.00 – $231.00Price range: $37.00 through $231.00 -
 Scandinavian Geometric Area Rugs for Stylish Home Décor
Rated 5.00 out of 5$28.00 – $416.00Price range: $28.00 through $416.00
Scandinavian Geometric Area Rugs for Stylish Home Décor
Rated 5.00 out of 5$28.00 – $416.00Price range: $28.00 through $416.00