Transform Your Space: A Step-by-Step Guide to Crafting the Perfect Travel Photo Gallery Wall
Have you ever returned from a trip, filled with memories and wonderful experiences, only to have those photos remain trapped in your phone or digital camera? You’re not alone. Many of us capture breathtaking moments, yet they often get forgotten. In this guide, we’ll explore how to transform your space by creating a stunning travel photo gallery wall, showcasing your adventures in style.
This article will empower you to turn your travel memories into a beautiful display that tells your story, engages your guests, and brings joy every day. We’ll walk through each step, from selecting the right photos to arranging them on your wall. Let’s dive in and discover how you can make your gallery wall a true reflection of your journeys!
Why Create a Travel Photo Gallery Wall?
A travel photo gallery wall serves more than just decorative purposes; it offers emotional and psychological benefits as well.
Emotional Connection
Seeing your travel memories on display evokes nostalgia and joy. Each picture can transport you back to those beautiful moments, reminding you of places visited, cultures experienced, and adventures undertaken.
Design Impact
A well-crafted gallery wall can transform a dull space into an inspiring environment. The vibrant colors, compositions, and stories behind each photograph create a dynamic focal point in your home.
Personalized Space
By showcasing your travels, you personalize your living space. It’s a reflection of you, your interests, and your journey, making your place feel more like home.
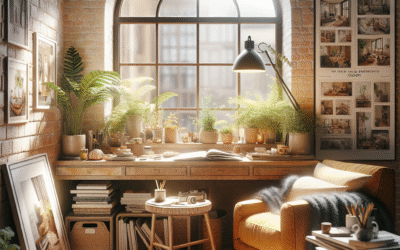
Step 1: Curate Your Travel Photos
The first step in creating your gallery wall is selecting the right photographs. Curating them thoughtfully lays the foundation for a cohesive display.
Choosing the Right Photos
Aim for a combination of landscapes, candid moments, and shots that tell a story. Select images that evoke powerful memories. Consider using a mix of wide shots and close-ups for visual variety.
Quality Over Quantity
Instead of trying to cram every photo into your gallery, focus on a few stunning visuals. This highlights special moments and avoids visual clutter.
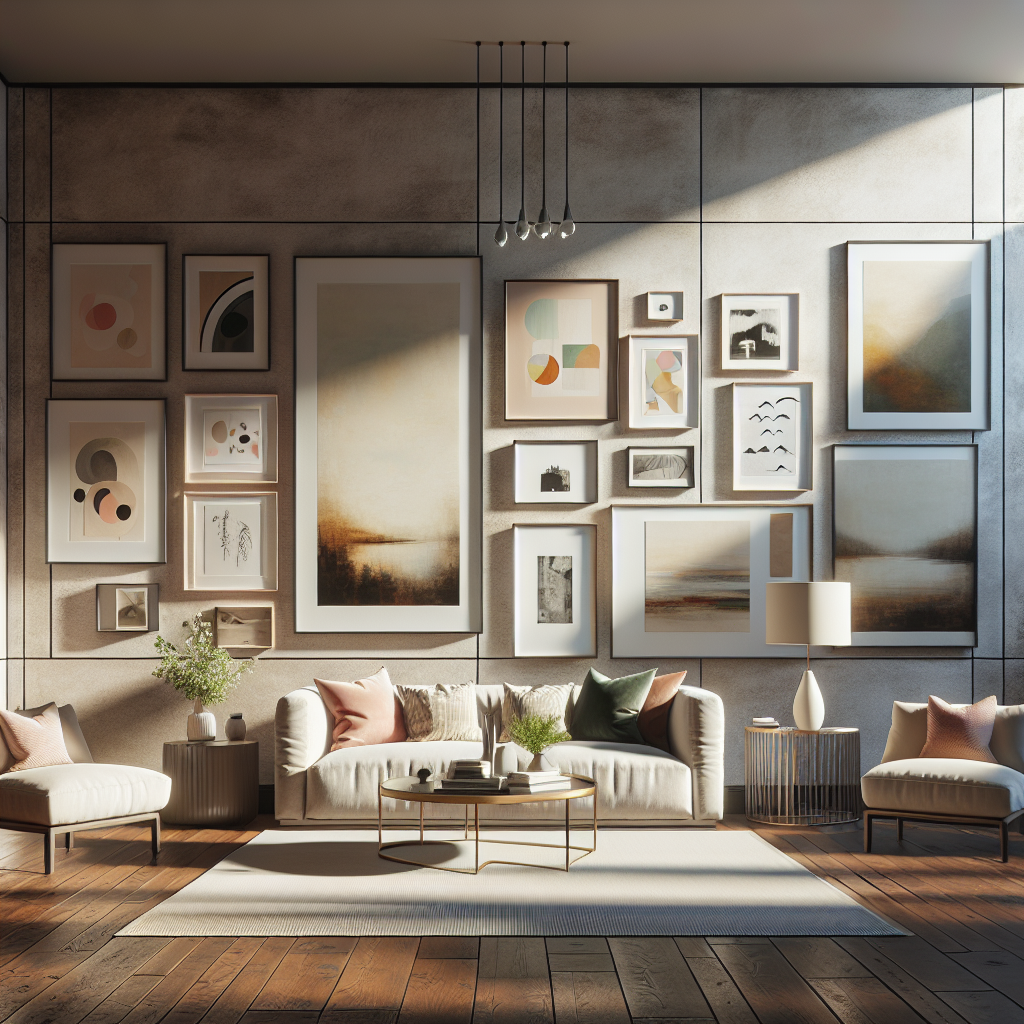
Step 2: Decide on a Layout
The layout of your gallery wall significantly influences its aesthetic. Here are some popular arrangements:
Grid Layout
This involves placing photos in a uniform grid, providing a structured and clean look. It works great for images of similar sizes.
Salon Style
A salon-style layout features an eclectic mix of frames and sizes, creating a more relaxed artistic expression. This is ideal for showcasing a variety of memories.
Linear Arrangement
For a modern touch, a linear arrangement works well. This can be horizontal or vertical, emphasizing a particular theme or journey.
Step 3: Select Frames and Mats
The right frames can elevate your photos and enhance your gallery wall’s overall appeal.
Material Choices
Consider wood for a rustic feel, metal for a contemporary look, or acrylic for a minimalist style. Mixing these materials can create visual interest.
Color Coordination
Choose frames that complement each other and the colors in your photos. Neutral tones often work best, but don’t shy away from colors that add flair.
Step 4: Prepare Your Wall
Before hanging your photos, it’s essential to prepare your wall properly.
Picking the Right Wall
Expecting plenty of natural light enhances the display. Ensure the wall is free from furniture, allowing for optimal visibility of your gallery.
Creating a Template
Lay your frames on the floor first to visualize your arrangement. This method avoids unnecessary holes in the wall and lets you see how the arrangement flows.
Step 5: Hang Your Photos
Now that you’re armed with your amazing photos and a solid layout, it’s time to hang them!
Tools You’ll Need
Gather tools such as a hammer, nails, a level, and a measuring tape. For heavier frames, consider wall anchors to keep them secure.
Hanging Techniques
When hanging photos, use the measurement method to ensure they’re at eye level. As a general rule, the center of the gallery should be around 57-60 inches from the ground, which is considered average eye level.
Step 6: Personalize Your Gallery Wall
Don’t forget to add personal touches that reflect your style!
Incorporate Unique Artifacts
Feel free to mix in mementos from your travels like ticket stubs, postcards, or souvenirs that can add layers of storytelling to your wall.
Use Captions
Adding captions or small quotes can provide context to photos, inviting viewers to engage with your experiences further.
Maintaining Your Gallery Wall
Once your gallery wall is complete, maintaining it ensures that it continues to inspire.
Regular Updates
Every few months, consider rotating new photos in or out. This keeps your wall fresh and reflects your continued adventures.
Cleaning and Care
Remember to dust and clean your frames regularly to keep the display looking its best. A simple microfiber cloth will do the trick!
Frequently Asked Questions (FAQ)
What size should my travel photo wall be?
The size largely depends on your available wall space and the number of photos you wish to display. A balanced arrangement fits a variety of sizes and creates visual interest.
Can I mix different frame styles on my gallery wall?
Absolutely! Mixing frame styles can add character and uniqueness to your gallery wall. Just try to ensure they complement each other in color and theme.
How often should I update my gallery wall?
Aim to update your gallery wall every few months or whenever you have new photos or experiences worth showcasing.
What should I do with photos that I want to display but don’t fit in?
Consider creating a photo book or scrapbook for those photographs. They can complement your gallery wall beautifully and preserve more memories.
How do I choose the right wall for my gallery?
Look for a wall that is visible and receives good lighting. Avoid walls shadowed by furniture or other elements.
Conclusion & Next Steps
Creating a travel photo gallery wall is more than just an aesthetic choice; it’s a way to preserve memories and turn your space into a personal gallery of your adventures. By following these steps, you can achieve a gallery that not only enhances your living area but reminds you of the incredible experiences you’ve had.
What are you waiting for? Start curating your photos today and transform your space with a beautiful gallery wall! For more inspiration, check out our articles on home decoration tips or cool travel destinations.
Content Disclaimer
The information provided here is for educational purposes and should not be considered professional advice. Always consult with a qualified expert regarding your specific situation.
Categories
- Accent Walls & Ceilings (84)
- Art Curation & Gallery (83)
- Bedding Style Trends (89)
- Bedroom Makeover (96)
- Bohemian & Eclectic Styles (80)
- DIY & Budget-Friendly Decor (78)
- Eco-Friendly Design (83)
- Furniture Care (87)
- Home Decor & Design Ideas (181)
- Home Wellness Spaces (103)
- Integrated Outdoor Living (91)
- Japandi Style (84)
- Kids and Nursery Decor (73)
- Living Room Decor (99)
- Mix & Match Techniques (95)
- Modern & Contemporary Design (88)
- Rug Sizing & Placement (89)
- Scandinavian Design Inspiration (51)
- Seasonal Home Decor (100)
- Small Space Solutions (93)
- Wall Art & Painting Tips (94)
Recent Comments
Archives
Product Gallery
-
 Majestic African Wildlife Canvas Art for Stylish Home Decor
Rated 5.00 out of 5
Majestic African Wildlife Canvas Art for Stylish Home Decor
Rated 5.00 out of 5 -
 Cozy Irregular Green Plush Rug for Nordic Living Spaces
Rated 5.00 out of 5$44.23 – $278.89Price range: $44.23 through $278.89
Cozy Irregular Green Plush Rug for Nordic Living Spaces
Rated 5.00 out of 5$44.23 – $278.89Price range: $44.23 through $278.89 -
 Scandinavian Geometric Area Rugs for Stylish Home Décor
Rated 5.00 out of 5$33.15 – $502.10Price range: $33.15 through $502.10
Scandinavian Geometric Area Rugs for Stylish Home Décor
Rated 5.00 out of 5$33.15 – $502.10Price range: $33.15 through $502.10