Visual Harmony: Expert Tips for Designing a DIY Grid Gallery Wall
Opening Section
Have you ever stared blankly at a bare wall, unsure how to give it the character and warmth it deserves? You’re not alone! A grid gallery wall can transform any space into a vibrant showcase of your personality and experiences. In this comprehensive guide, you’ll learn design principles, practical steps, and expert tips to create a stunning DIY grid gallery wall. Whether you’re a seasoned designer or a beginner, our insider knowledge ensures that your space will exude visual harmony and style.
By the end of this article, you’ll have a clear roadmap to make your own grid gallery wall, complete with actionable insights, materials needed, and organizational strategies. Let’s dive in!
Understanding the Basics of a Gallery Wall
A gallery wall is not just a collection of frames; it’s an artful display that tells a story. Here are some key principles to consider:
What is a Grid Gallery Wall?
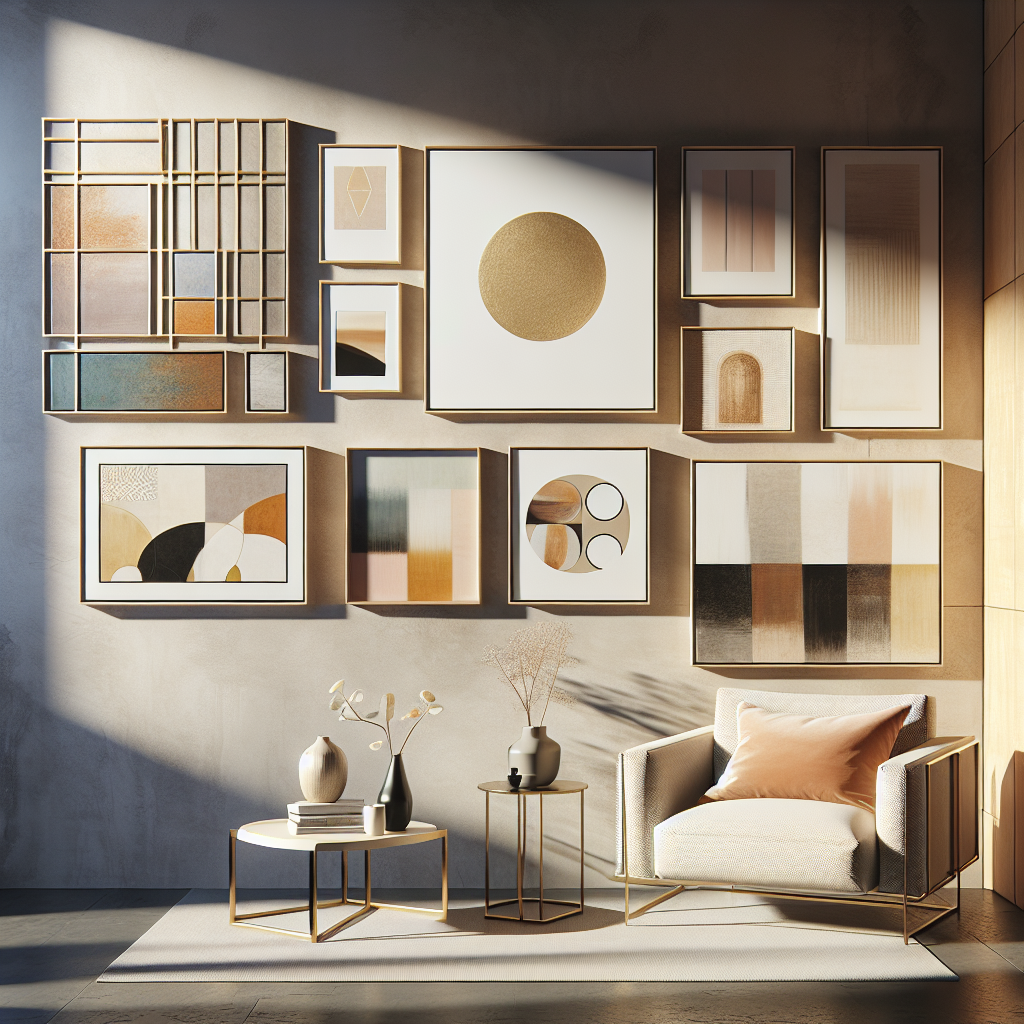
A grid gallery wall is characterized by its organized structure, typically displaying artwork or photographs in a rectangular grid format. This layout offers a sense of balance and symmetry, making it appealing to the eye.
Choosing Your Artworks
When selecting artworks for your grid, consider various mediums—photos, prints, textiles, and even three-dimensional objects. Diverse materials can enhance your gallery’s visual interest.
Color Coordination
A cohesive color palette can unify your gallery wall. Choose a primary color and use shades and complementary colors within your selected pieces. Remember, contrasting colors can also create a dynamic visual impact, so don’t shy away from experimenting!
Planning Your Gallery Wall Layout
The planning stage is crucial in designing an engaging gallery wall. Follow these steps to ensure a well-thought-out design:
Measure Your Space
Start by measuring the wall space you want to use. A good rule of thumb is to cover about 60-75% of the wall for a balanced look.
Design Simulation
Use design software or even paper cut-outs to simulate how your pieces will fit together. Arrange and rearrange until you find a configuration that resonates with you.
Spacing Considerations
When spacing your frames, aim for 2 to 4 inches between so the artwork flows harmoniously. Different spacing can evoke different feelings, with tighter arrangements suggesting energy, while wider gaps create a relaxed vibe.
Materials You Need
To bring your grid gallery wall to life, gather these essential materials:
- Frames in various sizes (uniformity vs. eclectic mix)
- A level for precision
- Measuring tape to ensure correct placements
- Picture hanging strips or nails
- A hammer (if using nails)
- Pencil for marking
- Artworks and photographs
Steps to Create Your DIY Gallery Wall
Step-by-Step Implementation
- Choose Your Location: Find a wall that can act as the canvas for your gallery.
- Prepare Your Frames: Clean and, if needed, paint or refurbish your frames for a fresh look.
- Arrange Your Art: Lay your artworks on the floor to finalize the layout.
- Mark the Positions: Use a level and pencil to sketch where each frame will go on the wall.
- Hang Your Frames: Begin hanging from the center and work outwards for balance.
Enhancing Your Gallery Wall with Accessories
To elevate your gallery wall, consider adding accessories and accents:
Lighting Elements
Install wall sconces or use LED strip lights to illuminate your artworks. Good lighting can bring depth and texture, enhancing the visual experience.
3D Elements
Incorporate small shelves for plants or decorative objects. Adding 3D items creates additional layers and draws the viewer’s eye around the space.
Textural Layers
Include textiles like woven wall hangings or fabric art to introduce varied textures, making the gallery wall more engaging.
Case Studies and Real-World Examples
Here are a few inspiring examples of successful grid gallery walls:
Residential Spaces
A family in a suburban home turned their hallway into a vibrant gallery wall featuring family portraits and travel snapshots. They used matching frames in white for cohesion, pulling together printed images and original artworks. The result was a lively family history display that invited conversation and reminiscence.
Commercial Examples
A local spa created a soothing gallery wall in their reception area, showcasing calming nature photographs framed in natural wood. This alignment with their brand ethos provided a visually engaging welcome for clients.
Student Projects
Interior design students frequently design gallery walls in their coursework, utilizing mixed media and varied frame colors to create eye-catching art displays that reflect their creative identities.
Common Mistakes to Avoid
Every DIY project has pitfalls, and gallery walls are no exception. Here are mistakes to watch out for:
- Overcrowding: Avoid cramming too many frames together; this can lead to visual chaos.
- Insufficient Planning: Failing to measure and plan before hanging can result in an uneven display.
- Ignoring Balance: Strive for visual balance—distracting focus can diminish the overall aesthetic impact.
FAQ Section
How do I choose the right art for my gallery wall?
Select a mix of personal photos, prints, and artwork that resonate with you. Consistency in framing will tie your gallery together.
What is the best way to hang frames without damaging walls?
Use adhesive picture hanging strips for lighter frames or appropriate wall hardware for heavier pieces.
Can I mix frame styles on my gallery wall?
Yes! A mix of frame styles can add interest, but aim for a cohesive color palette for harmony.
What’s the ideal height for hanging frames?
The center of your artwork should be at eye level, typically around 57-60 inches from the floor.
How do I ensure my gallery wall doesn’t look overcrowded?
Leave adequate spaces between pieces, about 2-4 inches, for visual breathing room.
Conclusion & Next Steps
Creating a DIY grid gallery wall is an excellent way to express your personality and showcase your creativity. By following the tips and steps outlined in this guide, you’ll be on your way to designing a harmonious display that enchants every viewer. Remember to plan carefully, choose your visuals wisely, and don’t hesitate to get creative with textures and accessories!
If you found this article helpful, subscribe to our newsletter for updates on home design tips and creative projects. Check out related articles on seasonal decor and interior design trends to keep your space fresh and inviting!
Content Disclaimer
Information provided for educational purposes. Consult experts for professional advice on design-related projects.
Categories
- Accent Walls & Ceilings (84)
- Art Curation & Gallery (83)
- Bedding Style Trends (89)
- Bedroom Makeover (96)
- Bohemian & Eclectic Styles (80)
- DIY & Budget-Friendly Decor (78)
- Eco-Friendly Design (83)
- Furniture Care (87)
- Home Decor & Design Ideas (181)
- Home Wellness Spaces (103)
- Integrated Outdoor Living (91)
- Japandi Style (84)
- Kids and Nursery Decor (73)
- Living Room Decor (99)
- Mix & Match Techniques (95)
- Modern & Contemporary Design (88)
- Rug Sizing & Placement (89)
- Scandinavian Design Inspiration (51)
- Seasonal Home Decor (100)
- Small Space Solutions (93)
- Wall Art & Painting Tips (94)
Recent Comments
Archives
Product Gallery
-
 Majestic African Wildlife Canvas Art for Stylish Home Decor
Rated 5.00 out of 5
Majestic African Wildlife Canvas Art for Stylish Home Decor
Rated 5.00 out of 5 -
 Cozy Irregular Green Plush Rug for Nordic Living Spaces
Rated 5.00 out of 5$31.00 – $196.00Price range: $31.00 through $196.00
Cozy Irregular Green Plush Rug for Nordic Living Spaces
Rated 5.00 out of 5$31.00 – $196.00Price range: $31.00 through $196.00 -
 Scandinavian Geometric Area Rugs for Stylish Home Décor
Rated 5.00 out of 5$24.00 – $352.00Price range: $24.00 through $352.00
Scandinavian Geometric Area Rugs for Stylish Home Décor
Rated 5.00 out of 5$24.00 – $352.00Price range: $24.00 through $352.00