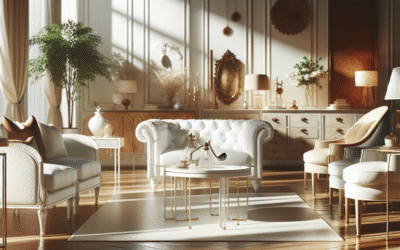
DIY Gallery Ledges: Budget-Friendly Style for Your Home
Let’s face it: our homes are our canvases. We want them to reflect our style, tell our stories, and feel authentically “us.” But if you’ve ever scrolled through Pinterest or flipped through a home decor magazine, you know that achieving those curated, picture-perfect walls often comes with a hefty price tag. Custom framing, expensive art prints, and designer shelving can quickly drain your decor budget faster than you can say “gallery wall.” The good news? You don’t need an unlimited budget to create stunning, personalized displays. That’s where DIY gallery ledges come in – your secret weapon for transforming bare walls into dynamic, artful statements without breaking the bank.
Imagine effortlessly swapping out artwork with the seasons, displaying your child’s latest masterpiece, or showcasing cherished travel photos in a way that feels intentional and chic. With budget-friendly gallery ledges, this dream is entirely within reach, even if your DIY skills are currently limited to assembling IKEA furniture (and maybe struggling with that). This comprehensive guide isn’t just about saving money; it’s about empowering you to inject personality into your living space, one beautiful display at a time. We’re going to dive deep into everything you need to know, from choosing the right materials and mastering simple construction techniques to styling your ledges like a pro. Get ready to unlock a world of affordable elegance for your home!
By the end of this extensive guide, you’ll be armed with the knowledge and confidence to:
- Understand the various benefits of gallery ledges over traditional hanging methods.
- Identify the most cost-effective and suitable materials for your DIY project.
- Follow clear, step-by-step instructions for building different styles of ledges.
- Learn clever styling tips to create cohesive and eye-catching displays.
- Troubleshoot common challenges and ensure a safe, long-lasting installation.
- Discover advanced techniques to customize your ledges for a truly unique look.
Why DIY Gallery Ledges Are a Game Changer for Budget Decor
Before we pick up our saws and drills, let’s talk about why DIY gallery ledges aren’t just another fleeting trend, but a smart, sustainable, and utterly stylish home decor solution. They offer a flexibility and ease of use that traditional framed art simply can’t match, all while keeping your wallet happy.
The Unbeatable Versatility of Picture Ledges
Unlike a nail-and-hammer setup, which locks you into a specific arrangement until you’re willing to patch holes, gallery ledges offer unparalleled versatility. Think about it: you can instantly re-arrange, add, or remove frames, books, small plants, or decorative objects without creating a single new hole in your wall. This makes them perfect for renters, indecisive decorators, or anyone who loves to refresh their space frequently. It’s a dynamic display system that evolves with your taste and life.
Cost-Effectiveness: Making Every Dollar Count
This is where the “budget-friendly” aspect truly shines. Store-bought gallery ledges, especially those made from solid wood or with specific finishes, can be surprisingly expensive. By opting for a DIY approach, you gain significant control over material costs. You can utilize common, affordable lumber (like pine or MDF), repurpose materials, or even choose unfinished options that you paint or stain yourself, saving a bundle on labor and markup. We’re talking about potentially hundreds of dollars in savings, which can then be allocated to other decor elements or a well-deserved celebratory dinner.
For example, a 4-foot basic picture ledge from a major home goods store might set you back $40-$60. To build two or three similar ledges yourself, you could be looking at under $50 for all materials, assuming you have basic tools. That’s a significant difference!
Expression and Personalization: Beyond the Mass-Produced
When you build something yourself, it carries a unique imprint of your effort and vision. A DIY gallery ledge becomes more than just a shelf; it’s a piece of your creativity brought to life. You get to choose the exact dimensions, the precise finish, and the specific style that perfectly complements your home’s aesthetic. No more settling for off-the-shelf options that are “close enough.” This level of personalization infuses your home with character and authenticity that mass-produced items just can’t replicate.
Choosing Your Canvas: Best Materials for DIY Gallery Ledges
The foundation of any great DIY project lies in selecting the right materials. For budget-friendly gallery ledges, you have several excellent options, each with its own pros, cons, and cost implications. Understanding these will help you make an informed decision that aligns with your skill level, desired aesthetic, and, of course, your budget.
Image Suggestion: Infographic comparing wood types, showing costs, ease of work, durability, and paintability.
1. Pine: The DIY All-Star
Pine is arguably the most popular choice for DIY projects, and for good reason. It’s relatively inexpensive, widely available at any hardware store, and easy to work with. It’s soft enough to cut and drill with basic tools but sturdy enough for a gallery ledge.
- Pros: Very affordable, readily available, takes paint and stain well, lightweight, easy to cut.
- Cons: Can dent or scratch more easily than hardwoods, knotty varieties may require knot-sealing primer if painting.
- Cost: Typically the lowest cost per linear foot.
- Best For: Beginners, painted ledges, rustic or farmhouse styles.
2. MDF (Medium-Density Fiberboard): The Smooth Operator
MDF is an engineered wood product made from wood fibers pressed together with resin. It’s incredibly smooth, stable, and has no grain, making it ideal for painting.
- Pros: Very smooth finish, no knots or grain, warp-resistant, dense (good for stability), excellent for painted applications.
- Cons: Heavy, generates fine dust when cut, requires specific cutting techniques to prevent chipping, can swell if exposed to moisture, not suitable for staining (no grain).
- Cost: Mid-range, often slightly more than basic pine.
- Best For: Modern, minimalist ledges, achieving a seamless painted look.
3. Plywood (Birch or Sanded): The Sturdy Sheet
While a full sheet of plywood might seem overkill for a single ledge, if you’re building multiple ledges or have other projects in mind, a good quality sanded plywood (like birch plywood) can be a fantastic option. You’d rip it down into strips. Plywood offers excellent strength-to-weight ratio.
- Pros: Very strong and stable, available in large sheets (economical for multiple items), some grades have beautiful natural grain for staining.
- Cons: Can be more challenging to get perfectly smooth edges when cut, requires proper tools for ripping, generally more expensive than pine.
- Cost: Higher mid-range, dependent on grade.
- Best For: Long ledges, heavy displays, custom dimensions where you need entire sheet versatility.
4. Reclaimed Wood: The Eco-Friendly Charmer
For those who love a story and a sustainable approach, reclaimed wood is a treasure trove. Think old barn wood, pallet wood (with caution!), or even salvaged planks from an old fence. It brings instant character and a unique patina.
- Pros: Eco-friendly, unique aesthetic, instant character, often free or very low cost.
- Cons: Can be inconsistent in quality, may require more prep (cleaning, sanding, de-nailing), can be harder to find specific dimensions.
- Cost: Potentially free to low cost (except if buying from a specialty reclaimed lumber yard).
- Best For: Rustic, industrial, or bohemian styles, for those willing to put in extra prep work. (Note: Pallet wood should only be used if you can verify it’s safe (HT stamped, not MB or chemical treated)).
Consider Your Aesthetic and Tools
When selecting your material, also think about your overall decor style. Do you want sleek and modern? Go with MDF or a smooth pine. Do you want rustic charm? Reclaimed wood or knotty pine. Finally, consider your tool chest. Pine is the most forgiving for hand saws, while MDF and plywood benefit greatly from power saws for clean, straight cuts.
By carefully weighing these factors, you can pick the perfect material to kickstart your DIY gallery ledge adventure!
Essential Tools & Supplies: Equipping Your DIY Workshop
Don’t be intimidated by visions of elaborate workshops. While high-end tools can make any project easier, creating DIY gallery ledges is surprisingly accessible with a relatively simple toolkit. Here’s what you’ll likely need, categorized for clarity.
Cutting & Measuring
- Tape Measure: Essential for accurate dimensions.
- Pencil: For marking cuts.
- Straight Edge/Speed Square: Ensures straight, square cuts.
- Saw:
- Hand Saw: Budget-friendly, requires more effort. Good for pine.
- Circular Saw: Faster, more powerful, great for straight cuts on longer boards.
- Miter Saw: Ideal for precise crosscuts and angled cuts (if building more complex ledges).
- Jigsaw: Useful for curves, but generally not needed for basic ledges.
- Clamps: To hold your wood securely while cutting or gluing.
Assembly
- Drill/Driver: To pre-drill holes and drive screws. A cordless drill is incredibly convenient.
- Drill Bits: Various sizes for pilot holes and countersinking.
- Wood Glue: For stronger joints (e.g., Titebond III).
- Wood Screws: Appropriate length for your wood thickness. Typically 1.5 to 2 inches. Choose coarse thread for softwoods, fine thread for hardwoods.
- Finishing Nails or Brad Nailer (Optional): For added security or a slightly cleaner look if not using visible screws.
Sanding & Finishing
- Sandpaper: Various grits (e.g., 100-grit for initial shaping, 150-grit for smoothing, 220-grit for fine finish).
- Sanding Block or Electric Sander: Speeds up the sanding process.
- Wood Filler (Optional): To fill screw holes or imperfections.
- Primer (if painting): Especially important for pine (knots) and MDF.
- Paint or Wood Stain/Sealer: Your chosen finish.
- Paint Brushes/Rollers: For application.
- Clean rags: For wiping off excess stain or dust.
Mounting
- Stud Finder: Crucial for safely mounting ledges to wall studs.
- Level: To ensure your ledges are perfectly straight.
- Wall Anchors (if not hitting studs): Appropriate type for your wall material (drywall, plaster, etc.) and weight capacity. Toggle bolts or self-drilling anchors are common.
- Mounting Screws: Longer, stronger screws to attach the ledge to the wall/anchors.
Always prioritize safety: wear safety glasses when cutting or drilling, and a dust mask when sanding. Investing in good quality tools will not only make this project easier but also open up a world of future DIY possibilities for your home.
Step-by-Step Construction Guides: Building Your DIY Gallery Ledges
Ready to build? We’ll walk through two popular and beginner-friendly designs for DIY gallery ledges. The principles are similar across many different styles, allowing you to adapt these techniques for your own unique vision. Remember to measure twice, cut once!
Design 1: The Classic “L” Shaped Ledge (Simple & Versatile)
This design is incredibly straightforward and effective. It’s essentially two pieces of wood joined at a right angle, creating a lip to hold your items.
Materials Needed (for one 36-inch ledge):
- One 1×4 inch board (for the back piece that mounts to the wall) – 36 inches long
- One 1×2 inch board (for the bottom flat surface) – 36 inches long
- (Alternate: One 1×3 inch for the bottom and 1×1 for the lip, for an even deeper ledge.)
- Wood glue
- 1.5-inch wood screws
- Finishing supplies (sandpaper, paint/stain)
Instructions:
- Measure and Cut:
- Determine the desired length of your ledge.
- Cut your 1×4 and 1×2 boards to this exact length. Ensure cuts are square and clean.
- Alt-Text Suggestion: A person using a miter saw to cut a piece of pine wood to a precise length.
- Sand All Surfaces:
- Thoroughly sand all cut edges and surfaces. Start with 120-grit, then move to 220-grit for a smooth finish. This is much easier to do *before* assembly.
- Assemble the “L”:
- Lay the 1×4 (back piece) flat. Apply a bead of wood glue along one long edge of the 1×2 (bottom piece).
- Align the glued edge of the 1×2 with one long edge of the 1×4 to form an “L” shape. The 1×2 should sit horizontally, resting on the 1×4’s edge. This creates an open “L.” (Some prefer to attach the 1×2 to the *face* of the 1×4, which makes the ledge slightly shallower, but still works).
- Using your drill, pre-drill pilot holes through the 1×4 into the edge of the 1×2. This prevents splitting. Space holes every 6-8 inches.
- Drive 1.5-inch wood screws through the pilot holes to secure the 1×2 to the 1×4. Wipe away any excess glue with a damp cloth immediately.
- Let the glue cure completely (check glue manufacturer’s instructions, typically 24 hours).
- Alt-Text Suggestion: Close-up of two pieces of wood being joined with wood glue and screws to form an “L” shaped gallery ledge.
- Finish Your Ledges:
- Once dry, fill any visible screw holes with wood filler, let dry, and sand smooth.
- Apply primer if using pine or MDF and painting.
- Paint or stain your ledge in your desired color or finish. Apply multiple thin coats for the best result.
- Seal with a clear coat if desired for added durability.
This “L” shaped design provides a stable bottom shelf and a back piece ready for wall mounting. You’ve just built a beautiful, functional DIY gallery ledge!
Design 2: The Triple-Deck Gallery Ledge (Deeper & More Secure Lip)
This design offers a deeper display area and a more pronounced lip to prevent items from sliding off. It uses three pieces of wood: a back, a bottom, and a front lip.
Materials Needed (for one 36-inch ledge):
- One 1×4 inch board (for the back) – 36 inches long
- One 1×3 inch board (for the bottom surface) – 36 inches long
- One 1×2 inch board (for the front lip) – 36 inches long
- Wood glue
- 1.25-inch and 1.5-inch wood screws
- Finishing supplies
Instructions:
- Measure and Cut:
- Cut all three boards (1×4, 1×3, 1×2) to your desired length.
- Sand All Surfaces:
- As with Design 1, sand all pieces thoroughly before assembly.
- Assemble the Base and Lip:
- Lay the 1×3 (bottom piece) flat. This will be the main horizontal shelf.
- Apply a bead of wood glue along one long edge of the 1×2 (front lip).
- Attach the 1×2 to the front edge of the 1×3, ensuring the top edges are flush. This forms the lip.
- Pre-drill pilot holes through the 1×2 into the edge of the 1×3.
- Drive 1.25-inch wood screws through these pilot holes. (Slightly shorter screws than Design 1 to prevent piercing through the other side of the 1×3).
- Wipe excess glue.
- Attach the Back Piece:
- Apply a bead of wood glue along the remaining long edge of the 1×3 (opposite the lip).
- Align the 1×4 (back piece) against this glued edge, ensuring the top edges of the 1×4 and 1×3 are flush and the pieces form a right angle.
- Pre-drill pilot holes through the back of the 1×4 into the edge of the 1×3. Space these every 6-8 inches.
- Drive 1.5-inch wood screws through the 1×4 into the 1×3.
- Let glue cure.
- Alt-Text Suggestion: Exploded diagram showing three pieces of wood (back, bottom, lip) in position to be assembled into a deep gallery ledge.
- Finish Your Ledges:
- Fill screw holes, sand smooth, prime, and paint/stain as described for Design 1.
This triple-deck design provides a robust structure, making it ideal for displaying heavier items or ensuring smaller frames don’t accidentally get nudged off. Both of these DIY gallery ledge designs are fantastically budget-friendly and offer a rewarding building experience.
Mounting Your Masterpiece: Secure Installation for Gallery Ledges
Building your DIY gallery ledges is only half the battle; proper installation is absolutely critical for safety and longevity. You don’t want your beautiful display crashing down! This section covers the essential steps for securely mounting your ledges.
Image Suggestion: Infographic demonstrating how to use a stud finder and mark stud locations on a wall.
1. Locate Your Studs: The Golden Rule of Wall Mounting
Wall studs are the wooden (or sometimes metal) vertical framing pieces behind your drywall. Attaching your ledges directly to studs provides the strongest, most secure mounting point. Always try to hit at least two studs per ledge, if possible.
- Use a Stud Finder: Slowly run your stud finder across the wall horizontally, at the approximate height where your ledge will go. Mark the edges of the studs with a pencil.
- Confirm Stud Location: Drill a very small pilot hole (smaller than your screw) to confirm you’ve hit the center of the stud. If you hear solid wood, you’re good. If it’s empty, patch the tiny hole and try nearby.
- Mark Ledge Placement: Hold your finished ledge against the wall at your desired height. Use a level to ensure it’s perfectly straight. Mark the bottom edge of the ledge and also mark the stud locations on your ledge itself.
Pro Tip: Standard stud spacing is usually 16 or 24 inches on center. Once you find one, you can often measure horizontally to find the next.
2. Pre-Drill Ledge and Wall
With your stud locations marked on the ledge (back piece) and the wall, it’s time to pre-drill.
- Ledge: On your gallery ledge, drill pilot holes through the back piece, centered where it will align with the studs. Make these holes slightly larger than the shaft of your mounting screws (but smaller than the screw head) and countersink them so screw heads sit flush or slightly below the surface.
- Wall (at Studs): For mounting into studs, you typically don’t need to pre-drill the wall for wood screws, but it can make driving easier.
3. When Studs Aren’t an Option: Using Wall Anchors
Sometimes, your desired ledge placement just doesn’t align with studs. In this case, you’ll need wall anchors. Choose anchors appropriate for your wall type (drywall, plaster, brick, concrete) and that can support the weight of your ledge plus what you intend to display.
- Drywall Anchors:
- Self-drilling/toggle anchors: Excellent for heavier loads on drywall. Follow manufacturer instructions for installation. These often involve drilling a pilot hole, then screwing or inserting the anchor.
- Molly bolts: Durable metal anchors for medium-to-heavy loads. Requires a larger pilot hole.
- Masonry/Concrete Anchors: Requires a hammer drill and specific masonry bit.
When using anchors, pre-drill holes in the wall according to the anchor manufacturer’s specifications *before* positioning your ledge. Then install the anchors.
4. Attach the Ledge to the Wall
- Position and Secure: Hold your ledge perfectly level against the wall, aligning the pre-drilled holes with your stud marks or installed anchors.
- Drive Screws: Use your drill to drive long, sturdy wood screws (typically 2.5 to 3 inches for studs, or screws provided with wall anchors) through the ledge and into the studs or anchors. Tighten until snug, but don’t overtighten, especially with anchors, as you can strip them.
- Check Stability: Give your ledge a gentle tug to ensure it’s firmly attached. It should feel solid with no wobble.
Take your time with mounting. A well-installed DIY gallery ledge will serve as a beautiful and reliable display for years to come. Remember, safety first!
Styling Your Budget-Friendly Gallery Ledges: From Clutter to Curated
Building your DIY gallery ledges was the hard part; now comes the fun and creative challenge: styling! The beauty of ledges is their flexibility, but a thoughtful approach will elevate your display from a random assortment to a cohesive, eye-catching focal point. This isn’t just about putting things on a shelf; it’s about telling a story.
The Art of Layering: Adding Depth and Interest
One of the most effective techniques for styling gallery ledges is layering. This creates visual depth and makes your display feel full and intentional, rather than flat.
- Back to Front: Place larger, heavier frames or artwork at the back of the ledge, leaning against the wall.
- Overlap Thoughtfully: Introduce smaller frames, photos, or objects in front, slightly overlapping the larger pieces. Don’t be afraid to let things touch or partially obscure each other – this is what creates that layered, lived-in feel.
- Vary Heights: Mix frames of different sizes. Use books, small pedestals, or blocks to elevate some items, adding varied heights and preventing a stagnant, flat line.
Mixing Mediums: Beyond Just Pictures
While called “gallery ledges,” don’t limit yourself to just framed art! The most interesting displays incorporate a variety of textures, materials, and objects. The “budget-friendly” aspect truly shines here, as you can incorporate found objects, thrift store finds, and personal mementos.
- Framed Art & Photos: Of course! Mix landscape with portrait, black and white with color.
- Small Plants: Succulents, air plants, or small trailing plants in decorative pots add life and a touch of nature.
- Books: Stack a few favorite books horizontally, or display a beautiful coffee table book upright.
- Decorative Objects: Small sculptures, ceramic vases, candles, mementos from travel, or even interesting rocks.
- Textural Elements: A small bundle of dried flowers, a woven coaster under a small vase, or a piece of interesting fabric.
Achieving Balance and Flow: The Golden Rules
Even with varied items, your display needs to feel balanced. This doesn’t mean perfect symmetry, but rather a visual equilibrium.
- Visual Weight: Distribute “heavy” items (dark colors, large objects) evenly across the ledge. Counterbalance large frames with a cluster of smaller items.
- Color Palette: Stick to a cohesive color palette. This doesn’t mean everything has to be the same color, but choose 2-3 main colors and a few accent colors that work well together. Black and white, earthy tones, or a pop of a vibrant hue can be unifying.
- Theme or Story: What story do you want your ledge to tell? Is it travel memories, a collection of local art, or family photos? A subtle theme can guide your selections.
- Odd Numbers: When grouping small items, groups of three or five often feel more aesthetically pleasing than even numbers.
- Whitespace: Don’t overcrowd! Leave some breathing room between items. A little empty space allows each piece to stand out.
Comparison: Gallery Ledges vs. Traditional Gallery Walls
| Feature | Gallery Ledges | Traditional Gallery Walls |
|---|---|---|
| Flexibility/Rearranging | Excellent; easy to swap items without new holes. | Limited; new arrangement often means new holes. |
| Installation Difficulty | Moderate (building & mounting ledges). | Moderate (planning layout, precise hanging). |
| Cost (DIY) | Very Budget-Friendly (materials for ledges are cheap). | Budget-Friendly (focus on frame costs). |
| Display Diversity | High; accommodates frames, books, plants, objects. | Primarily framed items. |
| Visual Depth | Inherent; allows for natural layering. | Can be achieved with varied frame depths, but less natural. |
Don’t be afraid to experiment! Try different arrangements, step back, and see what feels right. The beauty of DIY gallery ledges is that you can endlessly tweak and refine your display until it’s perfectly *you*.
Finishing Touches & Advanced Customization: Elevate Your Ledges
You’ve built and styled your DIY gallery ledges, but let’s push the boundaries a bit more! The finishing touches are where you really make these budget-friendly creations look like bespoke pieces. And for those feeling a bit more adventurous, some advanced customizations can make your ledges truly unique.
Perfecting the Finish: Beyond Basic Paint
- Distressing for a Farmhouse Look: After painting, lightly sand edges and corners to reveal some of the raw wood beneath. This creates a charming, worn-in aesthetic.
- Staining & Antiquing: If you used pine or another stain-friendly wood, experiment with different stain shades. For an antique feel, apply a dark glaze or “antiquing wash” over a painted surface, then wipe back.
- Two-Tone Finishes: Paint the main ledge one color and the front lip another contrasting or complementary color. This subtle detail can add a lot of visual interest.
- Faux Wood Grain: With MDF, you can use specialized tools and techniques to mimic wood grain patterns before staining or painting, creating a high-end look on a budget material.
- Wax & Seal: For durability, especially on stained wood, apply a few coats of clear wax or a polyurethane topcoat. This protects against scratches and makes cleaning easier.
Creative Enhancements for Unique Ledges
- Built-In Lighting: Consider adding thin LED strip lighting along the underside of the ledge (where it meets the wall) for a dramatic, backlit effect. This is particularly stunning for art displays. Battery-operated options are great for a truly DIY approach.
- Integrated Hooks: Screw small decorative hooks into the underside of your bottom ledge. Perfect for hanging lightweight items like keys, scarves, small plants, or even a framed piece from a ribbon.
- Magnetic Strip: Attach a thin magnetic strip (available at craft stores or hardware stores) to the back piece of your ledge. This is fantastic for displaying metal-backed art, children’s drawings held by magnets, or small metal objects.
- Fabric Inlay: Adhere a piece of attractive fabric, wallpaper, or even cork to the back wall section of your ledge for added texture or pattern.
- Picture Rail Molding Integration: If your home has traditional picture rail molding, you can sometimes adapt ledges to hang from this for a classic, no-holes approach. This is a bit more advanced but offers a lot of charm.
Tool Recommendation: Consider a small Dremel tool for intricate sanding, routing, or precise cuts for advanced features like LED channels.
Scaling Up: Multiple Ledges & Full Wall Displays
Don’t stop at just one! Many homes benefit from multiple DIY gallery ledges arranged strategically.
- Stacked Arrangement: Install several ledges vertically, spaced evenly or with varying gaps. This creates a multi-tiered display perfect for a large wall. Ensure you consider the height needed for items on the lower ledge overlapping the one above.
- Corner Ledges: For a continuous flow, design and build ledges that meet perfectly in a corner. This often involves precise miter cuts (45 degrees) at the corner joint.
- Asymmetrical Groupings: Instead of perfect symmetry, try ledges of different lengths placed at varying heights for a more modern, dynamic look.
When planning multiple ledges, map out your design on the wall using painter’s tape to visualize the spacing before drilling any holes. This allows you to stand back and adjust until you’re happy. These advanced techniques and finishing touches turn a simple wooden shelf into a standout design element, showcasing just how much impact a budget-friendly gallery ledge can have.
Troubleshooting & Maintenance: Keeping Your Ledges Looking Great
Even the most perfectly executed DIY project can encounter a hiccup or two. And once your DIY gallery ledges are up and looking fabulous, you’ll want to keep them that way. Here’s a guide to common issues and ongoing maintenance.
Common Troubleshooting Scenarios
- Ledge Feels Wobbly After Installation:
- Cause: Insufficient anchoring to the wall, screws not hitting studs properly, or screws not tightened enough.
- Solution: Remove everything from the ledge. Retighten all screws. If wobbling persists, check if you hit a stud (if aiming for one). If not, you’ll need to either relocate the ledge to hit studs or use more robust wall anchors. For drywall, toggle bolts or larger self-drilling anchors are often needed for heavy items. Never rely solely on small plastic anchors for anything with significant weight.
- Wood is Splitting When Drilling Screws:
- Cause: Pilot hole too small, or no pilot hole at all. Driving screws too close to the edge of the wood.
- Solution: Always pre-drill pilot holes. Ensure the pilot drill bit matches the *shaft* (not the threads) of your screw. If splitting occurs, remove the screw, apply wood glue into the split, clamp, let dry, then redrill a slightly larger pilot hole or move the screw position slightly.
- Paint/Stain is Uneven or Peeling:
- Cause: Improper surface preparation (not sanded well, greasy residue), not using primer (especially on pine knots or MDF), too-thick coats, or insufficient drying time between coats.
- Solution: Lightly sand the affected area (or the whole ledge if widespread). Clean thoroughly. Reapply primer if needed. Apply thinner, even coats of paint/stain, allowing adequate drying time between each.
- Ledges Appear Uneven/Slanted:
- Cause: Not properly leveled during installation.
- Solution: Loosen mounting screws slightly. Place your level on the ledge and adjust until perfectly flat. Retighten screws carefully. If screws are in anchors, you might need to slightly adjust the anchor itself if it wasn’t installed perpendicularly.
- Items Sliding Off the Ledge:
- Cause: Ledge not deep enough, or items placed too close to the front edge.
- Solution: For existing ledges, consider adding a thin strip of clear adhesive felt or rubber bumper dots to the bottom of frames/objects. For future ledges, build a deeper “lip” (as in Design 2) or choose wider board for the bottom piece.
Routine Maintenance for Long-Lasting Ledges
- Dust Regularly: Use a soft, dry cloth or a duster to remove dust and keep your display looking fresh.
- Gentle Cleaning: For painted or sealed ledges, wipe with a slightly damp cloth and mild soap if needed. Avoid harsh chemicals that could strip the finish. For stained, unsealed wood, a dry cloth is usually best.
- Check Stability Periodically: Every few months, gently test the ledges to ensure they are still securely fastened to the wall. Retighten screws if needed.
- Protect Against Scratches: Place felt pads on the bottom of heavy or abrasive decorative objects to prevent scratching the ledge surface.
- Rotate & Refresh: The beauty of DIY gallery ledges is their flexibility! Periodically refresh your display by swapping out artwork, photos, or objects. This keeps your space feeling new and exciting.
By being proactive with planning, careful during installation, and attentive with maintenance, your budget-friendly gallery ledges will bring you joy (and compliments!) for many years to come.
Discover more clever DIY storage solutions for small spaces.
Case Study: Sarah’s Living Room Transformation with DIY Ledges
Let’s look at a real-world example of how DIY gallery ledges can transform a space without breaking the bank. Sarah, a graphic designer and proud parent of two young children, faced a common dilemma: a large, blank wall in her living room, a tight decor budget, and a desire to display her kids’ constantly evolving artwork alongside her own eclectic taste.
The Problem: Bare Walls and Budget Constraints
Sarah’s living room felt a bit sterile. She had expensive taste but a modest income. Traditional art was costly, and she needed a flexible solution to showcase her children’s crayon masterpieces without committing to permanent nail holes every week. The idea of a full gallery wall felt overwhelming and too rigid for her dynamic family life. She also had a collection of small sculptures and unique ceramics that were gathering dust in a box.
The Solution: Three Budget-Friendly DIY Gallery Ledges
After finding inspiration online, Sarah decided to create three 4-foot long gallery ledges using simple pine boards. She opted for Design 2 (the triple-deck ledge) for extra depth and security. Her local hardware store provided the necessary lumber for under $40, and she already owned a basic drill and hand saw. Over a weekend, she accomplished the following:
- Material Selection & Cuts: Purchased three 8-foot pine 1×4, 1×3, and 1×2 boards, which she had cut down to three 4-foot sections at the store, with enough left over for smaller projects.
- Assembly: Used wood glue and 1.5-inch screws to assemble the three ledges. She opted for an unfinished wood look, so sanding was crucial for smoothness.
- Finishing: Applied a natural clear wax finish to protect the pine and highlight its grain.
- Installation: Used a stud finder to locate three studs that aligned horizontally in her living room. She then installed the three ledges one above the other, spacing them 18 inches apart to allow for taller frames and objects.
The Transformation: A Dynamic, Personalized Display
The impact was immediate. Sarah now had over 12 feet of display space. She artfully arranged:
- Children’s Art: Easily rotated new drawings weekly, placing the newest on top and storing older pieces behind.
- Travel Photography: A mix of unframed prints and smaller framed photos from family vacations.
- Personalized Objects: Her collection of small ceramics, a few favorite books, and even a small propagation station for houseplant cuttings found a new home.
- Cost Savings: Her entire display system cost less than a single large framed print she had considered buying.
Sarah’s living room went from bland to brilliant, a true reflection of her family’s journey and her creative spirit, all thanks to her budget-friendly gallery ledges. She loves the flexibility, constantly re-arranging items to keep the display fresh and engaging. This project not only saved her money but also gave her a huge sense of accomplishment and a unique focal point in her home.
Vision for Infographic: Before/After photos of Sarah’s living room wall, highlighting the blank wall vs. the styled ledges.
Recommended Resources & Tools for Your DIY Journey
To help you on your DIY gallery ledge adventure and beyond, here are some recommended resources and tools that can make your projects easier, safer, and more professional-looking:
Essential Tools (Investments That Pay Off)
- Ryobi One+ Cordless Drill/Driver Kit: (View on Home Depot) – A fantastic entry-level, versatile cordless drill that’s perfect for most DIY home projects. The One+ battery system means you can gradually add other tools.
- DEWALT DWE6421 Random Orbit Sander: (View on Amazon) – An orbital sander makes quick work of smoothing wood and preparing surfaces for painting or staining. A definite time-saver.
- STANLEY FatMax Tape Measure: Accurate and durable, a good tape measure is foundational.
- Stud Finder (Zircon or Franklin Sensors): Don’t skimp on this! A reliable stud finder (like Franklin Sensors) makes mounting safe and hassle-free.
Wood & Hardware Supplies
- Local Hardware Stores (Home Depot, Lowes, Menards): Best for readily available pine, MDF, wood glue, screws, and basic finishes.
- Specialty Lumber Yards: If you’re looking for higher-grade hardwoods, specific plywood, or reclaimed wood, a local lumber yard can offer better selection and advice.
- Online Fastener Retailers: For bulk screws or specific types of anchors, online stores often have better pricing than small packs from hardware stores.
Inspiration & Learning
- YouTube Tutorials: Search for “how to cut wood straight,” “how to use a drill,” or “basic woodworking joints.” Visual learning is incredibly effective.
- Pinterest & Instagram: Endless inspiration for styling gallery ledges and other DIY decor projects.
- Related Blog Posts: Explore more articles on DIY shelving ideas or maximizing small space decor.
Remember, building your toolkit is a journey, not a destination. Start with what you need for your DIY gallery ledges, and add more as your confidence and ambitions grow!
How much weight can a DIY gallery ledge hold?
The weight capacity of your DIY gallery ledge depends heavily on two factors: the strength of your materials and, most importantly, how securely it’s mounted to the wall. A pine ledge properly installed into at least two wall studs using good quality wood screws can typically hold 20-30 pounds per linear foot. If using robust wall anchors (e.g., toggle bolts) on drywall, you can still achieve significant weight capacity, but it will be less than stud mounting. Always err on the side of caution and distribute weight evenly.
Can I use pallet wood for my budget-friendly gallery ledges?
Yes, but with significant caution. Pallet wood can be very budget-friendly, often free, and offers a unique rustic look. However, you must verify the pallet’s safety. Look for an ‘HT’ stamp, indicating it was heat-treated. Avoid ‘MB’ stamps (methyl bromide treated) or any pallet without a clear stamp, as these chemicals can be toxic. Pallet wood also requires extensive cleaning, sanding, and de-nailing, which can be time-consuming. Only proceed if you’re confident in its origin and prepared for the extra prep work.
How deep should a DIY gallery ledge be?
The ideal depth depends on what you plan to display. For standard framed art and photos, a depth of 3 to 4 inches (the bottom flat surface) is usually sufficient. This allows for layering. If you plan to display larger frames, thicker books, or small potted plants, you might want a deeper ledge, perhaps 5 to 6 inches, to ensure stability and prevent items from easily being knocked off. The front lip should typically be at least 1 inch high to provide a secure barrier.
What’s the best way to hide screw holes in my DIY gallery ledges?
There are a few effective methods. For a clean finish, you can pre-drill pilot holes, then countersink them slightly (creating a small wider divot for the screw head). After driving the screw, fill the indentation with wood filler, sand smooth once dry, and then paint or stain over it. Alternatively, for a completely invisible look, you could use pocket hole joinery for assembly, though this requires a specialized jig. For hidden wall mounting, you can use keyhole hangers routed into the back of the ledge, but this makes it harder to secure directly into studs.
I’m a beginner. Which type of DIY gallery ledge is easiest to build?
For beginners, the ‘L’ shaped ledge (Design 1) is generally the easiest. It involves cutting just two pieces of wood to length and joining them at a right angle with glue and screws. Pine is the most forgiving material to work with if you’re new to using saws. This simple design provides a solid foundation for learning basic woodworking skills and achieving a great result on a budget.
How do I ensure my gallery ledge is perfectly level?
A good quality level is your best friend here! Once you’ve marked your desired height on the wall, hold the ledge in place and use a spirit level or a digital level to adjust its position until the bubble is perfectly centered (or the digital reading is 0 degrees). Mark your screw locations while the ledge is level. During final installation, take your time, hold the level against the ledge again, and gently tighten screws, making small adjustments if needed until it’s perfectly straight before fully fastening.
Conclusion: Unlock Your Home’s Potential with DIY Gallery Ledges
We’ve journeyed from understanding the sheer brilliance of DIY gallery ledges to meticulously building, installing, and creatively styling them. You now possess a wealth of knowledge to confidently tackle this impactful home improvement project. No longer should bare walls or a tight budget dictatate your home’s aesthetic. Instead, you’re empowered to create dynamic, ever-evolving displays that perfectly reflect your personality and style.
Remember, the magic of gallery ledges lies in their flexibility and the story they allow you to tell. They’re not just shelves; they’re stages for your memories, your passions, and your evolving tastes. By embracing the DIY spirit, you not only save money but also infuse your home with a unique sense of accomplishment and genuine character that store-bought items simply can’t replicate. So, what are you waiting for? Grab your tools, pick your materials, and start imagining the possibilities. Your walls are waiting for their beautiful, budget-friendly transformation! Go forth and build something amazing!
What’s Next for Your Home Decor Journey?
- Start Small: If you’re new to DIY, try building one short DIY gallery ledge for a bedroom or hallway to get comfortable with the process.
- Gather Inspiration: Keep collecting ideas for styling and what you want to display on your new ledges.
- Share Your Creation: Snap a photo and share your finished project online! You might inspire someone else to take on their own DIY challenge.
- Explore More DIY: Check out our other guides on how to build floating shelves or creative ways to organize small spaces for more budget-friendly home upgrades.
Content Disclaimer
The information provided in this article is for general informational and educational purposes only. It is not intended to be a substitute for professional advice. Always exercise caution and use appropriate safety measures when undertaking DIY projects. Consult with qualified professionals for specific guidance on structural integrity, electrical work, or if you are unsure about any aspect of installation or material selection. We are not responsible for any liability, loss, or risk incurred as a direct or indirect consequence of the use and application of any of the contents of this article. Product recommendations are based on general availability and user reviews and do not imply endorsement or warranty.
Categories
- Accent Walls & Ceilings (84)
- Art Curation & Gallery (83)
- Bedding Style Trends (89)
- Bedroom Makeover (96)
- Bohemian & Eclectic Styles (80)
- DIY & Budget-Friendly Decor (78)
- Eco-Friendly Design (83)
- Furniture Care (87)
- Home Decor & Design Ideas (181)
- Home Wellness Spaces (103)
- Integrated Outdoor Living (91)
- Japandi Style (84)
- Kids and Nursery Decor (73)
- Living Room Decor (99)
- Mix & Match Techniques (95)
- Modern & Contemporary Design (88)
- Rug Sizing & Placement (89)
- Scandinavian Design Inspiration (51)
- Seasonal Home Decor (100)
- Small Space Solutions (93)
- Wall Art & Painting Tips (94)
Recent Comments
Archives
Product Gallery
-
 Majestic African Wildlife Canvas Art for Stylish Home Decor
Rated 5.00 out of 5
Majestic African Wildlife Canvas Art for Stylish Home Decor
Rated 5.00 out of 5 -
 Cozy Irregular Green Plush Rug for Nordic Living Spaces
Rated 5.00 out of 5$50.99 – $321.60Price range: $50.99 through $321.60
Cozy Irregular Green Plush Rug for Nordic Living Spaces
Rated 5.00 out of 5$50.99 – $321.60Price range: $50.99 through $321.60 -
 Scandinavian Geometric Area Rugs for Stylish Home Décor
Rated 5.00 out of 5$36.62 – $554.84Price range: $36.62 through $554.84
Scandinavian Geometric Area Rugs for Stylish Home Décor
Rated 5.00 out of 5$36.62 – $554.84Price range: $36.62 through $554.84