Is your child’s room feeling a bit chaotic? Toys spilling out of bins, books piled precariously, and that never-ending quest for more space? You’re not alone. Every parent dreams of a tidy, beautiful, and functional space for their little ones, one that inspires creativity and encourages independence. The good news? Achieving this dream doesn’t require a complete overhaul or a massive budget. Often, the smartest solution is right there, above eye level:
Kids room decor with wall shelves.
Wall shelves are transformative. They unlock vertical space, turning cluttered surfaces into organized havens and bare walls into vibrant displays. More than just storage, they’re powerful design elements that can elevate the aesthetics of any child’s room, from a whimsical nursery to a functional teen den. But with so many options—floating, cube, corner, themed—how do you choose the right ones? And crucially, how do you ensure they’re safely installed and truly contribute to a child-friendly environment?
This comprehensive guide dives deep into the world of kids room decor with wall shelves. We’ll explore everything from choosing the perfect style and material to mastering safe installation and clever styling techniques. By the end, you’ll have the knowledge and confidence to transform your child’s room into a well-organized, inspiring, and utterly charming sanctuary that reflects their unique personality and grows with them. Get ready to banish clutter and embrace a world of vertical possibilities!
Here’s what we’ll cover:
- Why wall shelves are a game-changer for kids’ rooms
- Different types of wall shelves and their ideal uses
- Material considerations: durability, safety, and aesthetics
- Designing with shelves: themes, layouts, and visual appeal
- Mastering safe installation: essential tips for peace of mind
- Creative ways to style shelves for toys, books, and treasures
- Making shelves grow with your child (from nursery to teen)
- Common mistakes to avoid when decorating with wall shelves
- DIY wall shelf projects for the crafty parent
- Maintenance and longevity of your shelf setup
The Unbeatable Benefits of Kids Room Decor With Wall Shelves
When you think about optimizing space, especially in a child’s room, the floor often gets all the attention. But truth be told, the walls are frequently overlooked goldmines for storage and decor. Incorporating wall shelves into your kids room decor isn’t just about tidiness; it’s about unlocking a host of benefits that contribute to a more harmonious and stimulating environment for your child.
Maximizing Vertical Space: A Room’s Best Friend
Kids’ rooms, no matter their size, always seem to be bursting at the seams with toys, books, art supplies, and clothes. The floor soon becomes a minefield, limiting play space and making cleanup a nightmare. This is where wall shelves truly shine. They allow you to utilize vertical space that would otherwise sit idle, freeing up valuable floor area for imaginative play.
- Clutter Reduction: By moving items upwards, shelves immediately reduce floor and surface clutter, making the room feel larger and more open.
- Improved Accessibility: For often-used items (like favorite storybooks or frequently played-with toys), shelves at the right height make them easily accessible to children, encouraging independence.
- Enhanced Play Area: A clear floor means more room for building forts, setting up train tracks, or simply running around and burning off energy.
Beyond Storage: Stylish Statements and Personality Displays
While their primary function is storage, wall shelves are far from merely utilitarian. They are powerful design elements that contribute significantly to the overall aesthetic of your kids room decor. Think of them as blank canvases, ready to showcase your child’s personality, interests, and cherished possessions.
- Visual Interest: Floating shelves, cube shelves, or decorative ledges add architectural interest to plain walls, breaking up monotony.
- Themed Decor Integration: Easily integrate shelves into existing room themes – a boat shelf for a nautical room, cloud shelves for a dreamy space, or rustic wooden shelves for a woodland theme.
- Curated Displays: They provide the perfect platform for displaying treasured toys, framed art, photos, trophies, and heirlooms, turning them into decorative features rather than mere clutter. This is where your kids room decor truly shines.
- Color and Texture: Shelves come in a myriad of materials and finishes, allowing you to introduce new colors, wood tones, or metallic accents into the room’s palette.
Encouraging Organization and Responsibility
Teaching children to be organized is a life skill, and wall shelves can be a key tool in fostering this habit. When items have a designated, easily reachable spot, cleanup becomes less of a chore and more of a routine.
- Designated Homes: Clearly defined shelves help children understand where items belong, simplifying tidying up.
- Visual Cues: When a shelf is visibly full, it’s a clear cue that no more items should be added to that category without decluttering first.
- Empowerment: Allowing children to choose what goes on their shelves and how it’s arranged gives them a sense of ownership and pride in their space.
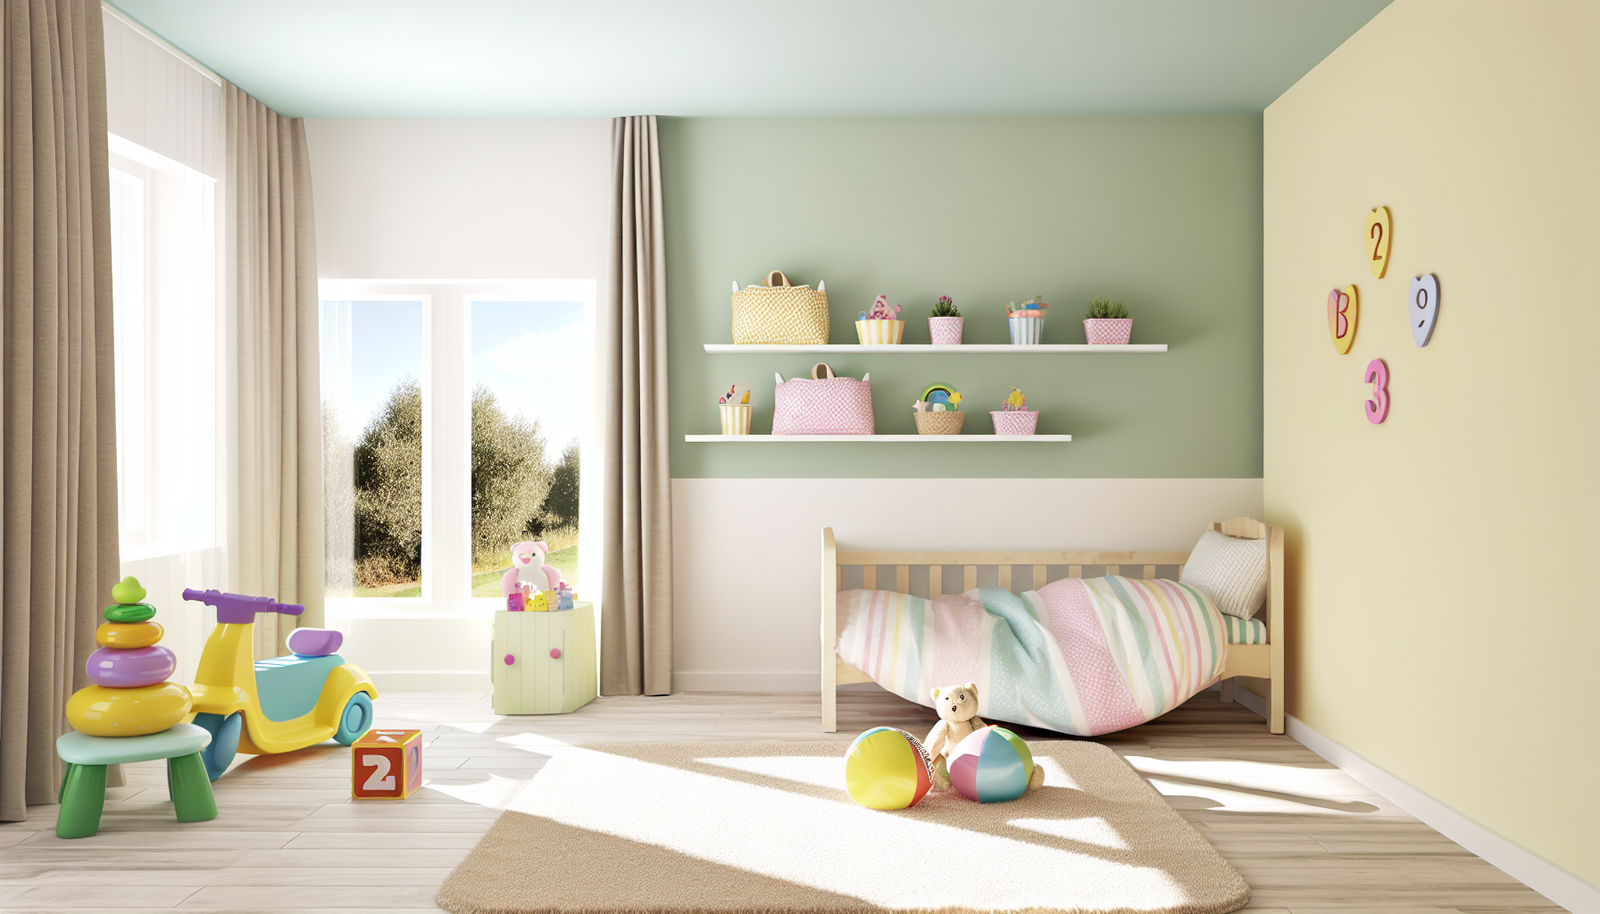
Image Suggestion: An overhead shot of a brightly lit kids’ room with visible clear floor space, showing how wall shelves above keep toys and books off the ground, creating ample play area. Alt-text: “Bright kids room with ample floor space thanks to wall shelves displaying books and toys, enhancing play area.”
Exploring the Variety: Types of Kids Room Wall Shelves
The world of wall shelves is vast and varied, offering a solution for nearly every design aesthetic and storage need. Knowing the different types available is the first step in selecting the perfect additions for your kids room decor.
1. Floating Shelves: Minimalist Magic
Description: These shelves appear to emerge directly from the wall with no visible brackets or supports. They offer a sleek, modern, and uncluttered look.
Pros:
- Extremely clean and contemporary aesthetic.
- Versatile in placement – can be staggered, aligned, or used to create unique patterns.
- Ideal for displaying lighter décor items, a few books, or small toys.
Cons:
- Installation can be more challenging and requires precise drilling and sturdy anchors.
- Typically have lower weight capacities compared to bracketed shelves.
- Not always ideal for heavy textbooks or a large collection of items.
Best for: Nurseries for displaying small decorative items, a few picture frames, or lightweight books. Older kids’ rooms for trophies, art, or small collectibles. They truly enhance modern kids room decor.
2. Cube Shelves (individual or multi-unit): Modular Marvels
Description: Comprising individual open-fronted “cubes” or multi-cube units, these shelves offer contained storage and display areas. They can be mounted individually or stacked/arranged in various configurations.
Pros:
- Excellent for organizing specific categories of items, like toys, books, or craft supplies.
- Often suitable for incorporating fabric bins or baskets for hidden storage.
- Provide a neat, segmented look.
- Highly customizable in terms of arrangement.
Cons:
- Can look bulky if too many are installed in a small space.
- May require secure mounting for each individual cube if used separately.
- Dust can accumulate inside the cubes.
Best for: Playrooms or bedrooms where specific categorization of toys, LEGOs, or art supplies is crucial. Larger units can even serve as room dividers if securely anchored.
3. Ledge Shelves (Picture Ledges): Display Dreams
Description: These are shallow shelves with a raised lip along the front, specifically designed to hold framed pictures, small books, or decorative plates in an upright position.
Pros:
- Perfect for creating dynamic gallery walls with interchangeable art and photos.
- Ideal for displaying children’s books with their covers facing out, making them more appealing.
- Easy to change out displays without removing items.
- Generally easy to install.
Cons:
- Limited depth means they can’t hold bulky items.
- Only suitable for items that can stand upright or are very shallow.
- Requires careful placement to prevent curious hands from knocking items off.
Best for: Reading nooks, displaying favorite children’s books, showcasing small art pieces, or creating a revolving gallery of your child’s drawings.
4. Corner Shelves: Maximizing Awkward Spaces
Description: Designed to fit snugly into the corner of a room, these shelves turn often-wasted space into functional storage or display areas.
Pros:
- Utilize often-ignored corner spaces efficiently.
- Provide unique visual interest.
- Can be stacked vertically to create a corner shelving unit.
Cons:
- Limited in size and capacity.
- May not work in every room layout.
- Installation can sometimes be trickier due to wall angles.
- Less versatile in terms of arrangement than straight shelves.
Best for: Small rooms, maximizing space around a desk or bed, or displaying small decorative items or a few choice books.
5. Bracketed Shelves: Sturdy and Reliable
Description: These are traditional shelves supported by visible brackets underneath, offering robust support and a more classic or industrial look depending on the bracket style.
Pros:
- Very sturdy and can hold significant weight.
- Wide range of bracket styles (metal, wood, decorative) to match any decor.
- Generally easier to install and more forgiving than floating shelves.
- Excellent for holding heavier items like large book collections or toy bins.
Cons:
- Brackets are visible, which some may find less aesthetically pleasing than floating shelves.
- Can sometimes look more utilitarian than decorative.
- Requires selecting brackets that complement the shelf and room aesthetic.
Best for: Heavy-duty storage for books, larger toy collections, or items that need strong, reliable support.
Image Suggestion: A collage depicting various shelf types: a minimalist floating shelf with a few soft toys, a set of colorful cube shelves with different themed bins, a picture ledge displaying children’s books, a neatly organized corner shelf, and a sturdy bracketed shelf holding a collection of hardcover books. Alt-text: “Collection of diverse kids room wall shelves: floating, cube, ledge, corner, and bracketed, showcasing their different styles and uses.”
Material Matters: Choosing the Right Shelf for Your Child
The material of your wall shelves isn’t just about aesthetics; it’s crucially important for durability, safety, and longevity, especially in a dynamic environment like a child’s room. Each material comes with its own set of characteristics that can influence your kids room decor and functionality.
Wood: Classic, Durable, and Versatile
Types: Solid wood (pine, oak, maple), plywood, MDF (Medium-Density Fiberboard), particleboard.
Pros:
- Durability: Solid wood is incredibly strong and long-lasting, capable of holding significant weight.
- Aesthetics: Offers a warm, natural look. Can be painted, stained, or finished to match any decor.
- Versatility: Available in a vast array of styles, from rustic to modern. Easy to cut and customize for DIY projects.
- Sustainability: Many wood options are sourced sustainably.
Cons:
- Cost: Solid wood can be more expensive than engineered wood products.
- Weight: Heavier than other materials, requiring robust installation.
- MDF/Particleboard: While more affordable, they are less durable than solid wood, can swell if exposed to moisture, and are less resistant to impact. Important to check for low VOC (Volatile Organic Compounds) finishes for children’s spaces.
Ideal for: Long-term use, heavy books, traditional or natural-themed kids room decor. MDF/particleboard offers budget-friendly options for lighter items.
Metal: Industrial Chic and Robust
Types: Steel, iron, aluminum. Often used for brackets or complete shelving units.
Pros:
- Strength: Extremely strong and can hold very heavy loads.
- Durability: Resistant to dents, scratches, and moisture (especially coated metal).
- Modern Aesthetic: Offers a sleek, industrial, or contemporary look.
- Slim Profile: Metal brackets can be thinner than wooden ones while providing strong support.
Cons:
- Appearance: May feel too “cold” or industrial for some kids’ room aesthetics.
- Edges: Can have sharper edges, requiring careful placement and rounded designs for safety.
- Weight: Heavier than some other options.
- Cost: Can be more expensive for solid metal units.
Ideal for: Playrooms or older kids’ rooms where a modern, industrial, or even superhero-themed kids room decor is desired. Excellent for heavy items or frequently accessed items.
Plastic/Acrylic: Colorful, Lightweight, and Child-Friendly
Types: PVC, clear acrylic, brightly colored plastics.
Pros:
- Lightweight: Easy to handle and install.
- Colors: Available in a rainbow of vibrant colors, perfect for playful kids room decor.
- Safety: Less likely to splinter or cause serious injury if bumped than wood or metal. Acrylic can be clear, offering a minimalist, “floating” effect.
- Affordability: Generally the most budget-friendly option.
- Easy to Clean: Wipes clean easily.
Cons:
- Durability: Less durable than wood or metal; can scratch, crack, or become brittle over time.
- Weight Capacity: Lower weight capacity, best for lighter items.
- Environmental Concerns: Less eco-friendly unless made from recycled plastics.
Ideal for: Nurseries and toddlers’ rooms for lightweight toys, soft books, or decorative items. Offers a fun, playful touch to kids room decor without breaking the bank.
Fabric Shelves/Wall Organizers: Soft and Flexible
Description: While not traditional rigid shelves, fabric wall organizers with pockets or cubbies serve a similar purpose and are excellent for specific items.
Pros:
- Softness: Extremely safe with no hard edges, perfect for very young children.
- Flexibility: Can be rolled up or folded when not in use.
- Lightweight: Easy to hang with simple hooks.
- Targeted Storage: Ideal for small toys, plush animals, or small clothing items (socks, underwear).
- Affordable: Generally very inexpensive.
- Easy to Clean: Many are machine washable.
Cons:
- Limited Capacity & Weight: Cannot hold heavy or bulky items.
- Less Aesthetic: May not provide the polished look of rigid shelves.
- Durability: Can tear or stretch over time.
- Not for Display: Primarily for storage, not for displaying decorative items.
Ideal for: Closets, inside doors, or small nooks for storing soft toys, baby essentials, or small clothing items. Complements rigid shelves for versatile kids room decor.
When selecting your material, always consider the age of your child, the types of items you plan to store, and your overall kids room decor vision. Prioritize safety by ensuring any finished materials are non-toxic and lead-free.
Image Suggestion: A split image or infographic comparing different shelf materials: one side showing a beautiful solid wood shelf with children’s books, another with an acrylic shelf holding soft toys, and a third with a metal shelf displaying action figures. Alt-text: “Comparison of wood, acrylic, and metal wall shelves for kids rooms, highlighting their aesthetic and functional differences.”
Designing with Shelves: Themes, Layouts, and Visual Appeal
Once you’ve chosen the ideal types and materials for your kids room decor with wall shelves, the real fun begins: designing their placement and styling them to perfection. This is where your child’s personality can truly shine through, transforming simple storage into a captivating visual narrative.
Integrating with Room Themes: Beyond the Basics
Your wall shelves are an extension of your child’s room theme, not just an add-on. Think about how they can seamlessly blend in or even enhance the chosen aesthetic. Here are some ideas:
- Fairy Tale Forest: Use natural wood shelves, perhaps shaped like tree branches or clouds. Decorate with whimsical elements like miniature deer, mushroom figurines, and storybooks with enchanting covers.
- Space Explorer: Opt for sleek, metallic finished shelves or dark blue floating shelves. Display glow-in-the-dark stars, astronaut figurines, planets, and books about the cosmos.
- Urban Jungle: Combine natural wood with industrial metal brackets. Add small potted real or faux plants, animal figurines, and art prints featuring jungle animals.
- Pastel Dreamland: Choose shelves painted in soft pastels (mint, pink, lavender). Adorn with soft fabric animals, delicate dreamcatchers, and subtle, charming prints.
- Superhero Hideout: Use bold, primary colored shelves or dark-colored shelves that allow brightly colored comic books and action figures to pop. Consider a shelf with a built-in light-up “bat signal.”
Pro Tip: Don’t just match the color; match the *vibe*. A rustic shelf can fit a woodland theme, while a sleek acrylic shelf suits a modern, minimalist kids room decor.
Layout Strategies: Creating Visual Flow and Function
The arrangement of your shelves significantly impacts both their functionality and the room’s overall aesthetic. Don’t just place them randomly! Consider these layout principles:
- Symmetry vs. Asymmetry:
- Symmetrical: Multiple shelves of the same size and type placed at equal intervals create a balanced, orderly look. Great for formal or classic kids room decor.
- Asymmetrical: Varying shelf lengths, heights, and types create a dynamic, playful, and modern feel. Excellent for rooms with lots of personality or to fill an unusual wall space.
- Stacked: Place shelves directly one above the other to maximize vertical storage in a concentrated area, ideal for books or collectible series.
- Staggered: Offset shelves horizontally and/or vertically to create visual interest and break up a large wall. Works well with floating shelves.
- Around a Feature: Frame a window, bed, or desk with shelves to create a cohesive storage and display area. This can make the feature feel more intentional and integrated into the kids room decor.
- Corner Wraps: Use corner shelves or extend straight shelves around a corner to seamlessly connect two walls and maximize tricky spaces.
- “Building Block” Layout: With cube shelves, arrange them like LEGO blocks – side-by-side, stacked, or offset – to create a custom, modular unit that grows with your child’s needs.
Styling Your Shelves: The Art of Display
This is where your kids room decor really comes alive. Styling isn’t just about putting things on shelves; it’s about creating a curated display that tells a story and engages the eye.
- Mix Heights and Textures: Combine tall items (books, vases) with shorter ones (figurines, small clocks). Introduce varied textures through baskets, wooden toys, and soft plushies.
- The Rule of Three (or Odd Numbers): Group items in odd numbers (3, 5, 7) for a more pleasing and dynamic arrangement.
- Color Cohesion: Organize items by color, or choose items that share a common color palette to create a harmonious look. Conversely, a pop of contrasting color can draw attention to a special item.
- Layering: Place larger items at the back, then layer smaller items in front. For picture ledges, layer smaller frames in front of larger ones.
- Storage Bins and Baskets: Incorporate decorative bins or baskets in complementary colors. These hide clutter (loose toys, small items) while adding texture and style to your kids room decor.
- Personal Touches: Always include items that are meaningful to your child – their favorite stuffed animal, a drawing they’re proud of, a photo, or a special souvenir.
- Negative Space: Don’t overcrowd! Allow for some empty space around items to let them “breathe” and stand out. Less is often more.
- Lighting: Consider adding small battery-operated fairy lights, LED strips, or a small decorative lamp on a shelf to create a cozy ambiance or highlight specific items.
- Rotate Displays: Keep the shelves fresh and engaging by occasionally rotating the items on display, especially as your child’s interests evolve. This is an easy way to update your kids room decor.
Remember, the goal is to create a space that inspires, organizes, and brings joy. Let your child be involved in the styling process – it fosters their sense of ownership and creativity!
Image Suggestion: A visually appealing infographic showing different shelf layouts (symmetrical, asymmetrical, staggered) and then a “before & after” styling example, showcasing cluttered vs. curated shelves with a mix of books, toys, and decorative elements. Alt-text: “Infographic demonstrating various kids room wall shelf layouts and a before-and-after styling showing effective decoration.”
Mastering Safe Installation: Peace of Mind for Parents
When it comes to kids room decor with wall shelves, safety is paramount. A poorly installed shelf can pose a significant hazard, especially in a child’s room where climbing, pulling, and bumping are common occurrences. This section is not just about mounting; it’s about ensuring absolute peace of mind.
The Golden Rule: Find Those Studs!
This is the most critical step. Drywall alone is utterly insufficient to securely hold a shelf, especially one that will bear weight from books or toys, or one that a child might try to pull on. You *must* anchor your shelves into wall studs whenever possible.
- What are Studs? These are the vertical wooden or metal framing pieces behind your drywall that provide structural support. They are typically spaced 16 or 24 inches apart.
- How to Find Them: A stud finder is an invaluable tool. Run it along the wall; it will beep or light up when it detects a stud. If you don’t have one, you can often knock lightly on the wall – a solid sound indicates a stud, while a hollow sound means drywall. Measurements from outlets or corners can also give clues (outlets are often attached to studs).
- Anchor Points: Aim to hit at least two studs for longer shelves. For shorter shelves, securing one side to a stud and using a heavy-duty wall anchor on the other side might suffice, but two studs are always preferable.
Beyond Studs: Heavy-Duty Wall Anchors (When a Stud Isn’t There)
Sometimes, a stud might not be precisely where you need it for your desired shelf placement. In these cases, high-quality wall anchors are essential. NEVER use basic plastic wall plugs for anything but the lightest photo frames in a child’s room.
- Toggle Bolts: Excellent for heavy loads. They spread out behind the drywall to create a secure grip.
- Molly Bolts (Sleeve Anchors): Good for medium to heavy loads. They expand as you tighten the screw.
- Self-Drilling Drywall Anchors: Best for lighter loads, convenient to install, but check weight limits carefully.
Key Considerations: Always match the anchor type to the weight of the shelf *plus* the maximum anticipated weight of its contents. Overestimate rather than underestimate. Read the weight capacity stated on the anchor packaging.
Choosing the Right Fasteners and Hardware
The screws that come with your shelf kit might not always be the best or longest option. Invest in high-quality screws that are appropriate for the shelf’s weight capacity and the type of wall material (wood screws for studs, machine screws for anchors).
- Length Matters: Ensure screws are long enough to penetrate well into the stud (at least 1.5-2 inches).
- Head Type: Phillips, flat, or hex head – make sure you have the correct screwdriver or drill bit.
- Leveling: Use a spirit level (or a level app on your phone) constantly. A crooked shelf is not only unsightly but can also cause items to slide off. Mark drilling points with a pencil first.
- Power Tools: A drill makes the job much easier and ensures proper pilot holes. Start with a smaller pilot hole than your screw for wood, or follow anchor instructions carefully.
Placement Height: Balancing Accessibility and Safety
Where you place the shelves is crucial for both functionality and safety. The general rule of thumb:
- Out of Reach (Young Children): For decorative items, breakables, or items you don’t want young children accessing, place shelves above their reach. This often means the bottom shelf is at least 4-5 feet (1.2-1.5 meters) from the floor.
- Within Reach (Older Children): For books and toys that you encourage your child to access independently, place the lowest shelf at a height they can comfortably reach while standing firmly on the floor. This might be around 2-3 feet (0.6-0.9 meters) for toddlers and preschoolers, and higher for older kids. Always supervise initial access.
- No Climbing Aid: Ensure shelves are positioned away from furniture that a child could use to climb onto them (dressers, beds, desks). The shelf should never serve as a stepping stone.
Weight Distribution and Load Limits
Even a perfectly installed shelf has a weight limit. Respect it.
- Know the Limit: Check the manufacturer’s suggested weight capacity for your shelf.
- Distribute Weight Evenly: Don’t place all the heaviest items on one end of a long shelf. Distribute weight across its length.
- Heavier Items at the Back: Place heavier items closer to the wall for better stability.
- Top Shelf Caution: Avoid placing heavy or unstable items on very high shelves where a fall could be dangerous.
Regular Safety Check-Ups
Kids’ rooms are dynamic, and things shift. Periodically check your installed shelves:
- Wiggle Test: Give them a gentle wiggle. Do they feel secure?
- Screw Tightness: Check if any screws have loosened over time.
- Anchor Integrity: Look for any signs of drywall damage around the anchors.
- Child’s Growth: As your child grows, re-evaluate shelf height and accessibility.
By taking these essential safety precautions, your kids room decor with wall shelves will not only look fantastic but also provide a secure and functional space for years to come.
Image Suggestion: An infographic demonstrating safe shelf installation: 1) Using a stud finder, 2) Drilling pilot holes, 3) Inserting anchors (with example of toggle bolt), 4) Screwing in shelf brackets securely. Also, a diagram illustrating safe shelf height zones (out of reach vs. accessible). Alt-text: “Step-by-step infographic on safe wall shelf installation, including finding studs, using anchors, and appropriate height placement for kids’ rooms.”
Creative Styling: Transforming Shelves into Kid-Friendly Masterpieces
Now that your wall shelves are safe and sound, it’s time to unleash your creativity! Styling these units is where the kids room decor truly becomes personalized. It’s about combining functionality with aesthetic appeal, creating inviting vignettes that spark imagination and keep clutter at bay.
1. The Curated Book Display: Beyond the Spine
Children’s books are often little works of art themselves. Don’t just stack them!
- Face-Out Power: For picture ledges, display books with their covers facing out. This makes them significantly more appealing and easier for children to select. Rotate popular books periodically.
- Rainbow Order: Arrange books by color. This creates a visually stunning display and can make it easier for kids to find a favorite book by its color.
- Themed Groupings: Group books by topic (animals, space, fairy tales) or series. Pair them with a relevant figurine or toy (e.g., a dinosaur book next to a toy dinosaur).
- Bookends with Personality: Use decorative bookends – perhaps character-themed, animal shapes, or simple, colorful blocks – to keep stacks tidy and add charm.
2. Thoughtful Toy Organization: Playful & Practical
Shelves are perfect for getting toys off the floor, but how you display them matters.
- Baskets and Bins: The unsung heroes of toy organization. Use attractive fabric or wicker baskets, or colourful plastic bins, to contain smaller items like LEGOs, blocks, playdough, or small cars. Label them with pictures or words for younger children.
- Figurine Vignettes: For action figures, dolls, or collectible characters, create small scenes on a shelf. This turns them into a display rather than just clutter.
- Rotation Station: Designate a shelf for toy rotation. Keep a rotating selection of toys accessible, putting the rest away. This prevents overstimulation and keeps toys “fresh.”
- Top Shelf Treasures: Place cherished but delicate toys (like limited edition collectibles or sentimental items) out of reach to protect them while still allowing them to be admired.
3. Art and Craft Supplies: Accessible Creativity
Encourage artistic expression by keeping supplies neatly organized and visible.
- Clear Containers: Use clear jars or acrylic containers for crayons, markers, colored pencils, and paint brushes. This makes it easy to see what’s available and adds a pop of color.
- Craft Caddies: Small portable caddies can hold frequently used items and be pulled out when creativity strikes, then returned to the shelf.
- Displaying Masterpieces: Allocate a section of a shelf (perhaps a picture ledge) for displaying your child’s latest artworks. Use small easels or mini clotheslines with clips. Change them frequently to celebrate new creations.
4. Adding Personality and Charm: The Finishing Touches
Beyond the functional items, the decorative elements truly define your kids room decor.
- Framed Art & Photos: Personalize the space with framed photos of family, friends, or pets. Include prints of your child’s favorite characters, animals, or motivational quotes.
- Plush Animal Parade: Line up a collection of your child’s favorite stuffed animals. They add softness, texture, and a lovable touch.
- Small Plants: Introduce a touch of nature with small, child-safe potted plants (e.g., spider plants, snake plants, or succulents that are non-toxic). Ensure they are secure and out of reach if your child is prone to investigating.
- Fairy Lights: Strand battery-operated fairy lights along the back or underneath a shelf for a magical glow, perfect for bedtime ambiance.
- Trophies & Awards: Celebrate achievements by giving trophies, medals, and certificates pride of place on a dedicated shelf.
- Unique Finds: Showcase unique trinkets, souvenirs from trips, or special gifts that hold meaning for your child.
- Nightlights and Small Lamps: A small, decorative nightlight or lamp on a lower shelf can be a comforting addition and provide practical illumination.
Remember, the goal is always balance: functionality meets beauty. Don’t be afraid to experiment, and most importantly, involve your child in the process. When they have a say in their kids room decor, they’re more likely to take pride in keeping it organized!
Image Suggestion: A split image showing “Smart Shelf Styling: Before & After.” The “Before” side shows a cluttered, unorganized shelf. The “After” side shows the same shelf beautifully styled with a mix of neatly stacked books, decorative bins, a few artistic toys, and a small plant, demonstrating effective use of space and aesthetics. Alt-text: “Example of smart kids room wall shelf styling, showcasing a transformation from cluttered to beautifully organized with books, toys, and décor.”
Growing with Your Child: Shelf Solutions for Every Age and Stage
One of the true strengths of kids room decor with wall shelves is their adaptability. Unlike bulky furniture fixed in size and function, shelves can evolve alongside your child, from a whimsical nursery accent to a practical study aid for teens. This foresight in planning saves money and effort in the long run.
Nursery & Toddler Room (Ages 0-3): Soothing, Soft, and Safe
In these early years, safety and accessibility for caregivers are paramount. Wall shelves are fantastic for keeping small, potentially hazardous items out of reach while providing visual stimulation.
- Focus: Displaying lovely decor, lightweight books, small soft toys, and essential baby items (e.g., wipes, extra diapers, lotions) within easy reach of the changing table, but not the child.
- Shelf Type: Picture ledges for face-out board books, small floating shelves for keepsakes, delicate cube shelves for plush animals.
- Material: Opt for smooth finishes, rounded edges (plastic or well-sanded wood), and non-toxic paint.
- Placement: Mostly above easy reach of the child, ensuring nothing breakable or heavy can fall. A low, securely mounted picture ledge for board books *might* be considered for a toddler, but only with supervision and very lightweight books.
- Styling: Soft colors, gentle lighting, charming figurines, family photos. Less is often more to maintain a calm environment.
Preschool & Early Elementary (Ages 4-8): Encouraging Independence and Play
As children grow, their desire for independence blossoms. Shelves can support this by making their favorite things accessible and encouraging them to tidy up.
- Focus: Organizing toys (LEGOs, action figures, dolls), paperbacks, art supplies, and displaying their own creations.
- Shelf Type: Robust cube shelves with bins, bracketed shelves for heavier book collections, and still, picture ledges for their growing library.
- Material: Durable wood or sturdy plastic that can withstand more active use.
- Placement: A mix of heights. Some shelves within their reach for daily access, others higher up for items you want to keep out of direct play or for decorative purposes. Ensure safe standing on the floor for all accessible shelves.
- Styling: Incorporate more vibrant colors. Use labeled bins for toys. Dedicate a “trophy shelf” for small achievements or collections. Allow them significant input on what goes where.
Tween & Pre-Teen (Ages 9-12): Hobbies, Collections, and Personalized Style
This is when hobbies, collections, and a stronger sense of personal style start to emerge. Shelves become vital for showcasing these interests and organizing school items.
- Focus: Displaying collectibles (action figures, model kits, sports memorabilia), chapter books, video games, craft projects, and early school supplies.
- Shelf Type: Floating shelves for a sleek look, deeper bracketed shelves for robust book collections or larger display items, corner shelves near a desk.
- Material: Wood or metal offers a more mature aesthetic.
- Placement: Integrate shelves around a desk or bed area where they’ll be most functional for study and personal space. Accessible heights for most items.
- Styling: Encourage them to style their own shelves. It might not be “perfectly” coordinated but will truly reflect their personality. Organize by category: gaming, comics, art. Use their sports trophies or musical instruments as decorative elements.
Teen Room (Ages 13+): Study, Self-Expression, and Sleek Organization
For teens, their room becomes a sanctuary – a place for studying, relaxing, and expressing their evolving identity. Shelves are essential for books, tech, and personal items, often with a more sophisticated edge to the kids room decor.
- Focus: Textbooks, novels, charging stations, personal electronics, favorite bands/movie memorabilia, skincare products, fashion accessories.
- Shelf Type: Minimalist floating shelves for a modern aesthetic, industrial-style metal and wood shelves, or custom built-ins for integrated storage.
- Material: Wood, metal, or sleek acrylic for a more mature look.
- Placement: Heavily integrated with a study area. Above a desk, flanking a bed for easy access to devices and books, or creating a gallery wall for their aesthetic.
- Styling: More adult aesthetics leveraging plants, abstract art, mood lighting, and sleek organizational tools. Less about toys, more about personal statements. Encourage decluttering and curated displays.
By investing in versatile, quality shelving and being open to re-styling as your child grows, your kids room decor with wall shelves can be a valuable and beautiful asset through every stage of their childhood.
Image Suggestion: A multi-panel infographic or a series of four distinct images showing shelf styling adapted for different age groups: a nursery shelf with soft toys, a primary-schooler’s shelf with labeled bins and books, a tween’s shelf with collectibles, and a teen’s shelf with books, tech, and mature decor. Alt-text: “Infographic demonstrating adaptable wall shelf styling for kids rooms, tailored from nursery to teen ages.”
Common Mistakes to Avoid When Decorating with Wall Shelves in Kids’ Rooms
While wall shelves offer incredible potential for kids room decor, a few common pitfalls can undermine their effectiveness, safety, or aesthetic appeal. Being aware of these missteps can save you time, effort, and even prevent hazards.
1. Overlooking Safety Measures: The Biggest No-No
We’ve stressed this, but it bears repeating. This is the gravest mistake.
- The Mistake: Not anchoring into studs, using inadequate drywall anchors for weight, placing shelves at a climbable height near furniture, or overloading shelves.
- The Fix: Always use a stud finder. If studs aren’t an option, invest in heavy-duty toggles or molly bolts suitable for the shelf’s intended load. Keep shelves mounted away from furniture kids might climb (beds, dressers). Know and respect the shelf’s weight limit, distributing items evenly.
2. Ignoring Accessibility for Your Child’s Age
A shelf that’s great for a teen won’t work for a toddler.
- The Mistake: Placing all shelves too high for a young child to access items, or placing highly breakable/small choking hazards on low shelves for toddlers.
- The Fix: Tailor shelf height to your child’s age and independence level. For younger children, accessible shelves should only contain soft, safe items. Keep valuables and small parts out of reach.
3. Over-Cluttering the Shelves (Too Much Stuff)
The irony of storage is that more storage can sometimes lead to more clutter if not managed.
- The Mistake: Filling every inch of shelf space, creating a visually overwhelming and messy appearance. Items get lost, and it’s harder to keep clean.
- The Fix: Embrace negative space. Not every shelf needs to be packed. Use selective displays, group similar items, and utilize decorative bins or baskets to hide smaller, less attractive clutter. Periodically declutter (and involve your child!).
4. Disregarding the Room’s Overall Aesthetic
Shelves should enhance, not detract from, your kids room decor.
- The Mistake: Installing shelves that don’t match the room’s existing theme, color scheme, or style. For example, industrial metal shelves in a soft, whimsical nursery.
- The Fix: Consider the room’s current or desired aesthetic. Choose shelf materials, colors, and styles that complement it. If you have a specific theme, look for shelves that subtly integrate with it (e.g., cloud-shaped shelves for a sky theme).
5. Underestimating Weight Capacity
A shelf rated for 10 lbs isn’t going to hold 30 lbs of textbooks.
- The Mistake: Installing lightweight shelves and then piling them high with heavy books, large toy bins, or other dense items, leading to sagging or even collapse.
- The Fix: Always check the manufacturer’s specified weight capacity. When in doubt, opt for sturdier materials (solid wood, metal) and bracketed designs over floating shelves for heavy loads. Plan what you’ll store before you buy.
6. Neglecting Future Growth and Adaptability
Kids grow fast, and so do their needs and preferences.
- The Mistake: Choosing highly specific, childish-themed shelves that your child will quickly outgrow (e.g., a cartoon character shaped shelf that won’t make sense for a teen).
- The Fix: Opt for more versatile, timeless shelf designs (simple floating shelves, classic wood, clean cube units) that can be easily repurposed or re-styled as your child ages. The “theme” can come from the items *on* the shelf, not the shelf itself.
7. Poor Planning and Measurement
Eyeballing it often leads to frustration.
- The Mistake: Not measuring the wall space, the items you want to put on the shelves, or the distance between shelves, resulting in ill-fitting or impractical setups.
- The Fix: Measure twice, drill once! Sketch out your desired shelf layout on the wall with painter’s tape or a pencil before drilling. Measure items to ensure they’ll fit on the shelf. Consider the vertical clearance needed between shelves for tall books or toys.
By being mindful of these common mistakes, you can ensure your kids room decor with wall shelves are not just beautiful, but also functional, safe, and truly long-lasting additions to your home.
Image Suggestion: A “Don’t Do This!” visual: a leaning, overloaded shelf with items tumbling off, showing poor installation and weight distribution, contrasted with a smaller image of a securely mounted, well-styled shelf. Alt-text: “Visual showcasing common wall shelf mistakes in kids rooms: overloaded, unsafely installed, and inappropriate height, with a contrasting image of a safe setup.”
DIY Wall Shelf Projects: Personal Touches for Your Kids Room Decor
For those who love a bit of hands-on creativity, DIY wall shelves offer an incredible opportunity to inject unique personality and custom functionality into your kids room decor. These projects can be surprisingly simple and incredibly rewarding.
1. The Crate Shelf: Rustic Charm Meets Easy Storage
Concept: Repurpose wooden crates into charming, functional shelves.
Materials:
- Wooden crates (new or vintage, available at craft stores or flea markets)
- Sandpaper (medium and fine grit)
- Paint or wood stain (child-safe, low VOC)
- Paintbrushes
- Drill and screws (suitable for mounting into studs or heavy-duty anchors)
- Spirit level
Steps:
- Prepare: Thoroughly sand the crates, especially if they are vintage, to remove any splinters or rough patches. Wipe clean.
- Finish: Paint them a fun color to match your kids room decor, or stain them for a natural, rustic look. Ensure paint is fully dry and cured.
- Mounting: Decide on your arrangement (single, stacked, staggered). Position the crate(s) on the wall, find studs, and use long, sturdy screws to secure them through the back of the crate directly into the studs. For added security, you can use L-brackets on the inside corners.
Tip: You can also stand crates on their side on the floor for easy, movable storage bins.
2. Skateboard Deck Shelves: Cool and Unique
Concept: Transform old or new skateboard decks into edgy, functional shelves.
Materials:
- Skateboard decks (without trucks/wheels)
- Sturdy L-brackets (ensure they are long enough to support the deck)
- Drill, screws, stud finder, spirit level
- Optional: Sandpaper, paint, or clear coat for decks
Steps:
- Prepare Deck: Clean the deck thoroughly. If desired, sand and paint/clear coat for a fresh look.
- Attach Brackets: Mark where you want the L-brackets on the underside of the skateboard deck. Pre-drill small pilot holes if needed, then screw the brackets securely to the deck. You’ll likely need two brackets per deck.
- Mount to Wall: Hold the shelf (with brackets attached) against the wall, level it, and mark your drill points for the wall. Find studs and mount the shelf directly into them using the appropriate screws.
Tip: This is a fantastic option for a teen’s room or a sporty kids room decor theme. Pair with other sports memorabilia.
3. Rope and Wood Swing Shelves: Whimsical and Easy
Concept: Create a charming, suspended shelf using wood and rope. Best for lightweight items.
Materials:
- A piece of pre-sanded wood (e.g., 1×6 or 1×8, desired length)
- Drill with a bit slightly larger than your rope diameter
- Sturdy rope (natural fiber or colorful synthetic)
- Large, strong ceiling hooks (for hanging, ensure they can take weight) OR wall brackets
- Optional: Paint or wood stain
Steps:
- Prepare Wood: Sand and finish the wood if desired.
- Drill Holes: Measure and mark points about 1-2 inches from each end of the wood plank, on both sides. Drill a hole through each of these four marks.
- Thread Rope: Cut two equal lengths of rope. Thread one end of a rope down through a front hole and up through the back hole on one side. Tie a secure knot underneath to hold the board. Repeat for the other three holes.
- Hang: Gather the two rope ends at the top, ensuring your shelf is level. Tie a secure loop at the top. Securely install two strong ceiling hooks into ceiling joists (or use sturdy wall brackets) and hang your shelf. You can also run the rope through the brackets themselves for a floating look.
Tip: This adds a playful, bohemian touch to a kids room decor. Ideal for soft toys or a few light books. Ensure hanging hooks are super secure and into ceiling joists, especially if within reach of a child.
4. Board and Bracket Shelves: Fully Customizable
Concept: The classic, most customizable DIY shelf, allowing you to choose every element.
Materials:
- Wood planks (pine, oak, MDF – choose based on desired strength and look)
- Shelf brackets (metal, decorative, floating – as per your style)
- Drill, screws (for wood and wall), stud finder, spirit level, measuring tape
- Optional: Wood stain, paint, clear coat
Steps:
- Cut & Finish Wood: Cut your wood planks to your desired lengths. Sand and apply any finish.
- Mark Bracket Placement: Decide where your brackets will go for optimal support (usually 16-24 inches apart, hitting studs).
- Mount Brackets: Mount the brackets securely to the wall, ensuring they are perfectly level and into studs.
- Attach Shelf: Place the finished wood plank on top of the mounted brackets. Secure it to the brackets from underneath or on top using small screws if the brackets have pre-drilled holes.
Tip: This method allows you infinite possibilities for kids room decor, from chunky rustic shelves to sleek modern ones. Always double-check bracket weight limits and ensure the screws connecting the shelf to the bracket are sufficient.
DIY projects allow you to create unique, personalized kids room decor with wall shelves that reflect your child’s personality and your family’s creativity. Always prioritize safety in construction and installation!
Image Suggestion: A collage or infographic illustrating these DIY shelves: a colorful stack of painted crates, a cool skateboard shelf with vibrant art, a whimsical rope-and-wood swing shelf with soft toys, and a classic custom wood shelf with unique decorative metal brackets. Alt-text: “Visual guide to DIY kids room wall shelves: wooden crates, skateboard decks, rope swing shelves, and custom board-and-bracket designs.”
Maintenance & Longevity of Your Shelf Setup
Once your kids room decor with wall shelves are installed and styled, you might think the job’s done. But like any part of a active child’s room, a little ongoing care ensures they remain beautiful, functional, and most importantly, safe for years to come. Thinking about longevity minimizes future headaches.
Regular Cleaning: Keeping Them Fresh
Kids’ rooms are magnets for dust, crumbs, and occasional sticky fingerprints. Routine cleaning is essential.
- Dusting: Plan to dust shelves weekly or bi-weekly. Use a microfibre cloth, a feather duster, or a vacuum cleaner with a brush attachment.
- Wiping Down: For wooden, plastic, or metal shelves, a damp cloth with a mild, child-safe cleaner can tackle sticky spots or grime. Always follow manufacturer’s recommendations for cleaning specific materials. Avoid harsh chemicals.
- Emptying & Deep Cleaning: Periodically, aim to remove everything from a shelf for a deeper clean. This is also a great opportunity to declutter and re-evaluate what’s being stored.
Periodic Safety Checks: Beyond the Initial Installation
Even the most perfectly installed shelf can eventually loosen or show signs of wear, especially in a child’s room where they endure daily interaction. Make these checks a habit:
- The Wiggle Test: Every few months, give each shelf a gentle but firm wiggle. Does it feel sturdy? Any noticeable movement?
- Check Fasteners: Look at the screws, bolts, or anchors. Are they still snug against the wall and the shelf? Are there any signs of cracking or damage to the drywall around the mounting points? If so, remove items, tighten screws, and assess for necessary repairs or re-anchoring.
- Shelf Surface Integrity: For wooden shelves, look for splinters, cracks, or signs of warping. For plastic, check for cracks or brittleness. Metal shelves should be free of rust or bends. Address these issues promptly (sanding, repainting, replacing).
- Weight Review: Has the weight on the shelf increased significantly? Reassess if it’s within the shelf’s capacity. As kids acquire more books or heavier toys, this is a common issue.
- Child’s Height: As your child grows, re-evaluate if the shelf height is still appropriate for their activity levels and what’s stored there. What was “out of reach” for a toddler might be easily accessible (and pullable!) for a five-year-old.
Decluttering and Re-organization: The Ongoing Process
Kids accumulate stuff. It’s a fact of life! Regular decluttering is key to maintaining functional and appealing kids room decor with wall shelves.
- Scheduled Purges: Make it a seasonal or annual event (e.g., before birthdays, holidays, or end of school year).
- The “Keep, Donate, Recycle, Toss” Method: Involve your child in sorting through items. This teaches them valuable organizational skills and responsibility.
- Toy Rotation: Consider rotating toys and books. Store some away and bring out a fresh selection every few weeks or months. This keeps the child engaged with their existing toys and prevents shelves from becoming permanently overloaded.
- Adapt to New Interests: As your child’s interests change, so should the items on their shelves. Replace childish decor with items reflecting new hobbies or passions. This ensures the shelves remain relevant and exciting.
Protective Measures: Preventing Wear and Tear
- Shelf Liners: For wood or painted shelves, consider using non-adhesive shelf liners, especially if you store items that could scratch or scuff the surface.
- Soft Pads: For very heavy or sharp-edged items, placing soft felt pads underneath can prevent scratches.
- Sunlight Exposure: If shelves are directly in sunlight, colors of items on the shelf or the shelf itself might fade over time. Consider UV-protective window film if this is a concern.
- Humidity Control: Extreme humidity fluctuations can cause wooden shelves to warp or crack. Keeping a consistent room temperature and humidity level (where possible) helps.
By integrating these maintenance practices into your routine, your investment in kids room decor with wall shelves will continue to pay off, providing stylish, organized, and — most importantly — safe storage solutions for your child’s evolving needs.
Frequently Asked Questions About Kids Room Decor With Wall Shelves
What is the safest way to hang shelves in a kid’s room?
The safest way is to always anchor shelves into wall studs using long, sturdy screws. If a stud isn’t available, use heavy-duty wall anchors specifically rated for significant weight, like toggle bolts or molly bolts. Never rely solely on drywall without proper anchors. Periodically check that fasteners remain tight and the shelf feels secure.
How high should wall shelves be in a child’s room?
The ideal height depends on your child’s age and what you’re storing. For young children (toddlers/preschoolers), place breakable or small, chokable items on shelves completely out of their reach (typically 4-5 feet off the floor). For books and toys you want them to access independently, place the lowest shelf at a height they can comfortably reach while standing firmly on the floor, usually 2-3 feet off the ground for preschoolers. Ensure shelves are away from furniture that could be used for climbing.
What kind of shelves are best for heavy books in a kids room?
For heavy books, sturdy bracketed shelves made of solid wood or metal are best. Floating shelves, while aesthetically pleasing, generally have lower weight capacities. Always ensure the shelf itself is robust, and critically, that it is securely anchored into wall studs using appropriate, long screws to support the weight of a full collection of books.
How can I make wall shelves look less cluttered in a child’s room?
To reduce clutter, incorporate decorative storage bins or baskets to hide smaller toys and miscellaneous items. Practice selective display by curating what goes on the shelves, leaving some negative space around items. Group similar items, use color cohesion, and periodically declutter the shelves to remove unused or outgrown items. Face books outwards for a cleaner look.
Can I use floating shelves in a nursery?
Yes, floating shelves can be beautiful in a nursery. They are ideal for displaying lightweight decorative items, small picture frames, or a few soft toys. However, ensure they are securely installed into studs (or with heavy-duty anchors) and are placed well out of reach of an infant or curious toddler to prevent any pulling or climbing hazards. Avoid placing heavy or breakable items on them.
What materials are best for kids room shelves, considering safety and durability?
Solid wood is a top choice for durability and can be finished with child-safe, low-VOC paints or stains. Metal (with rounded edges) is also very durable, especially for heavier items, offering an industrial or modern look. High-quality, non-toxic plastics are lightweight, colorful, and safer for very young children as they are less likely to cause injury if bumped. Avoid flimsy materials that could break or splinter easily.
How often should I clean and re-organize the wall shelves in my child’s room?
Regular dusting and light cleaning (wiping down) should happen weekly or bi-weekly. A more thorough deep clean and reorganization, where items are removed and sorted, is recommended quarterly or at least twice a year. This also provides an opportunity to perform safety checks on the installation and adjust the shelving to your child’s evolving needs and interests.
Conclusion: Building Beautiful, Functional, and Safe Spaces for Growing Minds
As we’ve explored, incorporating kids room decor with wall shelves is far more than a simple storage solution; it’s a strategic design choice that deeply impacts the functionality, aesthetic, and overall positive environment of your child’s personal space. From banishing floor clutter and maximizing vertical real estate to creating captivating displays that reflect your child’s personality, wall shelves are undeniably a powerhouse element in any well-designed kids’ room.
We’ve navigated the diverse world of shelf types, delved into the crucial considerations of materials for safety and durability, and outlined effective strategies for designing layouts that flow beautifully and accommodate various room themes. Crucially, we’ve emphasized the non-negotiable importance of safe installation, ensuring these additions are secure and contribute to a worry-free environment. Styling shelves creatively, adapting them for every stage of your child’s growth, avoiding common pitfalls, and even embarking on rewarding DIY projects are all within your grasp.
No more tripping over toys or struggling to find that one specific book. With thoughtfully chosen and securely mounted wall shelves, you create a space that inspires organization, fosters independence, and acts as a dynamic canvas for your child’s evolving interests. It’s about building a room that’s not just lived in, but loved. So, take these insights, measure your walls, gather your tools, and embark on the journey of transforming your child’s room into a perfectly organized, beautifully styled, and wonderfully safe sanctuary! Your child (and your feet!) will thank you.
Content Disclaimer
The information provided in this article regarding kids room decor with wall shelves is intended for general informational and educational purposes only. While every effort has been made to ensure the accuracy and safety of the recommendations (especially regarding installation), individual results may vary. It is strongly recommended to consult with professional installers or contractors for any complex installations and always follow manufacturer guidelines for all products. Prioritize safety by securely mounting any wall-hung items and regularly checking their stability. The author and publisher are not responsible for any mishaps or injuries that may occur from following the advice contained herein. Always exercise caution and common sense when decorating a child’s space.
Categories
- Accent Walls & Ceilings (61)
- Art Curation & Gallery (62)
- Bedding Style Trends (68)
- Bedroom Makeover (81)
- Bohemian & Eclectic Styles (58)
- DIY & Budget-Friendly Decor (64)
- Eco-Friendly Design (62)
- Furniture Care (71)
- Home Decor & Design Ideas (162)
- Home Wellness Spaces (59)
- Integrated Outdoor Living (67)
- Japandi Style (61)
- Kids and Nursery Decor (59)
- Living Room Decor (79)
- Mix & Match Techniques (73)
- Modern & Contemporary Design (66)
- Rug Sizing & Placement (73)
- Scandinavian Design Inspiration (20)
- Seasonal Home Decor (79)
- Small Space Solutions (73)
- Wall Art & Painting Tips (77)
Recent Comments
Archives
Product Gallery
-
 Large Area Green Rugs for Bedroom Nordic Living Room Decoration Shaped Carpet Irregular Plush Lounge Rug Home Thick Washable Mat
Rated 5.00 out of 5$54.94 – $346.41Price range: $54.94 through $346.41
Large Area Green Rugs for Bedroom Nordic Living Room Decoration Shaped Carpet Irregular Plush Lounge Rug Home Thick Washable Mat
Rated 5.00 out of 5$54.94 – $346.41Price range: $54.94 through $346.41 -
 Nordic Style Rugs for Bedroom Morandi Living Room Decoration Carpet Large Area Geometry Lounge Rug Home Cloakroom Non-slip Mat
Rated 5.00 out of 5$39.46 – $597.66Price range: $39.46 through $597.66
Nordic Style Rugs for Bedroom Morandi Living Room Decoration Carpet Large Area Geometry Lounge Rug Home Cloakroom Non-slip Mat
Rated 5.00 out of 5$39.46 – $597.66Price range: $39.46 through $597.66 -
 Irregular Shapes Living Room Decoration Carpet Modern Style Rugs for Bedroom Home Thicken Plush Rug Fluffy Soft Lounge Floor Mat
Rated 4.83 out of 5$55.84 – $347.37Price range: $55.84 through $347.37
Irregular Shapes Living Room Decoration Carpet Modern Style Rugs for Bedroom Home Thicken Plush Rug Fluffy Soft Lounge Floor Mat
Rated 4.83 out of 5$55.84 – $347.37Price range: $55.84 through $347.37